Das Golden Apple Archipelago ist zurück für das Summertime Odyssey-Event von Genshin Impact, das vom 15. Juli 2022 bis zum 24. August 2022 stattfindet . Verschiedene Charaktere haben personalisierte Domänen (auch Mirage genannt), die Sie einmal löschen können, um eine Menge Truhen zu plündern und mehr über ihre Überlieferungen zu erfahren. Xinyans Trugbild heißt Blazin' Trails , und du kannst 16 Truhen und eine Phantasma Muschel plündern Innerhalb. In dieser Anleitung zeigen wir Ihnen, wie Sie durch die Mirage navigieren und alle Rätsel lösen .
So betreten Sie die Blazin' Trails Mirage in Genshin Impact
Um Xinyan's Mirage frei zu betreten, müssen Sie zuerst die Blazin' Trails abschließen! Weltsuche. Sobald das erledigt ist, interagiere mit der Trommel auf Xinyans Insel nördlich der Verheerten Insel. Wählen Sie Die rührenden Saiten der Inseln aus .
Dann unter Phantasmal Tales , wählen Sie Blazin' Trails aus . Wenn Sie die beiden Truhen in der vorherigen Weltquest beansprucht haben, bleiben 16 Truhen und eine Phantasmal Conch unbeansprucht. Klicken Sie auf Mirage eingeben unten rechts auf dem Bildschirm, um zu beginnen.
Alle Rätsellösungen und Truhenpositionen in Blazin' Trails
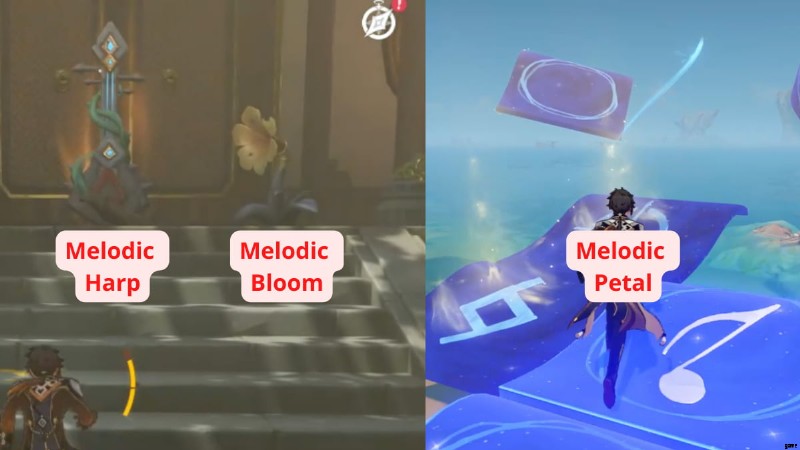
Bevor Sie beginnen, beziehen Sie sich auf das obige Bild, um die Rätselmechanik in diesem Mirage zu verstehen. Melodic Blooms geben die Kraft der Melodic Harp weiter, um eingeschlossene Melodien zu zerstreuen. In der Zwischenzeit müssen alle Melodic Petals einmal betreten werden, um eine Komposition zu vervollständigen.
Brust Nr. 1
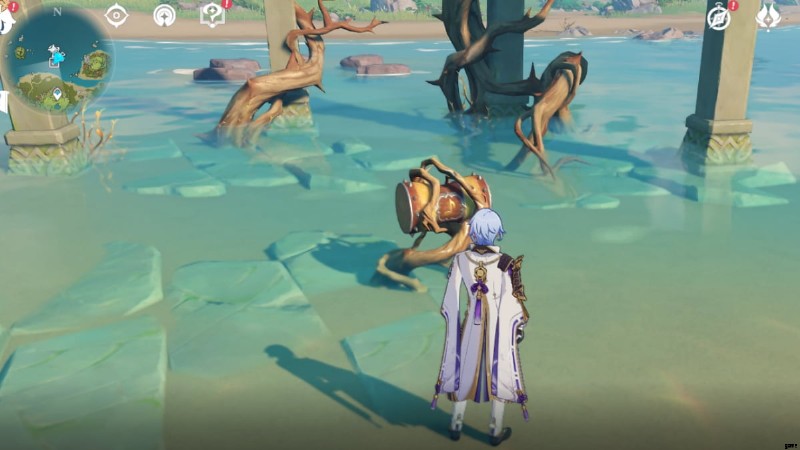
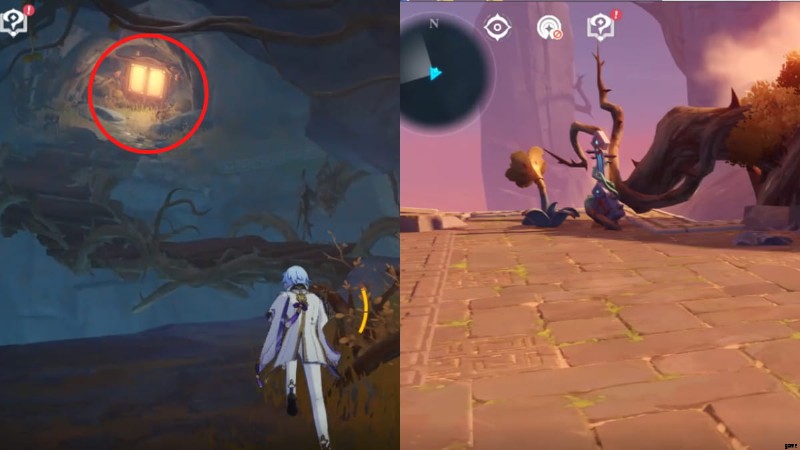
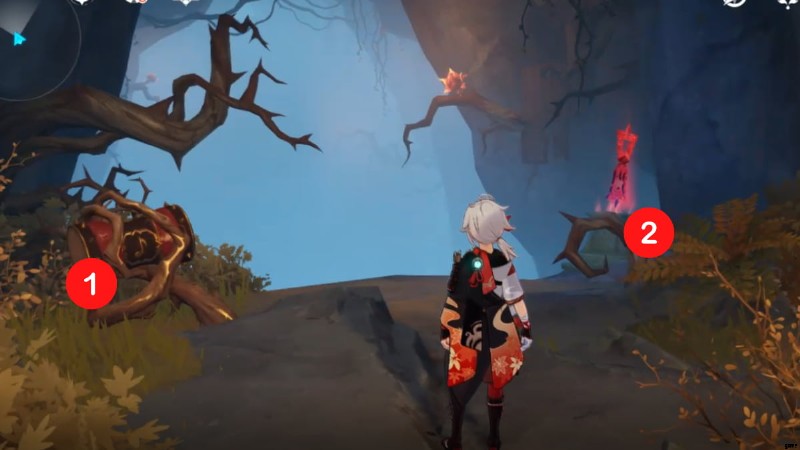
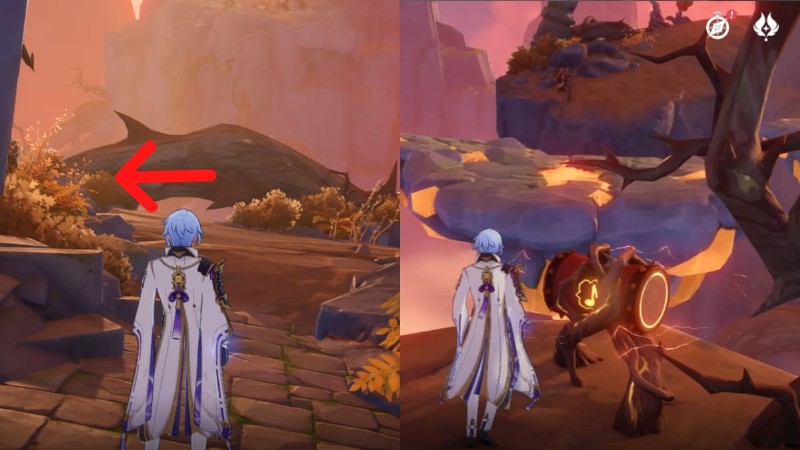
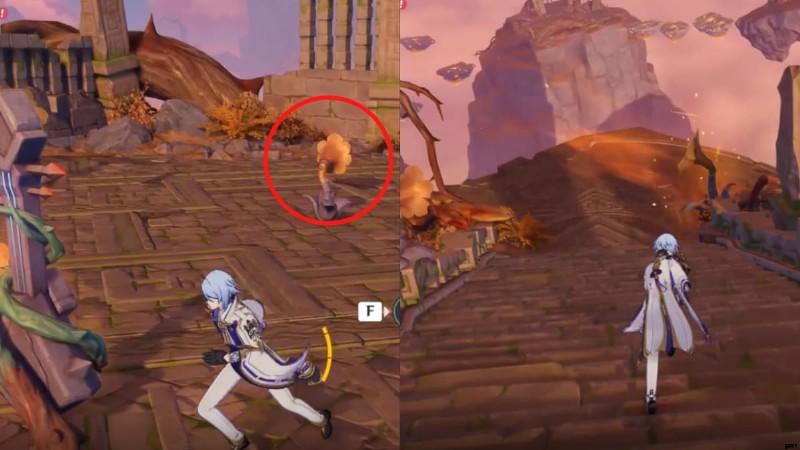
Beim Betreten der Domäne stehen Sie vor Frozen Soul (der großen blauen Blume). Sie dürfen jedoch nicht vorwärts gehen.
- Dreh dich stattdessen um und gehen Sie durch den Bogen, der aus der Höhle führt.
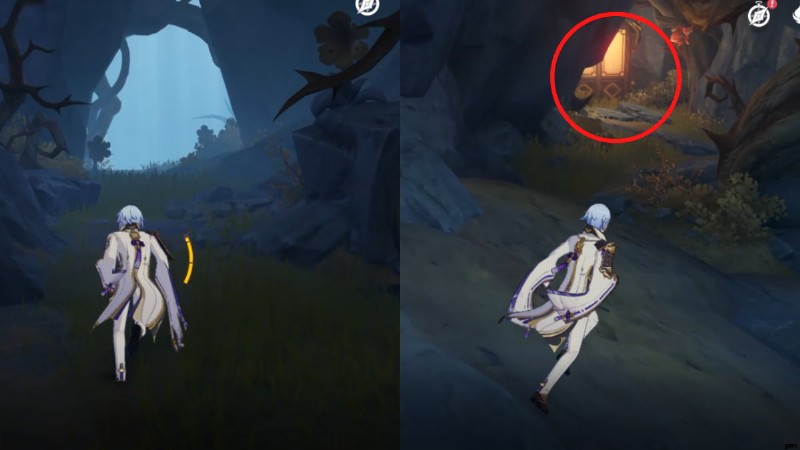
- Sobald Sie draußen sind, biegen Sie links ab und du wirst eine Tür am Horizont sehen.
- Interagieren mit der Tür, um sie zu öffnen, dann eintreten durch Vorwärtslaufen.
- Jetzt in einer neuen Umgebung auftreten mit der Melodic Harp, um einen roten Strom zu veranlassen, von der Melodic Bloom am Rand der Plattform zu fließen.
- Verwende die rote Strömung, um dich zur nächsten Plattform zu treiben.
Die rote Strömung funktioniert genau wie die vorhandenen Windströmungen im Spiel, indem sie Sie vorwärts treibt. Gegen den zinnoberroten Himmel ist es etwas schwer zu erkennen – also haltet die Augen offen!
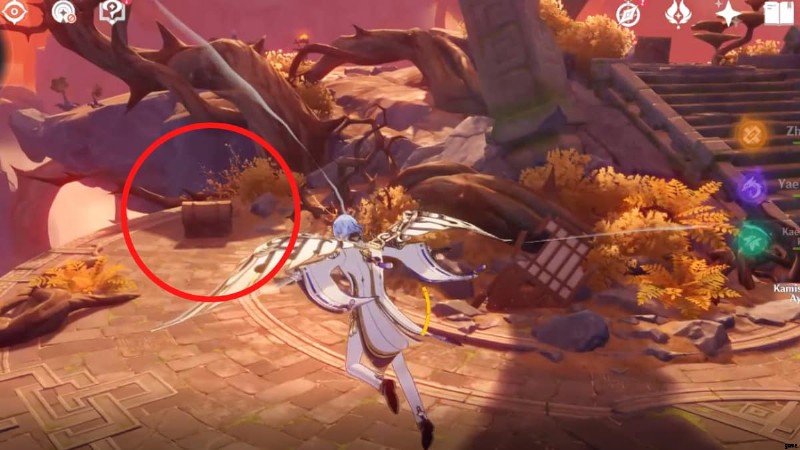
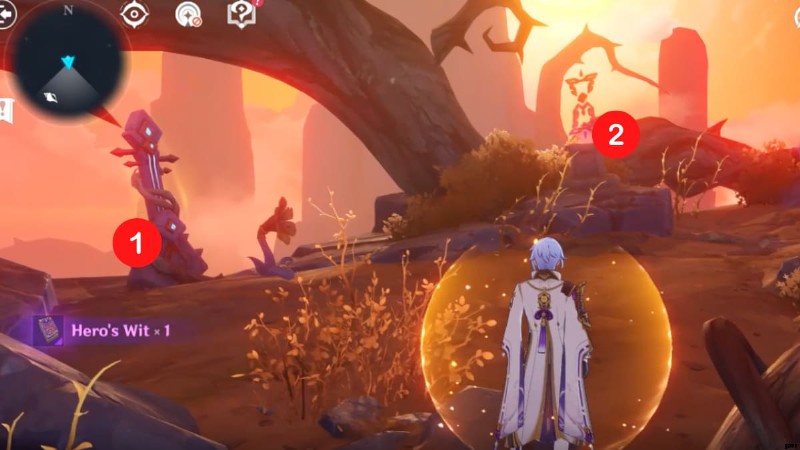
- Wenn Sie die neue Plattform erreichen, schauen Sie nach links , und Sie werden eine Gemeinsame Truhe entdecken .
- Sobald du dich der gewöhnlichen Truhe näherst, spawnen Feinde. Besiege die Feinde, um die gemeinsame Truhe freizuschalten und zu beanspruchen.
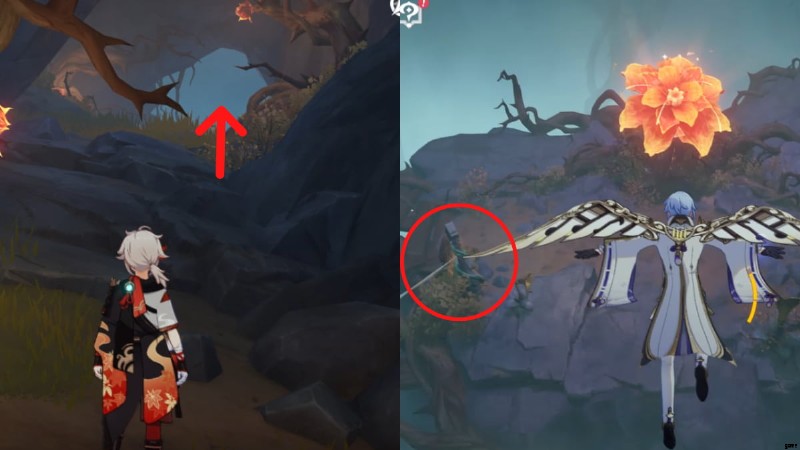
- Nachdem Sie die Truhe beansprucht haben, gehen Sie vorsichtig die Treppe hinauf zur nächsten Plattform gleiten.
- Auf der neuen Plattform durchführen mit der Melodic Harp, um Windströmungen und Ringe zum Spawn zu bringen. Benutze sie, um dich zur nächsten Plattform zu befördern.
Brust Nr. 2
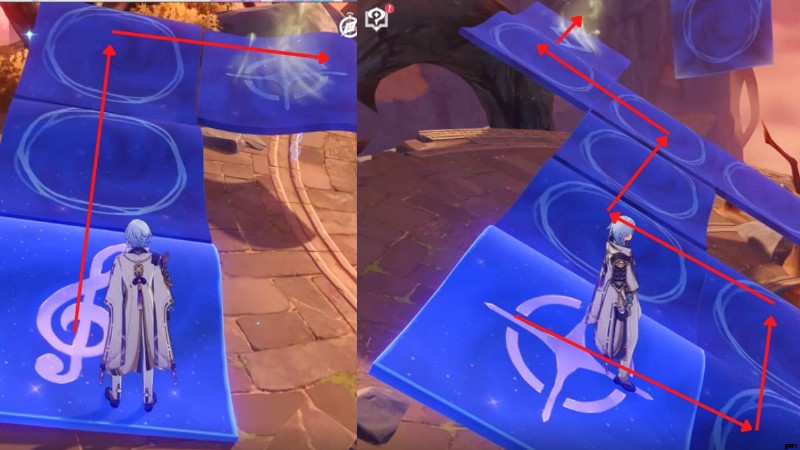
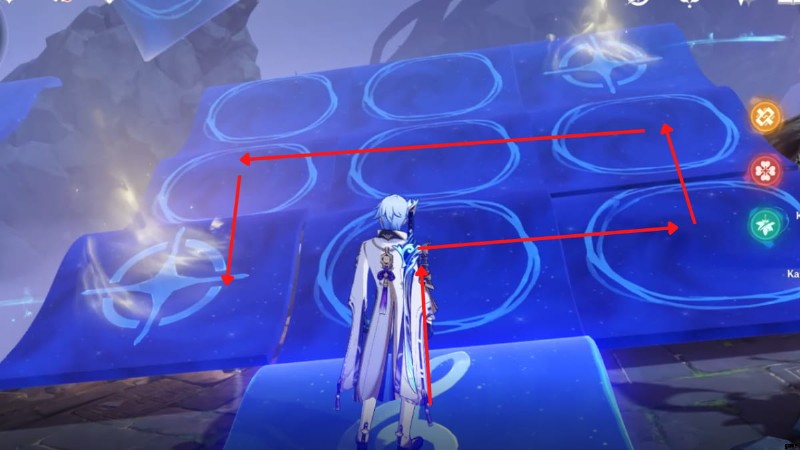
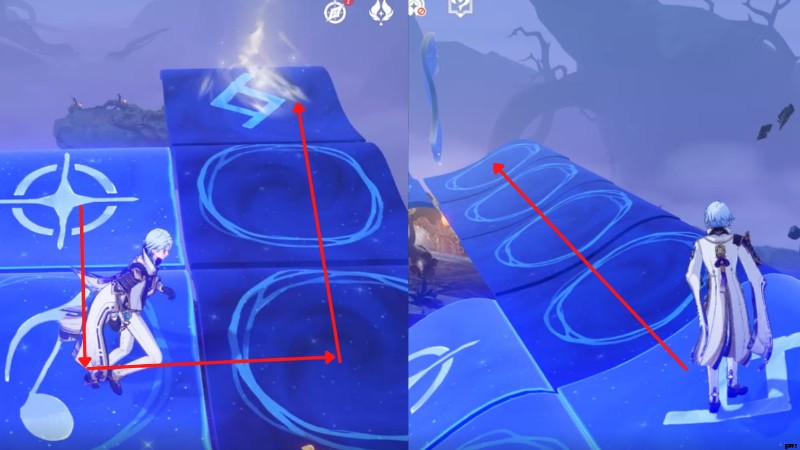
Auf dieser Plattform müssen Sie ein Melodic Petal-Puzzle lösen.
- Folge den Pfaden oben vorgeschrieben, um die ersten beiden Segmente des Melodic Petal-Puzzles zu lösen. Achten Sie darauf, sich nur vorwärts zu bewegen – gehen Sie nicht zurück oder treten Sie zweimal auf ein Blütenblatt, da das Rätsel sonst fehlschlägt.
- Folge dem Pfad oben für das dritte Segment des Melodic Petal-Puzzles.
- Sobald das erledigt ist, führen Sie aus mit der melodischen Harfe, um die Gemeinsame Truhe freizuschalten .
- Plündere die Gewöhnliche Truhe.
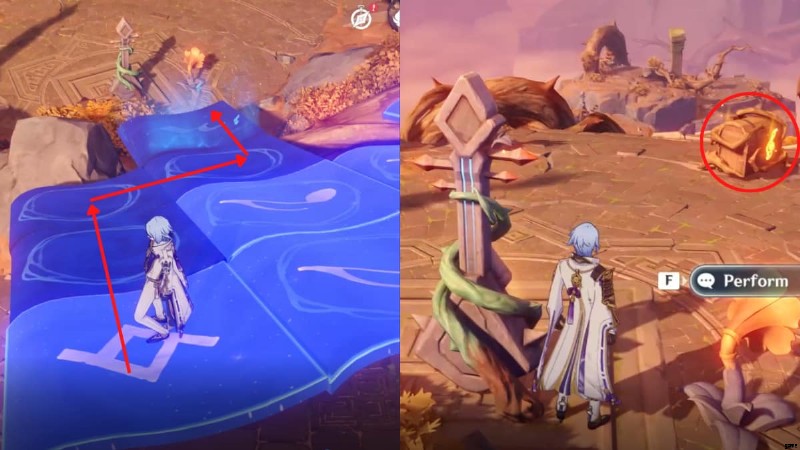
- Aufführen mit der Melodic Harpwieder um Windströmungen zu beschwören, die dich zum nächsten Ziel bringen.
Brust Nr. 3

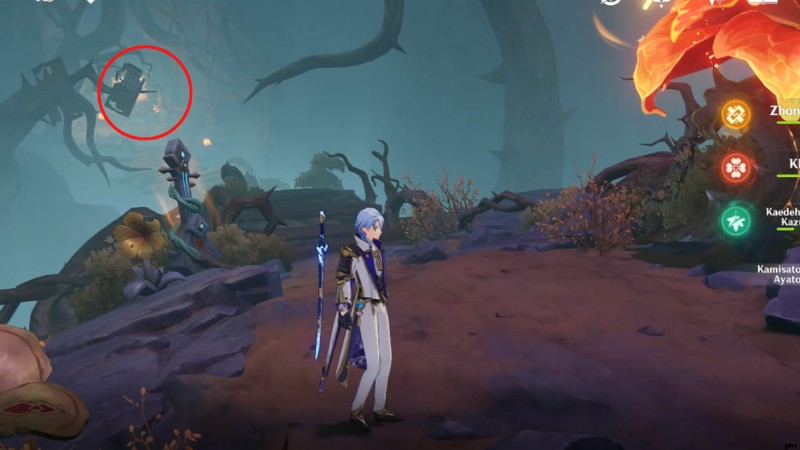
- Besiege auf dieser Plattform alle Feinde, um die Kostbare Truhe freizuschalten .
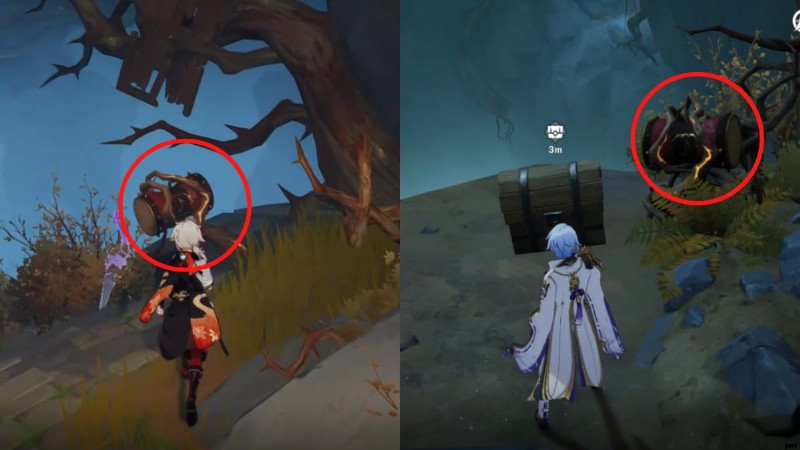
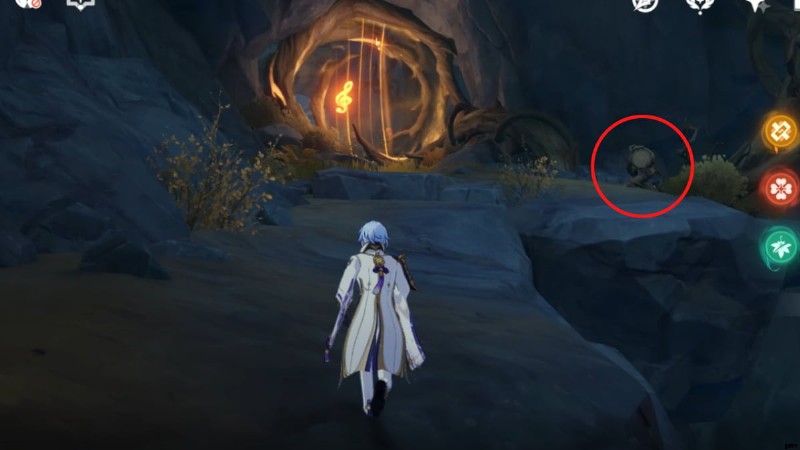
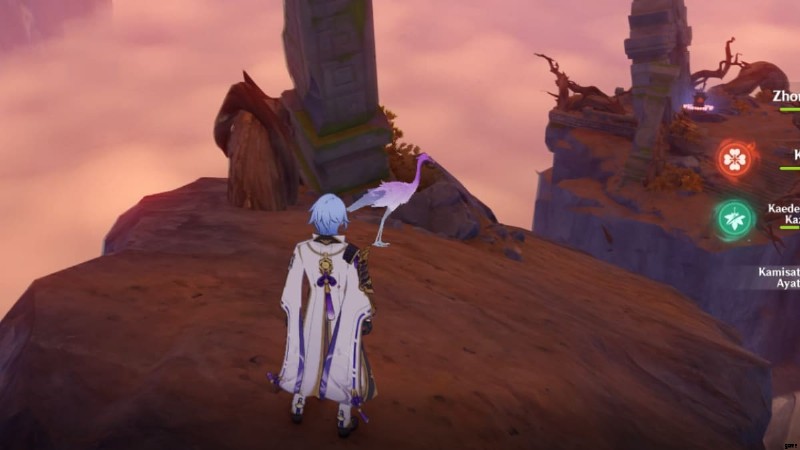
- Nachdem Sie die wertvolle Truhe geplündert haben, nähern Sie sich dem violetten Kranich und folge ihm weiter. Es verhält sich wie ein Seelie.
- Der violette Kranich geht durch eine Tür , signalisiert Ihr nächstes Ziel.
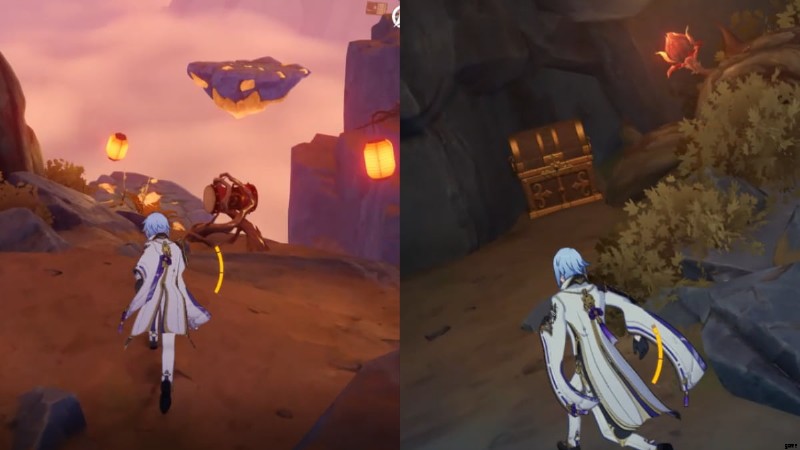
Truhen Nr. 4
- In this new environment, interact with the drums to spawn a bridge.
- Keep following the purple crane until it becomes a Common Chest damit du plündern kannst.
- Interact with the drums beside the Chest to prompt a cutscene to play. The bridges will change.
Chests #5, #6, #7
- Now you need to turn back and go through the door you just came from .
- Once you're back, perform with the Melodic Harp located west of the door.
- A wind current will spawn. Use it to propel you all the way to the Mirage's starting point.
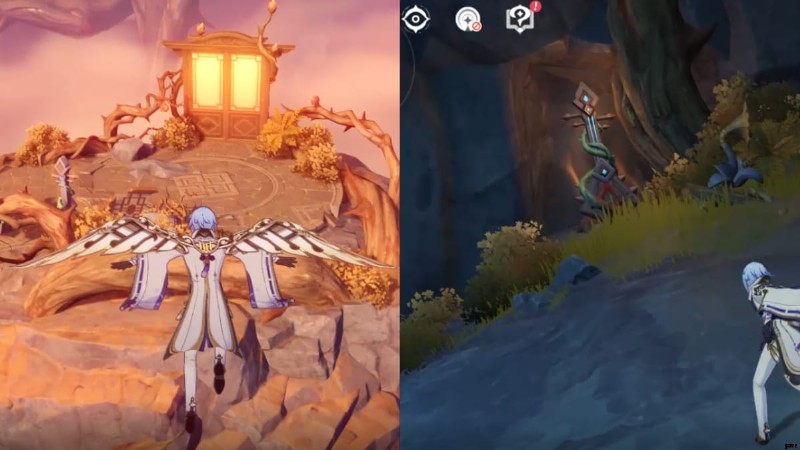
- You'll land on the platform with the first door you went through at the start of the Mirage. Go through it again .
- Once you're through the door, turn right until you see the Melodic Harp.
- Perform with the Melodic Harp and follow the notes as they will unlock a cave.
- Once the cave unlocks, you'll be greeted with one Luxurious Chest and two Exquisite Chests to loot!
Chest #8
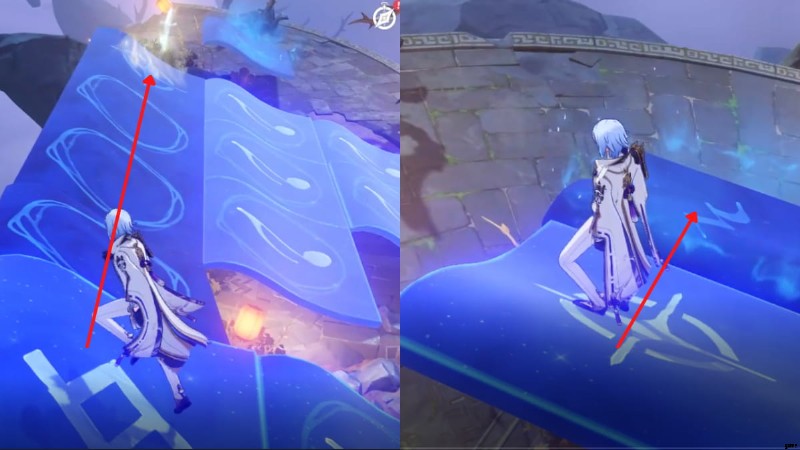
- After claiming the Chests, head back to the starting point of the Mirage, where you see the big blue flower in front of you.
- Like before, turn back and head toward the cave.
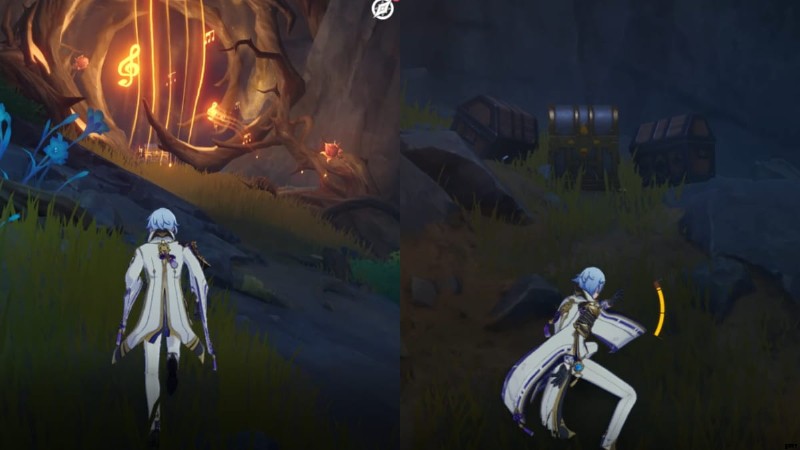
- This time, jump down until you see the big red flower.
- Turn left of the big red flower (where you see a Melodic Harp) and cross the bridge.
- You'll encounter another door , which you need to enter.
- Once you're in the new area, perform with the Melodic Harp to summon wind currents to propel you to the nearby platform.
You need to solve a Melodic Petal puzzle.
- Step onto the Petal, then follow the path above to clear the first segment.
- Follow the path above to solve the next segment.
- Finally, follow the paths above for the last two segments. They're pretty simple—just go in a straight line!
- Once that's done, perform with the Melodic Harp to summon wind currents to propel you to the next platform.
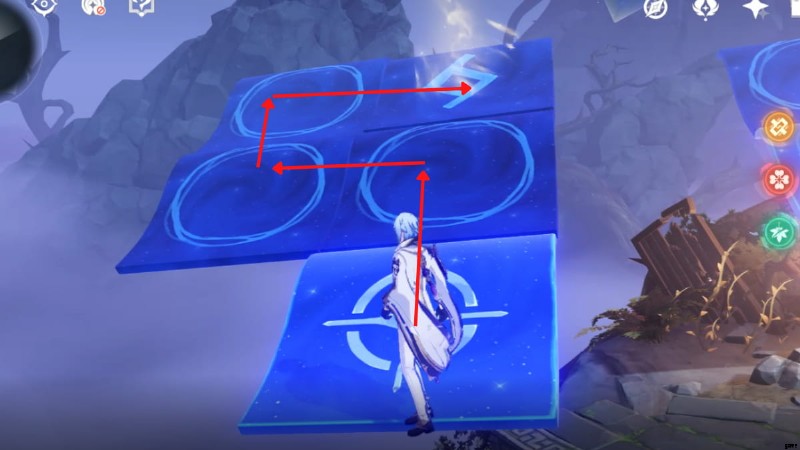
There's another Melodic Petal puzzle on this platform.
- Follow the path above to complete the first segment of the puzzle.
- Follow the path prescribed above for the next two segments.
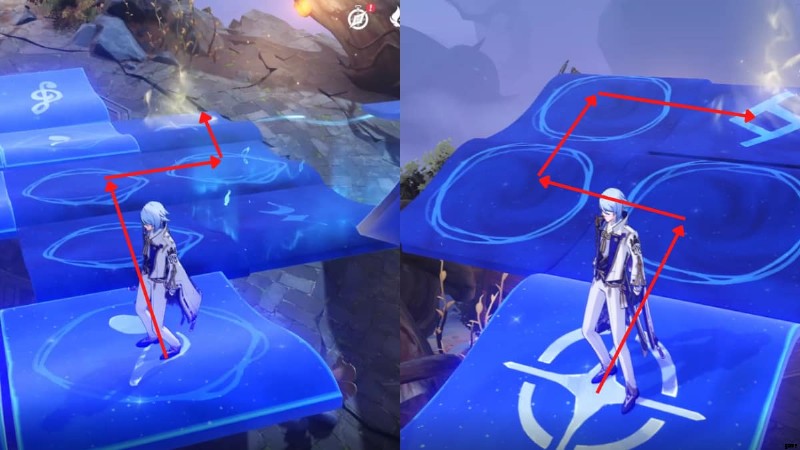
- Almost done! Follow the paths above for the next two segments.

- Lastly, follow the path above for the last leg of the Melodic Petal puzzle.
- Once that's done, perform with the Melodic Harp.
- The Common Chest will unlock. Make sure to loot it!
- Perform with the Melodic Harp again . This will summon wind currents to propel you to the next area.
Chest #9
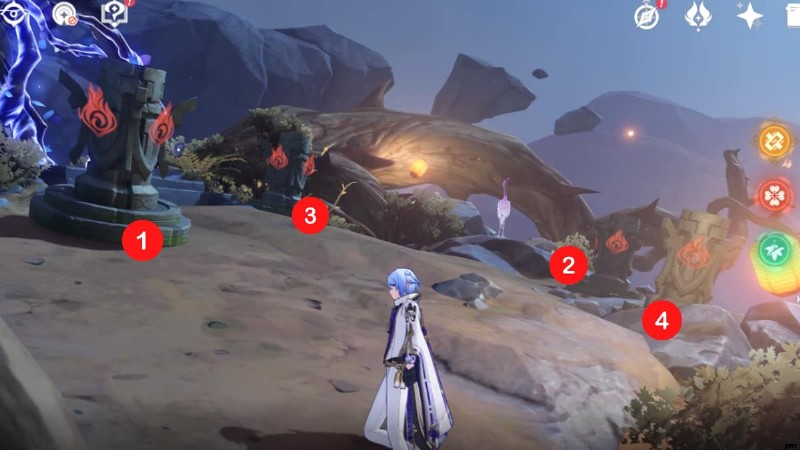
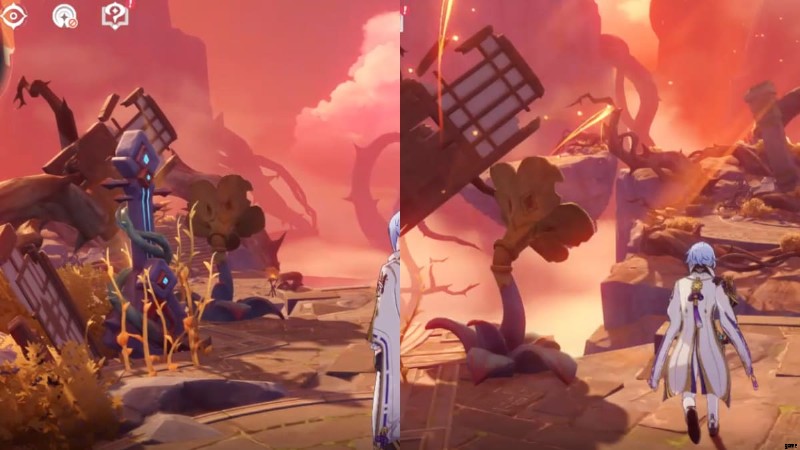
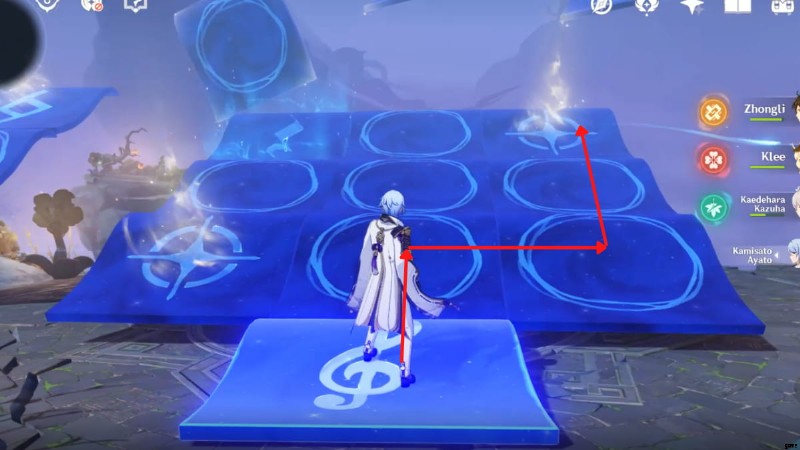
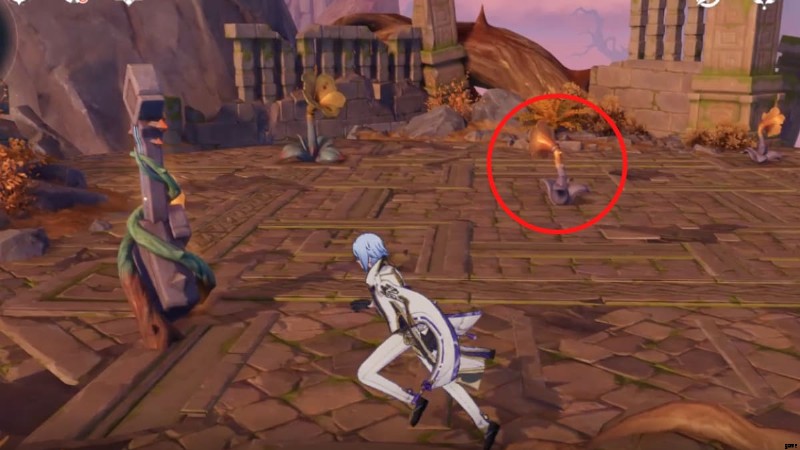
On this platform, you need to solve a Pyro Monument puzzle. If you don't have a character that can apply Pyro, interact with the glowing vines on the left to open the party setup menu and bring in someone like Amber to solve this puzzle.
- Reference the image above for the exact order of hitting the Pyro Monuments.
- If you hit all the Monuments in the right order, an Exquisite Chest wird auftauchen.
- After claiming the Exquisite Chest, approach the purple crane and let it guide you.
Chest #10

- The purple crane will turn into a Common Chest damit du plündern kannst.
- After claiming the Chest, enter the door daneben.
Chest #11
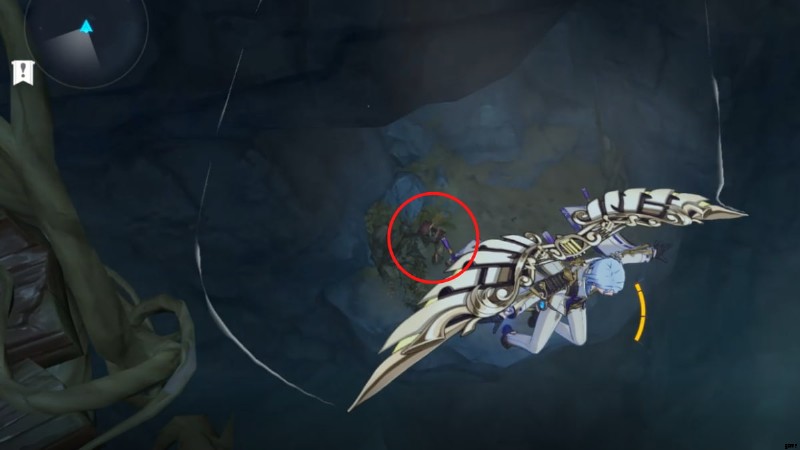
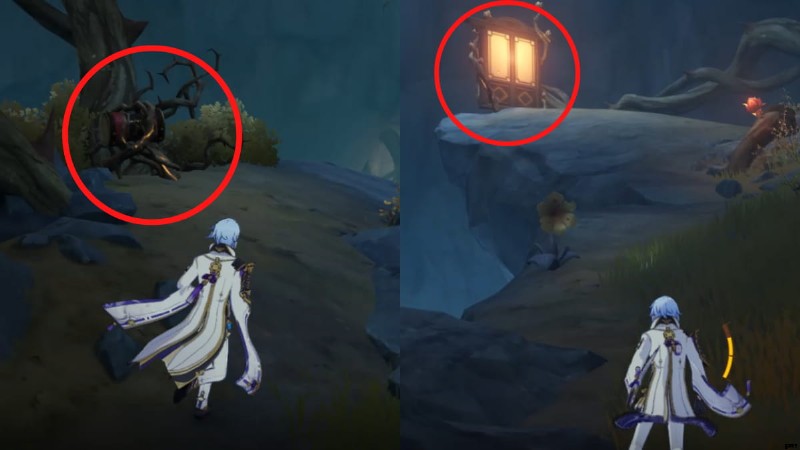
- Once you're inside the new area, defeat the enemy Hilichurls.
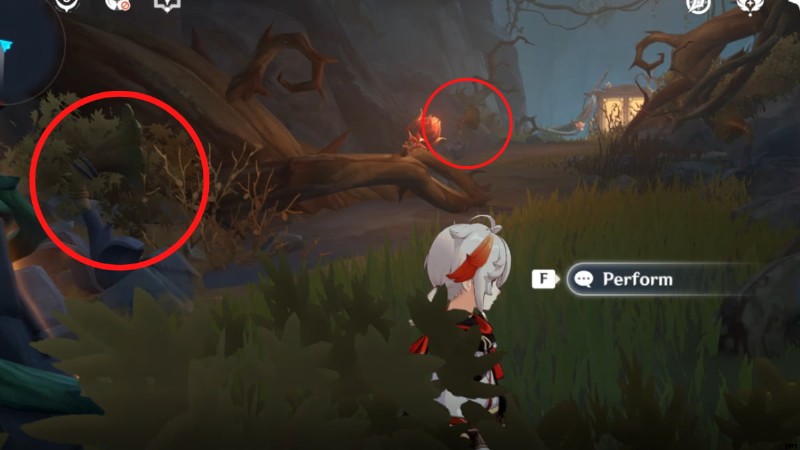
- There are three Melodic Blooms in the area. You need to adjust the orientation of the two Melodic Blooms circled in the image above once each so that they're facing forward.
- After that, perform with the Melodic Harp.
- An Exquisite Chest will unlock for you to loot. You will get a Quest Item called Reverberating Key .
Chest #12
- Go through the door .
- Interact with the Melodic Harp to summon a wind current to propel you onto the next platform.
- You will see another door , which can be unlocked using the Reverberating Key from earlier.
- Enter the door to cross to another area.
- Interact with the drums to summon a bridge.
- Then, interact with the Time Trial Challenge . All you need to do is run through the bridge really quickly to claim an Exquisite Chest . If you fail, don't worry and just try again.
Chest #13
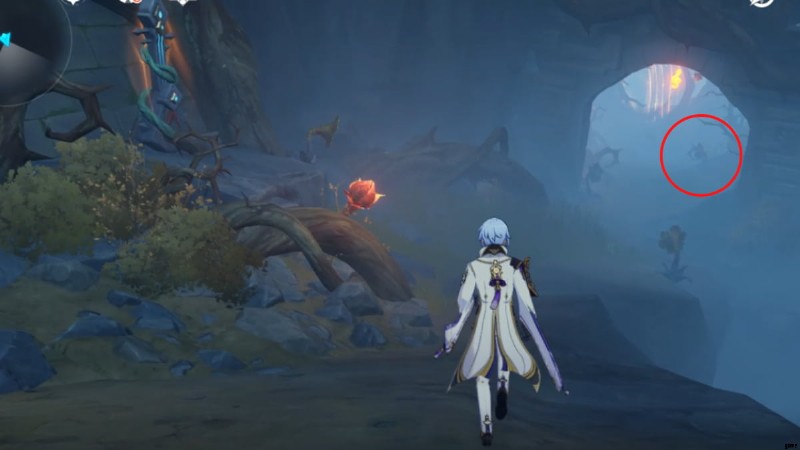
- Once you've claimed the previous Chest, you'll see a door. Don't go through it .
- Instead, turn back and go through the cave.
- Glide down toward the big red flower.
- Perform with the Melodic Harp to summon a wind current to propel you upward.
- Next, you need to interact with the drums to summon a bridge.
- Cross the bridge and get to the other side.
- Next, you need to glide down until you see a little crevice under the platform you were standing on.
- Go to that small crevice.
- Interact with the drums to summon another bridge.
- Cross the new bridge and keep going forward until you see a door .
- Enter the door to get to the final area in the Mirage.
- The moment you enter the new area, turn left .
- Interact with the drums to summon moving rocks.
- Use the rocks as a path to the next platform.
- On the next platform, you will see some Slimes. Defeat them to claim an Exquisite Chest .
Chest #14
- After claiming the Chest, turn to the right and perform with the Melodic Harp to summon wind currents.
- Before riding the current, interact with the Time Trial Challenge first to initiate it.
- Use the wind current to complete the Time Trial Challenge and claim an Exquisite Chest .
Chest #15 and Phantasmal Conch
- On this platform, perform with the Melodic Harp to unlock the Exquisite Chest .
- Once that's done, adjust the orientation of the Melodic Bloom circled in the image above twice .
- Perform the Melodic Harp again. This time, wind currents will appear.
- Use the wind currents to propel you upward.
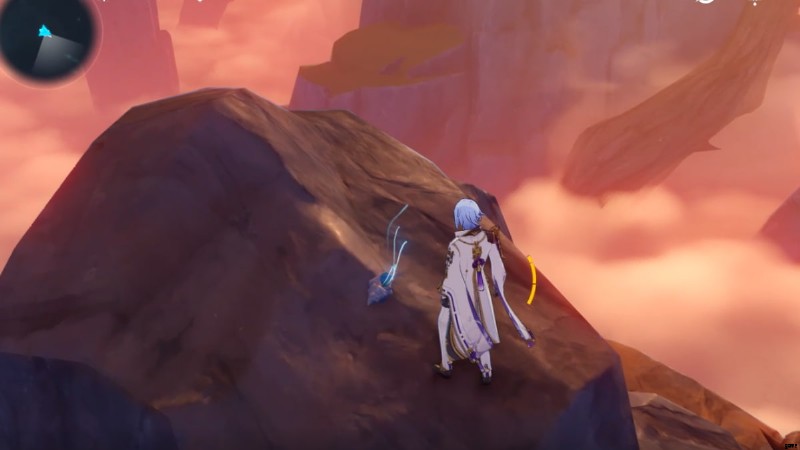
- You'll find the Phantasmal Conch on top of a landform. Make sure to interact with it!
If you have collected the rest of the Phantasmal Conches in the Golden Apple Archipelago and Kazuha's Domain, you can now claim Fischl's Outfit!
Chest #16
- Glide back down and adjust the orientation of the Melodic Bloom circled in the image above twice so that it's facing forward.
- Perform with the Melodic Harp.
- Go down the stairs and you'll see wind currents have been summoned. Use them to propel you to the next platform.
- You'll land on a platform with a purple crane . Approach it and keep following it.
- The purple crane will unlock the Pyro Monument on the next platform.
- Light up the Pyro Monument and enter the door .
- Turn left and enter the cave.
- Adjust the orientation of the very last Melodic Bloom (the one closest to the locked music note) once so that it's facing forward.
- Perform with the Melodic Harp.
- Go through the now-opened path and interact with the drums .
- Turn back and go through the door you just came from again.
- Interact with the drums to summon moving rocks. Use them to cross to the next platform.
- Just keep going forward until you see the door. Enter the door .
- Once in the new area, go straight, then turn right .
- You'll find the last Precious Chest —loot it and click the Paimon menu button to exit the Domain.
Other Blazin' Trails guides
- Genshin Impact Blazin’ Trails! World Quest walkthrough – Summertime Odyssey Xinyan Mirage Chest &puzzle guide
Check out our guide on All Chest locations in the Golden Apple Archipelago – Genshin Impact Summertime Odyssey event to loot even more Chests during the event!