In diesem Artikel findest du alles, was du zum Streamen auf Twitch benötigst. Die weltweit größte Live-Streaming- und Online-Chat-Plattform, der jeder jederzeit beitreten kann. Und noch besser, Sie können von einer Vielzahl von Konsolen streamen.
Wie kann ich mit dem Telefon auf Twitch streamen?
Es gibt mehrere Möglichkeiten, auf Ihrem Telefon zu streamen. Welches das Beste für Sie ist, hängt davon ab, ob Sie iOS oder Android verwenden. Ein weiterer zu berücksichtigender Faktor ist, was Sie streamen möchten.
Sie müssen auch überlegen, ob Sie alles haben, was Sie zum Streamen von Ihrem Telefon benötigen.
Was sind die Anforderungen für Mobilgeräte?
Verwenden Sie iOS oder Android?
Twitch hat eine offizielle App, die online verfügbar ist, aber was Sie brauchen, hängt vom Betriebssystem Ihres Telefons ab. Die iOS-App funktioniert nicht für Android und umgekehrt. Die Twitch-App für iOS steht im App Store zum Download bereit. Die Twitch-App für Android steht im Google Play Store zum Download bereit.
Hast du ein bestehendes Twitch-Konto? Dann müssen Sie nur noch die App öffnen und sich bei Ihrem Konto anmelden.
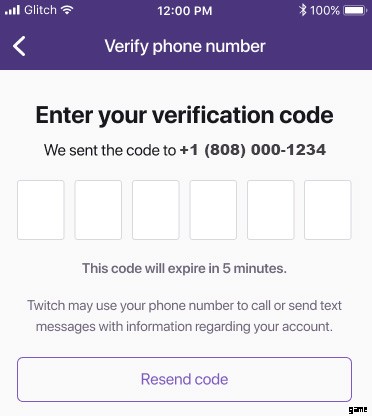
Wenn nicht, erstellen Sie zuerst eine. Es ist einfach und dauert nur wenige Minuten. Öffnen Sie zunächst die Twitch-App auf Ihrem Telefon und klicken Sie auf „Registrieren“. Anschließend können Sie alle erforderlichen Felder ausfüllen, bevor Sie auf „Weiter“ klicken. Zuletzt benötigt die App einen Bestätigungscode, der an Ihre Nummer gesendet wird. Geben Sie einfach den 6-stelligen Code ein, den Sie erhalten haben, und der Registrierungsprozess ist abgeschlossen. Herzlichen Glückwunsch, du bist jetzt bei Twitch angemeldet!
Welche Hardware benötigen Sie?
Die eingebaute Kamera und das Mikrofon Ihres Telefons sind die einzigen Dinge, die Sie im Spiel verwenden können. Während Sie außerhalb des Spiels spielen, dürfen Sie externe Hardware für Ihren Stream verwenden. Sie können einige davon sogar jetzt online kaufen und Ihr Streaming-Erlebnis verbessern.
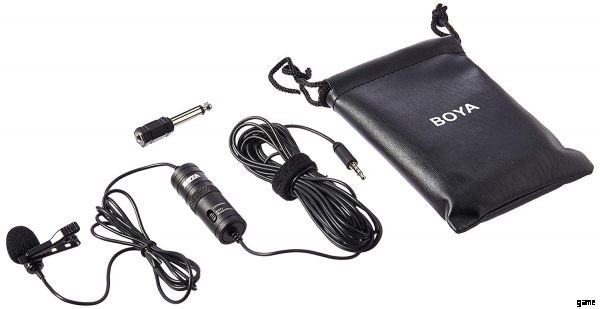
Die erste, die Sie bei Amazon kaufen können, ist die BOYA BY-M. Es ist ein omnidirektionales Mikrofon und wird mit einem sechs Meter langen Kabel geliefert. Holen Sie sich dieses Produkt jetzt und lassen Sie Ihre Zuschauer Sie deutlicher hören.
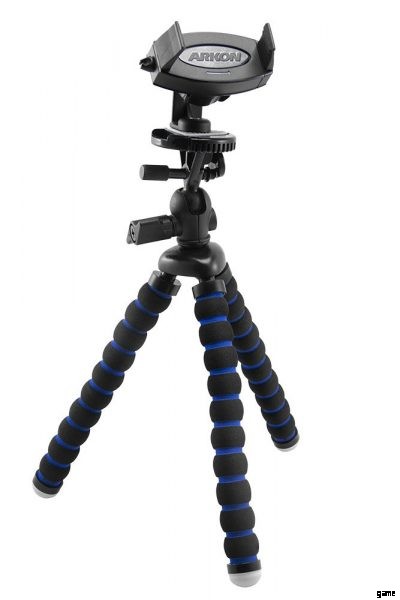
Eine weitere Notwendigkeit, wenn Sie Spiele über Ihr Telefon streamen, ist ein Smartphone-Stativ. Auf diese Weise können Sie Videos mit Stabilität aufnehmen und das Wackeln verringern. Ein großartiges Beispiel dafür ist das Arkon iPhone Stativ. Fügen Sie dies noch heute zu Ihrem Streaming-Arsenal hinzu und eliminieren Sie „wackelige Kameras“ für immer.
Schritt-für-Schritt-Verfahren
Für das Streamen eines Spiels, das Sie gerade spielen, sind zusätzliche Apps erforderlich. Hier sind die Anwendungen, die Sie je nach Betriebssystem Ihres Telefons benötigen:
Läuft Ihr Telefon auf Android?
- Laden Sie die Stream Screen Mirroring-App von Google Play herunter.
- Öffnen Sie die App auf Ihrem Telefon.
- Stimmen Sie einem Popup zu, damit die App den Bildschirm Ihres Telefons spiegeln und streamen kann.
- Öffnen Sie das Menü oben links auf Ihrem Bildschirm.
- Wähle „Twitch“ aus.
- Wähle „Mit Twitch anmelden“ aus.
- Geben Sie der Twitch-App die Erlaubnis, Ihr Spiel über Stream Screen Mirroring zu streamen.
- Tippen Sie auf die grüne Startschaltfläche, um mit dem Streamen zu beginnen.
Läuft Ihr Telefon unter iOS?
- Laden Sie die Omlet Arcade-App aus dem App Store herunter.
- Öffnen Sie die App auf Ihrem Telefon.
- Erstellen Sie ein Konto für Omlet Arcade.
- Geben Sie Ihren gewünschten Benutzernamen in das dafür vorgesehene Feld ein.
- Geben Sie Ihr Passwort in das dafür vorgesehene Feld ein.
- Geben Sie Ihr Passwort erneut in das dafür vorgesehene Feld ein.
- Geben Sie Ihre E-Mail-Adresse in das dafür vorgesehene Feld ein.
- Bestätigen Sie die Erstellung Ihres Kontos in Ihrer E-Mail.
- Spielen Sie Ihr bevorzugtes Spiel.
- Tippe auf das Popup-Fenster „Streaming starten“ im Spiel.
- Wählen Sie „Omlet Arcade“ aus.
- Wähle „Twitch“ aus.
- „Wähle „Mit Twitch anmelden“ aus.“
- Geben Sie Ihrem Stream einen Titel.
- Tippen Sie auf „Streaming starten“.
Sie können nicht nur Spiele streamen, sondern Ihren Zuschauern auch Ihre täglichen Aktivitäten zeigen. Befolgen Sie dazu einfach die nachstehenden Anweisungen:
- Öffne die Twitch-App auf deinem Handy.
- Tippen Sie auf die Kameraschaltfläche rechts auf Ihrer Statusseite, um mit dem Streamen zu beginnen.
Wie kann ich mit dem PC auf Twitch streamen?
Es gibt mehrere Möglichkeiten, mit deinem PC auf Twitch zu streamen. Beide benötigen den Download weiterer Apps. Die erste ist die Open Broadcaster Software (OBS) und die zweite ist XSplit.

Was sind die Anforderungen für den PC?
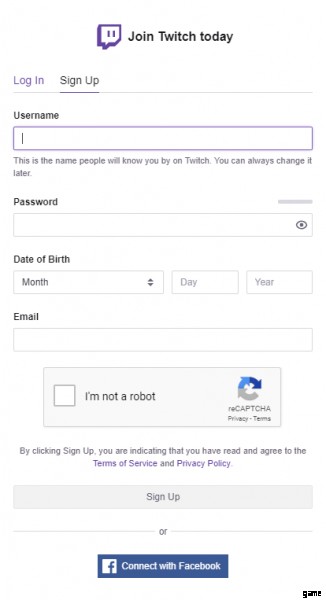
Bevor Sie mit dem Streaming von Ihrem PC beginnen können, müssen einige Voraussetzungen erfüllt sein. Das Wichtigste dabei ist ein aktives Twitch-Konto. Hier ist eine Anleitung, was zu tun ist, unabhängig davon, ob Sie ein Konto haben oder nicht. Hast du ein bestehendes Twitch-Konto? Dann müssen Sie sich nur noch bei Ihrem Konto anmelden und können mit dem nächsten Schritt fortfahren, den wir weiter unten besprechen werden. Wenn Sie jedoch noch kein Konto haben, erstellen Sie zuerst eines. Es ist einfach und dauert nur wenige Minuten. Gehe einfach auf https://twitch.tv und klicke auf „Anmelden“, um mit der Registrierung zu beginnen. Füllen Sie dann einfach die erforderlichen Felder aus und vervollständigen Sie die CAPTCHA-Eingabeaufforderung. Im letzten Schritt müssen Sie Ihre Registrierung per E-Mail bestätigen. Suchen Sie einfach nach der E-Mail und klicken Sie auf den Bestätigungslink, um den Vorgang abzuschließen.
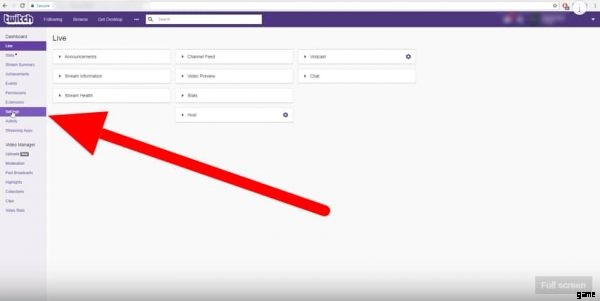
Twitch auf dem PC einrichten
- Öffnen Sie das Menü oben rechts auf dem Bildschirm.
- Wählen Sie „Dashboard“ aus.
- Öffnen Sie die Registerkarte „Wiedergabe“.
- Wählen Sie aus, was Sie streamen möchten.
- Geben Sie einen Titel für Ihren Stream an.
Welche Hardware benötigen Sie?
Für das Streamen von Spielen benötigen Sie keine zusätzliche Hardware über ein einfaches PC-Setup hinaus. Wenn Sie jedoch selbst streamen oder Kommentare zu einem Stream hinzufügen möchten, benötigen Sie etwas mehr Hardware.
Es gibt eine große Auswahl an Hardware, aus der Sie wählen können, um Ihr Twitch-Erlebnis auf dem PC zu maximieren. Und selbst bei einem einfachen PC-Setup ist manche Hardware besser als andere.
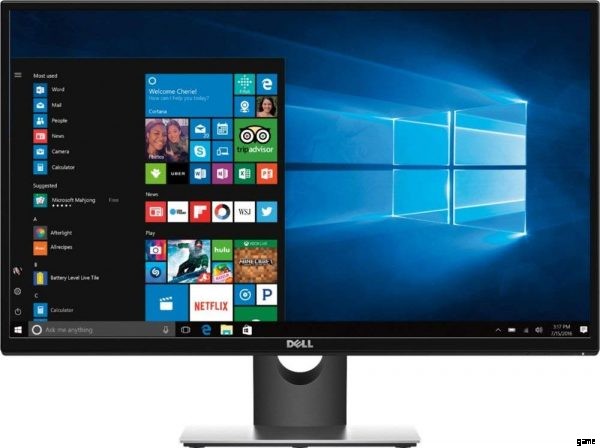
Eines, das Sie jetzt bei Amazon bekommen können, ist das Dell M27BLK. Ein 27-Zoll-LCD-Monitor. Holen Sie sich diesen Monitor jetzt, um Ihren Stream in High Definition zu sehen.
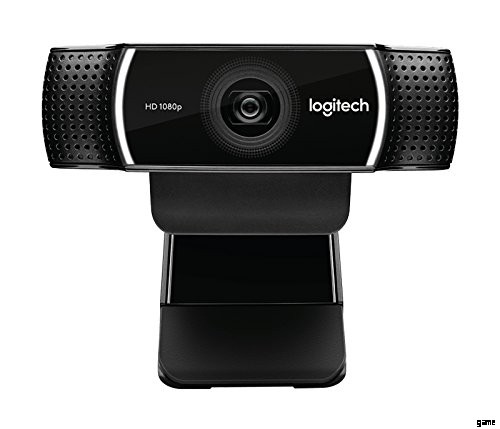
Außerhalb des grundlegenden PC-Setups wird die Logitech C922 Pro Stream Webcam dringend empfohlen. Es ist auch auf Amazon erhältlich. Zu den Top-Features gehören ein HD-Glasobjektiv und ein Premium-Autofokus. Es wird sogar mit einem 1,50 m langen Kabel und zwei eingebauten Mikrofonen für zusätzliche Vielseitigkeit geliefert. Kaufen Sie diese Kamera jetzt und lassen Sie Ihre Zuschauer Sie deutlicher sehen.
Wie kann ich mit OBS auf Twitch streamen?
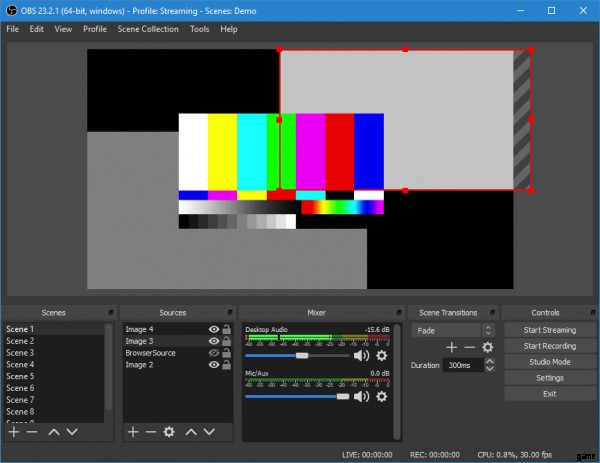
OBS steht für Open Broadcasting Software. Es ist ein Open-Source-Aufnahme- und Streaming-Programm, das auf einer Vielzahl von Betriebssystemen ausgeführt werden kann. Dazu gehören Windows, Mac und Linux. Sie können es kostenlos auf der Website des Entwicklers, obsproject.com, finden und herunterladen.
Der Nachteil von OBS im Vergleich zu XSplit ist, dass die Einrichtung und Verwendung länger dauert.
OS einrichten
- Öffnen Sie OBS auf Ihrem PC.
- Öffnen Sie das OBS-Einstellungsmenü.
- Wählen Sie „Broadcast-Einstellungen“.
- Öffnen Sie das Menü „Streaming-Dienst“.
- Wähle „Twitch“.
- Klicken Sie unten links im Menü auf „Optimieren“.
- Gehe zu deinem Twitch-Dashboard.
- Wählen Sie „Stream-Schlüssel“.
- Folge den Anweisungen auf dem Bildschirm, um deinen Streamschlüssel zu erhalten.
- Kopieren Sie Ihren Streamschlüssel.
- Zurück zu den Broadcast-Einstellungen von OBS.
- Füge deinen Streamschlüssel in das dafür vorgesehene Feld ein.
- Wählen Sie „OK“.
- Sobald OBS eingerichtet ist, können Sie mit dem Streaming beginnen.
Streaming auf OBS
- Kehren Sie zur Hauptseite von OBS zurück.
- Klicken Sie mit der rechten Maustaste auf „Quellen“.
- Öffnen Sie das Menü „Hinzufügen“.
- Wählen Sie „Game Capture“.
- Wählen Sie Ihr bevorzugtes Spiel aus.
- Klicken Sie auf „Monitoraufnahme“, wenn Sie Ihren Bildschirm als Teil des Streams anzeigen möchten.
- Drücken Sie auf „Videoaufnahme“, um den Feed Ihrer Webcam als Teil des Streams zu streamen.
- Sie können jede oder jede Kombination der oben genannten Aufnahmeoptionen streamen.
- Klicken Sie auf „OK“.
- Klicken Sie erneut mit der rechten Maustaste auf „Quellen“, um den Stream anzupassen.
Hinzufügen von Texten zu Ihrem Stream
- Öffnen Sie das Menü „Hinzufügen“.
- Wählen Sie „Text“ aus.
- Geben Sie einen Namen oder eine Quelle für Ihren Text an.
- Geben Sie den gewünschten Text in das Textfeld auf dem Bildschirm ein.
- Mit den bereitgestellten Tools und Optionen können Sie Schriftart, Größe und sogar die Farbe Ihres Textes ändern.
- Klicken Sie auf „OK“, um den gewünschten Text zu speichern.
Hinzufügen von Bildern zu Ihrem Stream
- Beachten Sie, dass Sie Bilder auf Ihrem Computer speichern müssen, um sie mit OBS zu Ihrem Stream hinzuzufügen.
- Öffnen Sie das Menü „Hinzufügen“.
- Wählen Sie „Bild“.
- Geben Sie einen Namen oder eine Quelle für Ihr Bild an.
- Klicken Sie auf „Durchsuchen“, um den Speicherort Ihres gewünschten Bildes zu finden und zu öffnen.
- Klicken Sie auf „Öffnen“, um das gewünschte Bild auszuwählen.
- Sie können die Einstellungen mit den bereitgestellten Tools und Optionen anpassen.
- Klicken Sie auf „OK“, um das gewünschte Bild zu speichern.
- Sie können Ihrem Stream mehr als einen Text und Bilder hinzufügen. Sie können auch ihre Position und Größe nach Belieben anpassen.
- Wählen Sie „Szene bearbeiten“, um Text oder Bilder wie gewünscht zu ziehen und abzulegen.
- Klicken Sie auf die roten Punkte und ziehen Sie sie um ein Bild oder einen Text herum, um ihre Größe wie gewünscht anzupassen.
Starte deinen OBS-Stream
- Klicken Sie auf „Streamvorschau“, um zu sehen, ob Sie vor dem Streamen weitere Änderungen hinzufügen müssen.
- Klicken Sie zum Beenden auf „Streaming starten“.
Wie kann ich mit XSplit auf Twitch streamen?
XSplit ist eine Live-Streaming- und Aufnahmeanwendung. Sie können es kostenlos von der offiziellen Website xsplit.com herunterladen. Einige Funktionen und Merkmale sind jedoch in der kostenlosen Version nicht verfügbar. Holen Sie sich das monatliche Abonnement, um diese Funktionen und Merkmale zu erhalten. Die kostenlose Version reicht jedoch aus, um auf Twitch zu streamen.
Im Vergleich zu OBS ist XSplit intuitiver und einfacher zu bedienen.

XSplit einrichten
- Öffnen Sie XSplit auf Ihrem PC.
- Klicken Sie oben auf dem Bildschirm auf „Senden“.
- Wähle „Twitch“.
- Klicken Sie auf „Autorisieren“, um die Twitch-Anmeldeseite aufzurufen.
- Geben Sie Ihren Benutzernamen in das dafür vorgesehene Feld ein.
- Geben Sie Ihr Passwort in das dafür vorgesehene Feld ein.
- Klicken Sie auf „Anmelden“.
- Klicken Sie auf „Fertig stellen“, damit XSplit Ihre Auflösung optimiert.
- Passen Sie Ihre Stream-Eigenschaften wie gewünscht an.
- Klicken Sie auf „OK“, um die Einrichtung abzuschließen.
Streaming auf XSplit
Öffnen Sie das Menü „Hinzufügen“ unten links auf der Hauptseite von XSplit.
- Öffnen Sie das Menü „Spielaufnahme“.
- Wählen Sie Ihr bevorzugtes Spiel.
- Öffnen Sie das Menü „Webcam, Aufnahmekarte, Videogeräte“.
- Wählen Sie die gewünschte Quelle für Ihren Stream aus.
- Klicken Sie auf „Mediendatei (Bild, Video, HTML)…“, um stattdessen eine Mediendatei zu streamen.
- Suchen Sie die Mediendatei, die Sie streamen möchten.
- Klicken Sie auf „Öffnen“.
- Wählen Sie „Bildschirmaufnahme“, um stattdessen Ihren Bildschirm zu streamen.
- Sie können jede oder jede Kombination der oben genannten Aufnahmeoptionen streamen.
Starten Sie Ihren XSplit-Stream
- Ziehen und skalieren Sie Ihre Stream-Quelle(n) wie gewünscht.
- Klicken Sie oben auf dem Bildschirm erneut auf „Senden“.
- Wähle „Twitch“, um mit dem Streamen zu beginnen.
Wie kann ich mit PS4 auf Twitch streamen?
Im Vergleich zu Ihrem Telefon oder einem PC ist es viel einfacher, mit Ihrer PS4 zu streamen. Sie müssen nicht erst weitere Apps herunterladen oder neue Programme installieren. Allerdings benötigst du noch ein paar Dinge, um mit PS4 zu streamen.
Was sind die Anforderungen?
Hast du bereits ein Twitch-Konto?
- Falls ja, müssen Sie sich auf Ihrem Telefon oder PC anmelden. Du kannst dich mit einer PS4 nicht bei deinem Twitch-Konto anmelden.
- Falls nicht, müssen Sie auf Ihrem Telefon oder PC ein Konto erstellen. Du kannst mit einer PS4 kein Twitch-Konto erstellen.
Welche Hardware benötigen Sie?
Die Grundausstattung einer PS4, eines Fernsehbildschirms und des Controllers reicht aus, um ein Spiel zu streamen. Aber du hast viele Optionen, um das Twitch-Streaming-Erlebnis optimal zu nutzen.
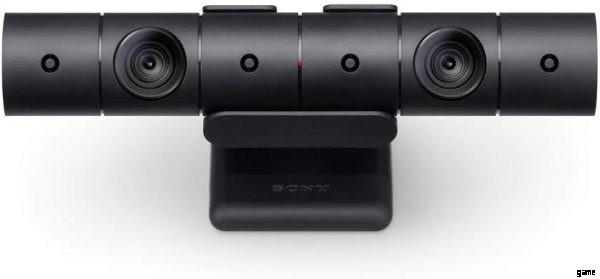
Die PlayStation-Kamera ist eine solide Option, die Sie jetzt bei Amazon erhalten können. Mit einem eingebauten Mikrofon können Sie sich selbst hinzufügen und das Spiel, das Sie streamen, kommentieren. Es gibt auch andere Funktionen wie Gesichts- und Spracherkennung. Und mit Playstation VR fügt es dem Spielerlebnis eine interaktive Dimension hinzu. Hol dir jetzt die Playstation-Kamera und starte noch heute das Streaming von deiner PS4!
Schritt-für-Schritt-Verfahren
Öffnen Sie zuerst das Spiel, das Sie streamen möchten.
Du benötigst außerdem dein Telefon oder deinen PC, um Twitch für PS4 zu aktivieren.
Gameplay-Übertragungsverfahren:
- Drücken Sie die Teilen-Taste auf Ihrem Controller.
- Wähle „Gameplay übertragen“ im Bildschirmmenü.
- Tippe in der Liste der verfügbaren Optionen auf „Twitch“.
- Gehe auf deinem Telefon oder PC zu https://twitch.tv/activate, um einen Aktivierungscode zu erhalten.
- Geben Sie den Aktivierungscode mit Ihrer PS4 ein.
- Tippen Sie auf „Aktivieren“.
- Tippen Sie auf „OK“.
- Drücken Sie erneut die Share-Taste auf Ihrem Controller.
- Wähle „Gameplay übertragen“ im Bildschirmmenü.
- Tippe in der Liste der verfügbaren Optionen auf „Twitch“.
- Passen Sie Ihre Einstellungen an.
- Tippe auf „Übertragung starten“, um deinen Stream zu starten.
Wie kann ich mit Xbox One auf Twitch streamen?
Wie bei der PS4 ist es viel einfacher, mit Xbox One zu streamen als mit Ihrem Telefon oder PC. Du musst jedoch eine App herunterladen, bevor du mit Xbox One auf Twitch streamen kannst.
Was sind die Anforderungen?
Do you have an existing Twitch account?
- If you do, then you need to login on your phone or PC. You cannot log in to your Twitch account with an Xbox One.
- If you don’t, then you need to create an account on your phone or PC. You cannot create a Twitch account with an Xbox One.
What hardware do you need?
The basic setup of an Xbox One, TV screen and the controller will be enough to stream a game with. But, you have many options with which to make the best of the Twitch streaming experience.
A solid option you can get on Amazon is the Microsoft Xbox One Kinect Sensor Bar. Its built-in camera and microphone let you add yourself and more to the stream. You even use them to perform Skype calls. The gaming experience is further enhanced through facial and voice recognition features. Get the Xbox One Kinect Sensor Bar right now and add another element to your stream.

Step-by-Step Procedure
Downloading Twitch on Xbox
- Go to the Xbox Live Store.
- Download the Twitch app for Xbox.
- Launch the Twitch app on your Xbox.
- Select ‘Log In’.
- As with PS4, you will need your phone or PC to activate Twitch for Xbox.
Activating The Twitch Account
- Go to https://twitch.tv/activate on your phone or PC to get an activation code.
- Enter the activation code with your Xbox.
- Click ‘Activate’.
- Open the game you want to stream.
- Press the home button on your controller twice.
- Open the ‘Snap’ menu at the bottom left of the screen.
- Select ‘Twitch’.
- Note:You can also use Kinect’s voice recognition to do this. Use the verbal command ‘Cortana, open Twitch’ to do so.
Broadcasting on Xbox
- Tap ‘Broadcast’.
- Give a title for your stream.
- Customize your settings.
- Tap ‘Start Broadcast’ to begin streaming.
Improving the Twitch Experience
What is Twitch Prime?
Twitch Prime is a premium service that comes bundled with Amazon Prime and Prime Video memberships.
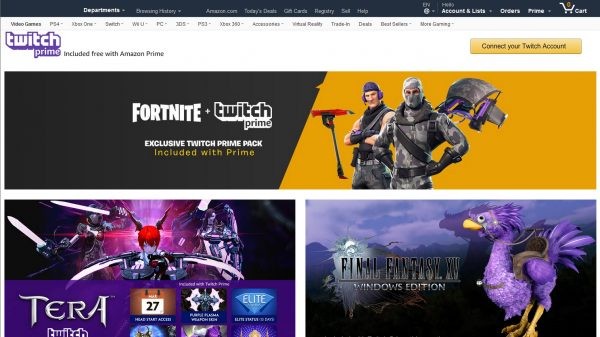
Members of Twitch Prime enjoy many benefits for a monthly fee. These include:
- Bonus games
- Exclusive in-game content
- Free subscriptions to affiliate and partner channels
- Exclusive emoticons available on chat
- An exclusive badge on chat
Sign up for Amazon &Twitch Prime today to receive special in-game items.
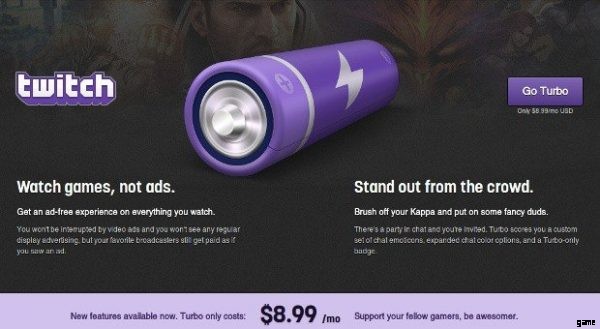
What is Twitch Turbo?
Twitch Turbo is a monthly subscription offered by Twitch. For a monthly fee, members enjoy many benefits:
- Ad-free viewing
- More emoticons available on chat
- Color customization for chat usernames
- An exclusive badge on chat
- Expanded memory for past streams
- Priority status for customer support
You’ll need a Twitch account to sign up for Twitch Turbo. Once you do, you can view Twitch Turbo’s monthly fee. Sign-up for Twitch Turbo today and enjoy ad-free viewing of your favorite streams.
Twitch Prime vs Twitch Turbo
As tempting as it would be to have both Prime and Turbo, you can’t have both. So if you have to choose between Prime and Turbo, which should you choose?
Based on benefits alone, Twitch Prime would be the way to go, as it offers more and better benefits. These include bonus games and in-game content, which are exclusive to Twitch Prime. Other free subscriptions would need payment if ever you want to level up.
That is not to say that Twitch Turbo doesn’t have anything over Prime. Its benefits are less exclusive, but there’s one that’s exclusive to Turbo. Twitch Turbo is the only Twitch service guaranteed to be ad-free. This makes it more convenient for your streaming or viewing satisfaction. No more ads popping up in the middle of streams that break your immersion.
To sum it up, Prime would be the way to go if you’re focused on bonus content. But when it comes to convenience, Turbo would be the obvious choice.
What is a Twitch Raid?
Raids are a community function offered on Twitch. They allow a streamer to send their viewers to another channel. This lets streamers to provide support to one another, and help expand the community.
Raiding is completely voluntary. A viewer can choose not to take part in a raid. The streamer behind the raid will be streaming the raided channel, though. So even if the viewer doesn’t join the raid, they can see it ongoing.
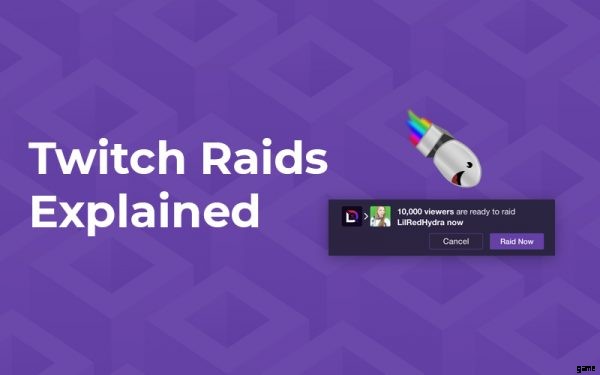
Launching a raid is simple and easy, with a simple step-by-step process to follow.
- Add ‘/raid’ next to the name of the channel you want to raid.
- Click ‘Raid Now’ after a ten-second countdown.
- If you do not click ‘Raid Now’, the raid will start in eighty seconds by default.
- You can also cancel the raid within those same eighty seconds.
- You and your viewers will arrive at the target channel once the raid begins.
- The owner of the raided channel will also receive notice of the ongoing raid.
What is a Twitch Affiliate?
Twitch Affiliates is a program allowing streamers to earn money from their broadcasts. One way is through accepting subscriptions from their viewers. Affiliates also get a share from total Twitch Prime subscriptions.
Affiliates can also earn from Bits to Cheer on their channels. Bought by viewers, these and used in chat. Affiliates receive a share of the amount paid for the bits used on their channel.
Affiliates can also make money by the games or in-game items they’re streaming. If either is available on Twitch, viewers have the option to buy during the stream. The Affiliate will receive a percentage from sales made on their channel.

Not everyone can be a Twitch Affiliate, though. There are qualifications needed to receive an invitation to become an Affiliate. These include at least:
- 50 followers.
- 500 minutes broadcast time
- 7 unique broadcasts
- 3 or more viewers on average at any single time
Other Relevant Topics

Twitch Stream Connection Failure
There are many possible causes why your stream disconnects in the middle. Whether you’re the one streaming or watching the stream, this is annoying. Here are the most common causes and their fixes.
Modem/Router Issues
The most common cause of your stream getting disconnected is your hardware. You can resolve this with ease, though.
The simplest and most effective solution is to reset both your modem and router. If that doesn’t work, you can try connecting your computer to the modem, and bypass the router completely.
A shared wi-fi could also be a problem, as other computers on the network compete with yours for bandwidth. In this case, either disconnect them from the wi-fi or wait until fewer computers are using the wi-fi.
Other Software
Another common reason behind a stream getting disconnected is other software. These include Skype, Steam, Torrent, and other similar programs that compete for bandwidth. Again, the solution is quite simple. Shut down those competing programs, and remove competition for Twitch on bandwidth.
Internet Service Provider Issues
Your Internet Service Provider (ISP) could also be a problem. The most common issue here is technical difficulties. This can be a broken cable, ongoing maintenance, or an issue on your ISP’s end. The only solution here is to contact your ISP and inquire about the problem. If they are unaware, then notify them to get a fix as soon as possible. Once or if they’re already aware, you wait until the issue gets resolved and you can resume streaming.
Another issue when streaming is that your stream exceeds your allotted upload speed. Even if your package from your ISP has fast download speeds, your upload speed may be much lower.
Again, contact your ISP and inquire about higher upload speeds to resolve the issue.

Location
One more issue is that of location, which often has to do with the distance. For example, you’re in Asia while Twitch’s servers are in America or Europe. The distance could leave the connection unreliable, especially at peak hours. Unfortunately, this is one issue that has no easy solution. You may be better served to find another, closer streaming service.
Stream Key on Twitch
A Stream Key is a unique code meant to identify you as the source of a broadcast stream. It’s not usually given or required by Twitch, but you will need it when setting up OBS for Twitch.
You can get the Stream Key on your Twitch account’s Dashboard. This is then entered into your OBS’ broadcast settings, as part of the setup.
How old do you have to be to Stream on Twitch?
Twitch does not extend its services to anyone below the age of 13. This is why account creation asks for your birthdate. The burden of responsibility is on you when you declare you’re 13 years old or older.
Twitch also assumes that users between the ages of 13 and 18 are under parental supervision. Parents are responsible for their compliance with the Terms and Conditions of service.
Best Time to Stream on Twitch
Twitch’s popularity and large user base mean that Twitch is always under heavy load. There are peaks of activity based on timezone, though. And from there, you can find when it’s more convenient to stream on Twitch.
In general, activity on Twitch peaks at daytime in America, and nighttime in Europe. For a more precise time, this is from 8 AM to 7 PM PST in the USA. In Europe, this would be from 3 PM to 2 AM GMT. Since this is when Twitch is under the heaviest load, you might want to avoid streaming at these times.
How to Stream on Private on Twitch
You can’t do a private stream on Twitch. This would go against its purpose as a streaming community. The closest you can get is to set your channel to ‘not playing’ while streaming. This would make it seem to other users that nothing is happening on your channel. But, should they view your channel, then they can see your stream regardless.
If you want to do a private stream with friends, then it would be best to explore other sites. Youtube allows for private streaming. You can also use Skype and screen share with your selected audience.
Can you stream movies on Twitch?
No, you cannot stream movies or other copyrighted materials on Twitch. This is in Twitch’s Terms and Conditions of Service. A violation would result in account deletion or even legal action.

If you want to want to watch movies for free online, there are sites where you can do so. One of those is Netflix, while others include FreeFlix and Youtube.
What else am I not allowed to stream on Twitch?
Apart from copyrighted materials, there are many subjects you cannot stream on Twitch. These include:
- Pornographic materials
- Excessive violence
- Hate speech
- Violating the privacy of others
- Illegal activities
- Harassing or threatening others
Streaming on Twitch to collect funds for political purposes is also prohibited. Candidates for political office are also not allowed to make money on Twitch. Unsolicited offers, advertisements, spamming, and other similar activities are also not allowed.
Test Twitch Stream
This is a function that allows you to check in advance if you can stream. Twitch has a built-in feature to perform this, called Broadcast Inspector. You don’t have to test before you stream, but there are two cases wherein you should test. The first is when you stream from a new location, and after you change your ISP. Note that you can only do this with a PC.
Performing a test stream is simple:
- Go to your broadcast settings.
- Select the closest Twitch server to your location.
- Starting the test depends on whether you’re using OBS or XSplit.
- For OBS, add ‘?bandwidthtest’ to your Stream Key.
- For XSplit, use the ‘Test Bandwidth’ feature in the server list menu.
If the test proceeds without issue, then you can go ahead and stream. If there are issues, usually dropped frames, I would suggest you switch to another server.
Twitch Squad Stream
Squad stream is a feature that allows up to four people to stream together in one window. It allows for more than one perspective on a stream, or to cover an event all at once. Starting a stream is quick and simple:
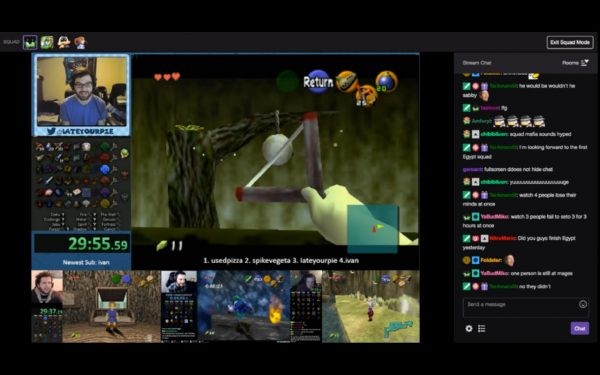
- Go to your Twitch Dashboard.
- Select ‘Squad Stream’.
- Click ‘Add a Channel’.
- Enter the channel you want to invite into the squad.
- Click the next ‘Add a Channel’ to send more invites.
- Remember that a squad stream can only have four people at most.
- Click ‘Start Squad Stream’ to begin streaming.
- Unless all invitees are present, a squad stream can’t begin.
The squad stream will end once all streamers leave the squad. But, it will continue even if only one member is streaming.
Best Games to Stream on Twitch
There are currently 38 genres of games on Twitch. These vary from Action, Adventure, Mobile Games, and even Visual Novels. From those genres, the top five games of Twitch at present are:
- Fortnite (Shooter)
- League of Legends (MOBA)
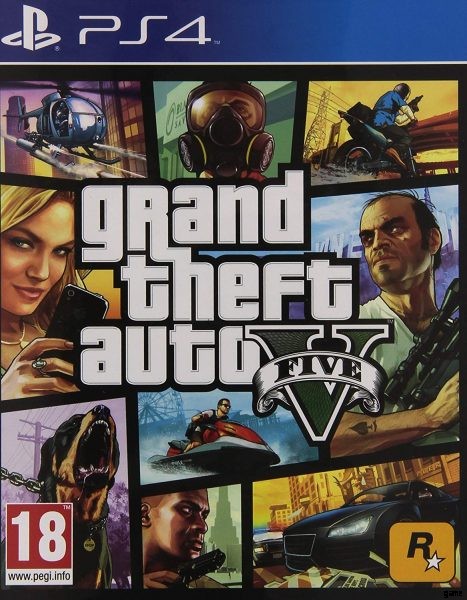
- Grand Theft Auto V (Driving/Racing, Action, Adventure)
- Teamfight Tactics (Strategy, Autobattler, Card &Board)
- World of Warcraft (MMORPG, RPG)
These are five games that guarantee you a large audience at present. But you are free to stream about any of the games you love including games like PUBG Mobile and DOTA 2.