In Minecraft können Sie die Welt so erkunden, wie Sie es möchten. Tatsächlich können Sie mit einem leeren Inventar überall im Spiel hingehen; Das macht das Abenteuer jedoch nicht sicher und unterhaltsam. Sie benötigen Werkzeuge und Tränke, um bessere Kämpfe und das Sammeln von Ressourcen zu erleben. Ersteres ist einfach herzustellen, aber letzteres erfordert das Brauen von Minecraft und Kenntnisse der Rezepte.
Das Brauen von Minecraft-Tranken kann kompliziert sein, wenn Sie nicht wissen, was zu tun ist oder was Sie brauchen. Außerdem gibt es im Spiel kein Alchemiebuch oder Anleitung, also müssen die Spieler das Internet nach einem durchsuchen. Egal, ob Sie gerade angefangen haben, diesen Top-Anwärter auf die besten Open-World-Spiele auf Mobilgeräten zu spielen oder nicht, Sie werden unseren Leitfaden hilfreich finden. Beginnen wir mit den Grundlagen, ja?
In diesem Artikel
- Arten von Tränken Minecraft Brewing Yields
- Ausrüstung und Gegenstände für Minecraft Brewing
- Wie man Tränke in Minecraft braut
- So verwenden Sie Minecraft Brewing Modifiers
- Die besten Tränke, die mit Minecraft Brewing hergestellt wurden
- Ein besonderer Trank zum Brauen
Arten von Tränken Minecraft Brewing Yields
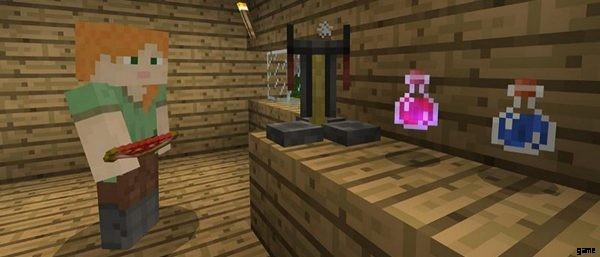
Es wird Ihr Vorteil sein, die Arten von Tränken zu verstehen, die durch Minecraft-Brauen erzeugt werden, besonders wenn Sie ein Anfänger sind. Genauer gesagt, das Know-how wird Ihnen helfen, je nach Ihrer Situation im Spiel, Tränke mit Bedacht einzusetzen.
Tränke in Minecraft werden danach klassifiziert, wie sie konsumiert werden und welche Wirkung sie haben. Im Folgenden erfahren Sie mehr über die Typen im Detail.
Nach Verbrauch:
1. Trinkbarer Trank
Ein trinkbarer Trank kann Status-Boosts oder negative Effekte geben, aber nur für deinen Charakter. Genauer gesagt hat es keine direkte Wirkung auf Feinde in der Nähe, wenn es eingenommen wird. Es ist großartig, es direkt vor einem harten Kampf zu konsumieren, damit Sie sich stark in die Action stürzen können.
2. Spritztrank
Ein Splash-Trank wird auf den Boden oder auf Feinde geworfen, damit Sie oder sie seine Wirkung spüren können. Diese Art von Trank ist großartig, um deine Kräfte schnell wieder aufzufüllen oder um feindliche Kreaturen und Spieler abzuwehren, sobald du einen Kampf ausgelöst hast.
3. Verweilender Trank
Ein Verweiltrank wird genauso verwendet wie ein Spritztrank, aber es gibt einen merklichen Unterschied zwischen den beiden Typen. Dieser Trank verweilt als Statuseffekt-Nebel im Vergleich zu einem Splash-Trank, der nicht an einem bestimmten Ort und zu einer bestimmten Zeit wirksam bleibt. Sie oder die Feinde müssen nur in den Deckungsbereich treten, um von dem Trank betroffen zu sein.
Basierend auf Wirkung:
1. Ungeschickter Trank
Ein umständlicher Trank ist der Basistrank, der beim Minecraft-Brauen hergestellt wird. Tatsächlich bleibt es als Wasser in einer Flasche, bis in der nächsten Braurunde eine sekundäre Zutat hinzugefügt wird. Außerdem stammen alle Tränke, außer dem Trank der Schwäche, von ungeschickten Tränken.
2. Dicker Trank
Ein dicker Trank ist ein Gebräu, das stärker ist als normale Varianten. Es wird auch Version zwei des ursprünglichen Tranks genannt; zum Beispiel Trank der Stärke II oder Trank der Heilung II. Es gibt einen Nachteil bei der Verwendung, nämlich eine verringerte Wirkung in Bezug auf die Dauer.
3. Weltlicher Trank
Ein weltlicher Trank ist aufgrund seiner negativen Wirkung die Basismischung, die zum Brauen eines Tranks der Schwäche in Minecraft erforderlich ist. Darüber hinaus ist es das Ergebnis der Kombination einer mit Wasser gefüllten Flasche und Redstone-Staub, Spinnenstaub, glitzernder Melone, Magma-Creme, Zucker, Flammenpulver oder Ghast-Träne.
Ausrüstung und Gegenstände für Minecraft Brewing
Das Schmieden von Waffen und Werkzeugen erfordert einen Arbeitsplatz und Ausrüstung. Ebenso benötigt das Brauen von Minecraft diese.
Für den Workshop können Sie kreativ sein, indem Sie einen unterirdischen Raum mit Ihren Ressourcenkisten oder einen unordentlichen Platz in der Nähe Ihres Gartens, Teichs oder Bauernhofs einrichten, um Ihre Ausrüstung darauf zu platzieren. Tatsächlich raten erfahrene Spieler, deine Workstation neben der Quelle deiner Materialien zu platzieren, um schnell Minecraft zu brauen.
Achte bei der Ausrüstung auf folgende Dinge:
1. Braustand
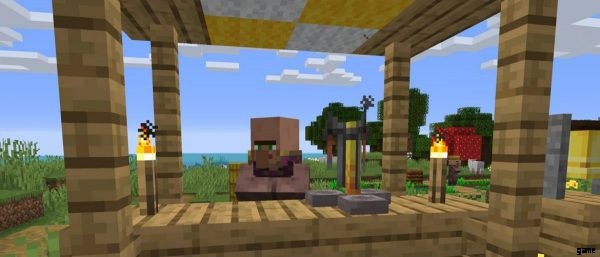
Der Braustand ist die Hauptausrüstung für die Herstellung von Tränken in Minecraft. Der einfachste Weg, es zu erhalten, besteht darin, in Tempeln, Iglus oder Schiffen danach zu suchen. Alternativ kann es aus drei Kopfsteinpflastersteinen und einem Flammenstab hergestellt werden, den du in einer gefährlichen Netherfestung sammeln kannst.
2. Cauldon
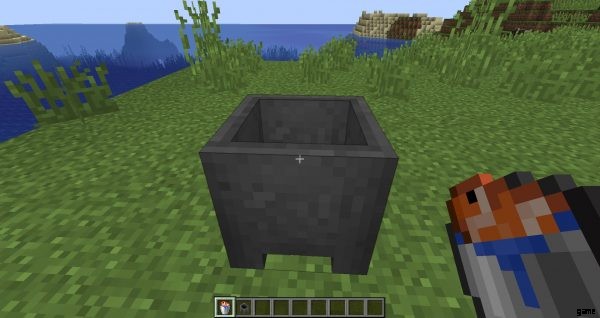
The cauldron was originally meant to be the brewing stand when the latter was not yet added to the game, per the game’s official website. Currently, the equipment serves as a holder for liquid or powder. You can scoop three times from it via glass bottles even if you do not have water, lava, or snow source nearby. Also, you can craft it from seven iron ingots. If you are close to a body of water, tundra, or the Nether, then the cauldron is just optional.
3. Glass Bottle
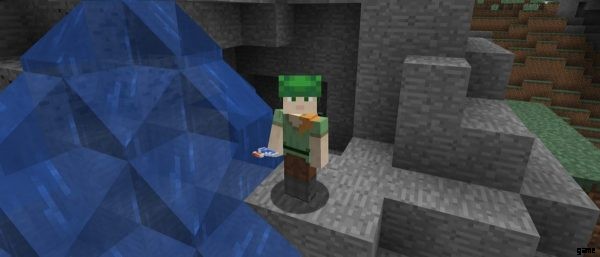
A glass bottle in Minecraft is as it is in the real world – a container for liquid. It can be reused or broken when you drink or throw a potion, respectively. Also, you can make a glass bottle from three pieces of glass from your crafting menu. Glass comes from smelted sand and coal in the game, in case you do not know.
4. Blaze Powder
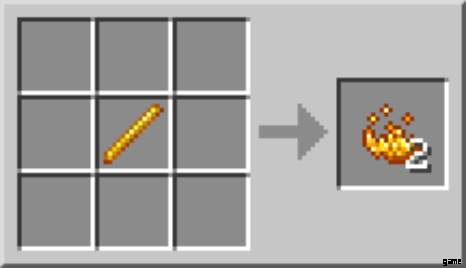
Just like a stove, a brewing stand will not work without fire. In Minecraft, fire’s counterpart is blaze powder. But, it is quite challenging to obtain this because you need to defeat the Blaze, a hostile monster in the Nether that drops the blaze rod when slain. Blaze powder comes from blaze rods you break down in your crafting menu.
5. Nether Wart
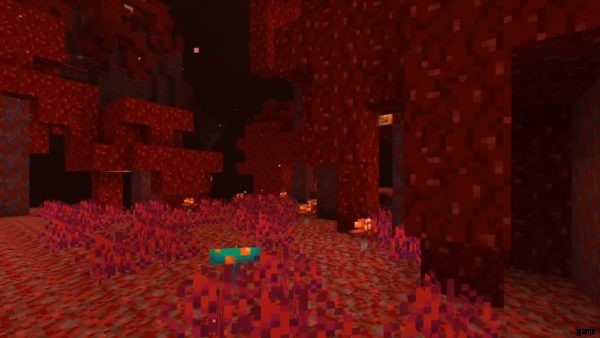
A Nether Wart is useful in brewing any potion, except the Potion of Weakness. It resembles red overgrown fungi, and you’ll find it thriving in Minecraft’s Nether realm, particularly in soul sand gardens of the fortresses. To elaborate, it can be harvested instantly like any shrub but you can opt to cultivate it elsewhere when you take home some soul sand from the Nether with you. Soul sand can be mined from a few blocks deep the ground in the Nether world.
How to Brew Potions in Minecraft
Now that you have everything on hand, you can experience Minecraft brewing. Let’s focus first on the generic way to make your potions. You can proceed to the next section about enhanced potions afterward.
 IMPORTANT TIP
 While you can process one potion at a time, it is more convenient to work on three bottles simultaneously to save time in Minecraft brewing.
Follow these instructions to brew basic potions in Minecraft:
1. Use three glass bottles to take water from a pond, container, or your cauldron.
2. Approach and click on your brewing stand to see its user interface.
3. Put some blaze powder on the top left slot of the UI.
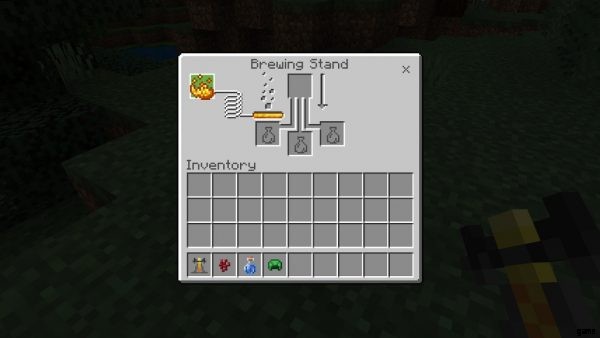
4. Place three water bottles on the three bottom slots of the UI.
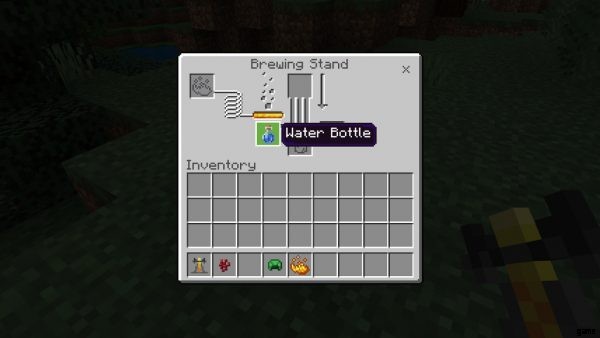
5. Drag the Nether Wart to the top central slot afterward.
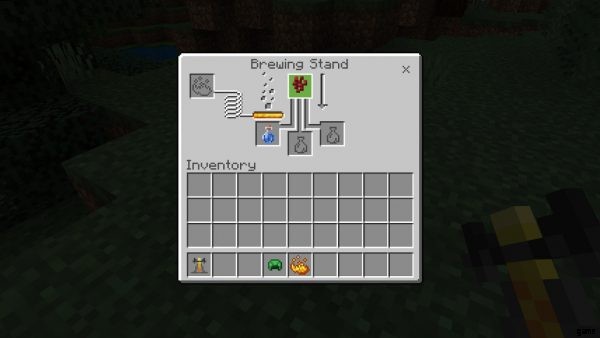
6. Wait for the arrow icon on the right to be filled; bottles turn into awkward potions once brewed.
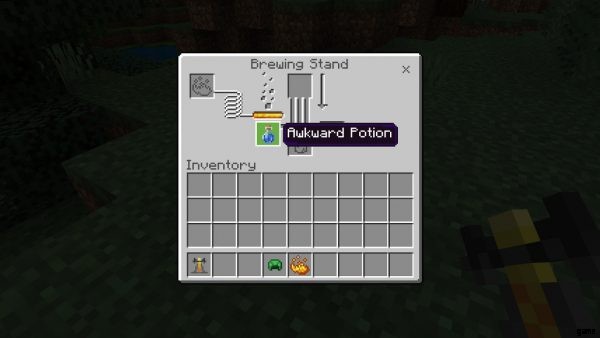
7. Put the secondary ingredient for the specific potion you’re making on the vacant top center slot (e.g., blaze powder for a Potion of Strength, golden carrot for a Potion of Night Vision, etc.)
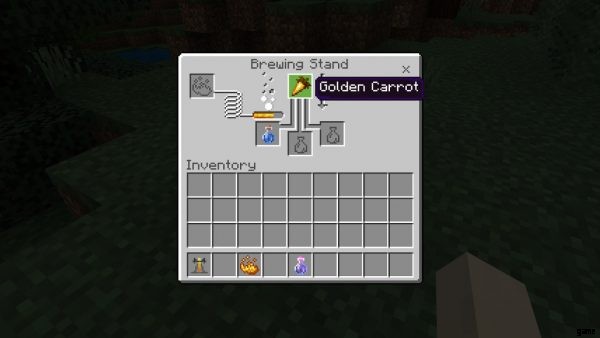
8. Wait for the arrow icon to be fully highlighted afterward.
9. Drag to your inventory the three potions, which now have an effect, or proceed to enhance them.
How to Use Minecraft Brewing Modifiers
Minecraft brewing can improve the existing potions you’ve crafted. Additionally, the essential ingredients for accomplishing that are called modifiers.
Modifiers can enhance a potion’s potency and working duration, or change its type and effect. They can also be used for further improving enhanced potions afterward. They come in the form of resources or enemy loot, which you can gather from all around the Minecraft world. Below is a table of Minecraft brewing modifiers, their effects, and other relevant information you need to know:
| Modifier | Source | Potion Type Result | Effect |
|---|---|---|---|
| Glowstone Dust | Glowstone block | Thick Potion | Makes potions stronger |
| Redstone Dust | Redstone ore | Mundane Potion | Makes potions last longer |
| Gunpowder | Creepers, Ghasts, Witches | Splash Potion | Potion bottles explode when thrown |
| Dragon’s Breath | Scoop Ender Dragon breath attack or fireball clouds via glass bottle | Lingering Potion | Potions emit a lingering fog when thrown |
| Fermented Spider Eye | Craft from Spider Eye and Mushroom | Potion of Weakness | Reversed potion effect |
To use any of the modifiers, you need to take off from the last step of the potion brewing guide we’ve discussed previously. That is when you’ve modified the base or awkward potions into potions with effect.
Follow these steps to enhance the potions afterward:
1. Place the three potions (e.g. Potions of Strength) on the bottom slots of the brewing stand UI.
2. Add new blaze powder on the left slot if it went empty.
3. Put the modifier ingredient on the top center slot.
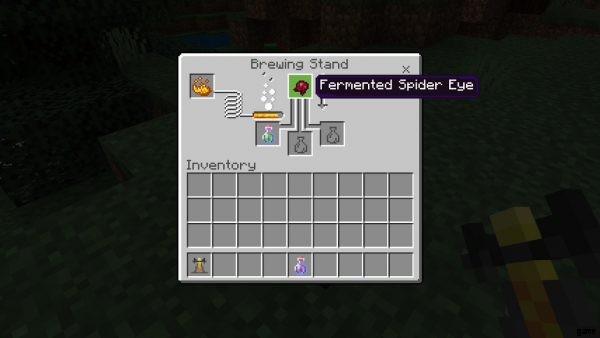
4. Wait for the arrow icon to be filled afterward.
5. Drag your enhanced potions to your inventory to store those.
Best Potions Made via Minecraft Brewing
Minecraft brewing is complex if you think of all the available ingredients and resulting potions. Also, there are so many combinations to mention, so let’s zero into the best Minecraft potions beginners and experts should brew:
| Potion | Effect | Ingredients | Ideal Modifiers &Results |
|---|---|---|---|
| Potion of Healing | Replenishes health | Awkward Potion + Glistering Melon | Glowstone dust (Potion of Healing II) Fermented Spider Eye (Potion of Harming I &II) |
| Potion of Regeneration | Replenishes health over 45 sec. | Awkward Potion + Ghast Tear | Glowstone dust (Potion of Regeneration II:Faster for 21 sec.) Redstone dust (1 min. 30 sec. effect) |
| Potion of Strength | Boosts attack power for 3 min. | Awkward Potion + Blaze Powder | Glowstone dust (Potion of Strength II:Stronger for 1 min. 30 sec.) Redstone dust (8 min. effect) |
| Potion of Night Vision | Enhances vision in the dark for 3 min. | Awkward Potion + Golden Carrot | Redstone dust (8 min. effect) |
| Potion of Poison | Damages health every 1.25 sec. for 40 sec. | Awkward Potion + Spider Eye | Glowstone dust (Potion of Poison II:More damage in 21 sec.) Redstone dust (1 min. 30 sec. effect) |
| Potion of Water Breathing | Prevents drowning for up to 3 min. | Awkward Potion + Pufferfish | Redstone dust (8 min. effect) |
| Potion of Fire Resistance | Gives immunity to burning for 3 min. | Awkward Potion + Magma Cream | Redstone dust (8 min. effect) |
A Special Potion to Brew
The table below contains everything you need to know about the unique Potion of Weakness that can only be made when you have a Mundane Potion. We’ve already mentioned previously the exact ingredients for brewing that base potion, so feel free to go back to the Potion Types section of this article in case you forgot.
| Special Potion | Effect | Ingredients | Ideal Modifiers &Results |
|---|---|---|---|
| Potion of Weakness | Makes the attack weaker by 0.5 points for 1 min. 30 secs. | Mundane Potion + Fermented Spider Eye | Redstone dust (4 min. effect) |
Minecraft Brewing Is Fun
Minecraft brewing makes the game enjoyable and dynamic because you can make any potion that matches your play style. For instance, if you are more of a fighter than an explorer, you can brew Potions of Strength to enhance your chances of winning against hostile creatures or mobs anytime. If the other way around, you might want the Potion of Night Vision or Water Breathing because you can navigate to more places with those. Additionally, brewing is more convenient compared to scouring places for potions or randomly waiting for those to drop as loot from fallen enemies.
Do you want to enjoy Minecraft even more? Try the best Minecraft shaders for enhancing your sandbox world on your mobile device.
