In Kapitel 2 von Deltarune , haben die Spieler Zugang zu einer geheimen Route, die die meisten Fans als „Snowgrave“ bezeichnen. Beim Durchspielen dieser versteckten Route wird es sehr schnell sehr dunkel. Diese geheime Option hat zwar keinen Einfluss darauf, wie das zweite Kapitel von Deltarune verläuft endet, verändert es jedoch den Verlauf der Erzählung und die Position einiger Figuren .
Dies macht deutlich, dass die Auswahl dieser Vorgehensweise Implikationen zu haben scheint, die sich in den nachfolgenden Kapiteln fortsetzen werden. Der versteckte Weg, der Undertale etwas widerspiegelt Der Weg des Völkermords erfordert jedoch einen äußerst strengen Prozess, um abgeschlossen zu werden. Befolgen Sie die unten aufgeführten Schritte und stellen Sie sicher, dass Noelle jeden angetroffenen Feind einfriert, sofern nicht anders unten angegeben Das Überspringen eines Feindes oder das Beenden der Begegnung mit etwas anderem als dem Einfrieren des Feindes bricht das Spiel aus der Snowgrave-Route heraus.
Vorbereitungen
Die Snowgrave-Route beginnt nicht richtig, bis Noelle sich der Gruppe in Cyber City anschließt, sodass jegliche Aktionen, die davor durchgeführt werden, den Verlauf der Route nicht beeinflussen . Es gibt jedoch bestimmte optionale Schritte, die Spieler unternehmen können, bevor sie beginnen, um die Route als Ganzes viel einfacher zu machen.
1. Hol dir die Eisenfessel und den Jevilstail
Die Eisenfessel befindet sich in Kris und Ralseis Gefängniszelle im Keller von Card Castle , während Jevilstail von bezogen wird Jevil zu verschonen. Der erhöhte Magiewert, der erhalten wird, wenn Noelle den Jevilstail ausrüstet, macht die früheren Teile der Route ein wenig schneller.
2. Hol dir den Schleuderkuchen und die leichte Süßigkeit
Den Spin Cake erhält man, indem man ihm in Kapitel 1 den Top Cake von Top Chef zurückgibt, während man die Light Candy erhält, indem man im Epilog von Kapitel 1 mit Noelle spricht, nachdem sie das Krankenhaus verlassen hat. Dies sind die stärksten Heilgegenstände der Spieler kann möglicherweise für die Snowgrave Route haben. Sie helfen beim Endboss sehr aus.
3. Holen Sie sich das Spannungsbit
Das Tension Bit befindet sich in einer Schatztruhe, die sich einen Raum östlich des Musikladens in Cyber Field befindet . Es gewährt dem Spieler einmalig 32 TP, wenn es verwendet wird. Da der Tension Bow in der Snowgrave Route nicht hergestellt werden kann (weil das Color Café nicht zugänglich ist und somit auch B.ShotBowties), verliert der Spieler nichts, wenn er ihn verwendet. Auch hier hilft es besonders beim Endboss.
4. Kaufe das Mecha-Säbel
Das Mecha-Säbel ist eine Waffe von Kris, die bei Sweet, Cap'n und K_K in Cyber Field gekauft werden kann. Es wird dringend empfohlen, dass der Spieler dies bekommt , da es für diese Route sehr wertvoll ist, Kris einen höheren Angriffswert zu geben.
5. Fight Every Enemy Before Noelle Joins
It's difficult to care too much about the recruits in this route, as the player will lose most of them from playing it anyway (the only ones that can be kept are the Queen's Mansion enemies ), so they might as well fight them for the higher stats. Kris, Susie, and Ralsei gain +2 HP for every enemy defeated, and every 10 enemies will give them +1 to Attack and Magic.
Trash Zone And Freeze Ring
As soon as Noelle joins in the First Alleyway, replace her Silver Watch with the Jevilstail and equip Kris with the Iron Shackle (if the player has them).
Walk left to the previous room and encounter a Virovirokun (for clarity, this guide will be referring solely to overworld sprites when talking about enemies). This, and all other enemies, must be defeated with Noelle's IceShock spell . Beating an enemy with the basic "Fight" command or sparing them will kick the player out of the Snowgrave Route. IceShock costs 16 TP to use, which is the exact number gotten from defending, so just have Kris defend and have Noelle cast Iceshock.
The player must continue to backtrack all the way to the room before Spamton's shop in the Trash Zone and IceShock a Poppup, another Virovirokun, and a Werewire along the way. They can go to the door of Spamton's shop to see some optional dialogue from Noelle. Once this has been accomplished, head back to Cyber City and IceShock an Ambyu-Lance and a Tasque before returning to the First Alleyway Save Point . The player can skip the puzzle in the Annoying Mouse Room just by going south repeatedly and answering "Proceed" twice after pressing the switch for the first time. This does not impact the route.
After that,
- There will be 2 Ambyu-Lances in the next room. Encounter either one and IceShock them both .
- Go to the left and open the chest containing the Pink Ribbon and equip it to Kris . This is arguably the best piece of armor in the game, so it is well worth getting.
- Go to the right and IceShock a Virovirokun and a Werewire in the next room.
- Go to the right again to the next room and IceShock an Ambyu-Lance and a Virovirokun. Make sure to not go beyond the lightning gate at the bottom of this room, as that will kick the player out of the route . The player can check the Ferris wheel poster and select "I will ride with you" followed by "Noelle will ride with me" or "Sorry" to see optional dialogue exclusive to this route.
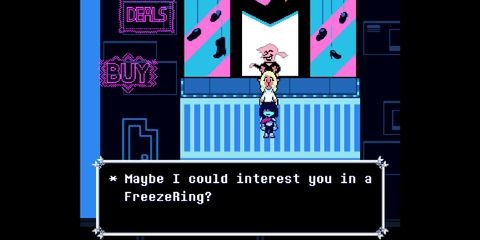
- Keep heading right and talk to the pink Addison. The player must answer "We're something else" when prompted . Saying "We're friends" aborts the route. Try to leave, and the pink Addison will offer the party a Freeze Ring. Say "Get it" 5 times in a row to obtain it.
- Equip Noelle with the Freeze Ring and leave the room through the southeastern exit, past the lightning gate. The player will be prompted to answer "It's natural" or "It's horrible" when leaving. Responding with either doesn't impact the route.
Thorn Ring And Berdly
- Go right into the next room and IceShock the Tasque.
- The room after that will have a Save Point and 3 boxes. The top right box contains 4 CD Bagels that the player can get by checking it 4 times . Leave by going right.
- The following room will have a Virovirokun and 2 Werewires. Encounter the Virovirokun and either Werewire (They count as the same encounter) and IceShock all of them. There is a chest near the Virovirokun that has the Bounce Blade. Leave by heading right.
- This big and long room contains an Ambyu-Lance and a Virovirokun. Iceshock both of them. The player can optionally visit Spamton in the dumpster through the southwestern exit, and he will keep track of how many enemies haven't been frozen with IceShock . The player should have 4 left if they've been following this guide exactly. Exit the big and long room through the northeast.
- Use "Proceed" 5 times in a row to get past this room. Leave through the right.
- Keep walking right and there will be 2 Maus that need to be frozen with IceShock . There is a chest containing a CD Bagel near the southwestern Maus. Leave through the southeast.
- Watch the cutscene of Noelle freezing the puzzle and head right.
- The next room will have 3 trash cans that contain $20, $80, and a CD Bagel. It will have 2 Poppups to the right and southwest. Freeze them both with IceShock .
- That should be all 20 enemies frozen at this point. The player can tell if they're done when Noelle has 166 maximum HP . Go back to Spamton's dumpster and buy the Thorn Ring from him for $1997. Equip Noelle with the Thorn Ring and remove all of her armor. (This is to prevent her from taking something valuable when she leaves the party.) Go back to the room with the 3 trash cans and leave through the south.
- The player will encounter Berdly in the next room. Say "Proceed" and begin the battle with him .
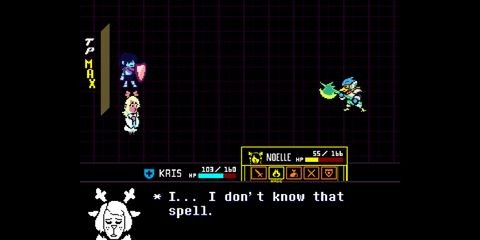
- Build up 100 TP as soon as possible by defending and go to Noelle's magic menu. Select "Snowgrave" 5 times in a row to end the battle. Leave through the northern exit and go through the manhole. Watch the cutscene of the party being reunited.
Queen's Mansion
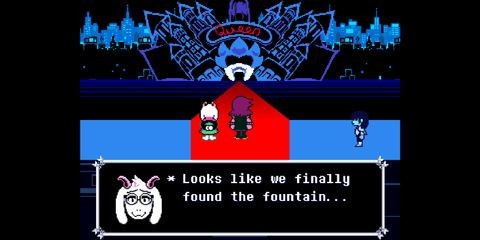
Immediately upon entering there will be a cutscene of Susie and Ralsei noticing a "statue" of Rouxls Kaard . After it's over, leave through the exit left of the bookcase. The player can optionally head to the room to the right and get some dialogue from Spamton.
After that:
- Go right through the next room and the player can optionally fight Mauswheel , or just leave through the north.
- Carefully go through the Pipis maze and head north. Make sure to walk and not run in this room , as that makes it a lot easier to navigate. If a battle with one is entered, defending can be used to gain TP to earn some free Heal Prayers from Ralsei.
- Head north and leave through the left, taking care to dodge all the Pipis along the way .
- Keep heading left and dodge more Pipis, this time on wheels . They can also be interacted with (using the Z key or whatever the player's interact button is) to make them float away.
- At the end of the next room, the player will be forced to battle Tasque Manager. Defeat or recruit her and go north.
- Ride the teacups and exit the room.
- The player can go to the western room to optionally battle Werewerewire. Leaving through the first exit will take the player back to the entrance and open a shortcut. The second exit leads to progress.
- Watch the cutscene of Susie going into Noelle's room and head right.
- Dodge the bullets from the plugs on the ceiling and keep going right .
- Watch the cutscene of Queen's monologue and exit to the right .
Spamton NEO Preparation &Battle
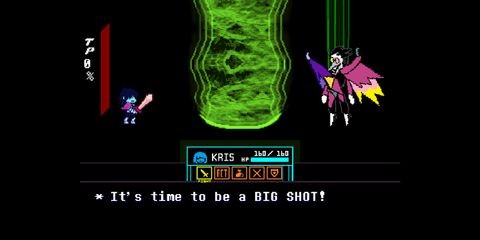
The player will now be in a room with a Save Point and a vending machine. Use the Save Point and buy as many CD Bagels from the vending machine as possible.
The recommended inventory for this upcoming boss is:
- Spin Cake
- Light Candy
- Tension Bit (If the player wishes to use it).
- CD Bagels for the rest of the empty slots.
The recommended equipment spread for Kris is:
- Weapon:Mecha Saber
- Armor Slot 1:Pink Ribbon
- Armor Slot 2:Jevilstail/Iron Shackle/Royal Pin (Depending on what the player has. They are ordered from best to worst).
Once ready, head north to the Fountain . The player will attempt to close the Dark Fountain, only to be interrupted by Spamton NEO. He thanks the player for helping him reach the position he's in now, only to begin angrily chastising them for trying to close the Dark Fountain and almost ruin everything he has accomplished. To try and keep the Dark Fountain open forever, Spamton NEO will battle the player to stop them, beginning the final boss of the Snowgrave Route.
This version of the Spamton NEO battle is more difficult than the one in the Normal Route for a variety of reasons.
- The player only has Kris for this battle , severely limiting their combat options and overall survivability
- Since Spamton NEO's damage is no longer being spread out across 3 party members, he deals much more damage per hit
- TP actually matters here , as not using them slows this battle down significantly
Here are some tips the player should know to make this battle easier.
- The player has access to the "X-Slash" and "FriedPipis" ACTs exclusively in this battle . X-Slash costs 25 TP and deals 2 high-powered hits to Spamton NEO. X-Slash should be used as much as possible, it's far and away the best way to deal damage.
- FriedPipis costs 32 TP and heals the player for 120 HP. This should really only be used as a saving throw for when they're low on health , as it's somewhat expensive to use. Items are the ideal healing method in this battle.
- During the "Flying Heads" (Turn 1) and "Spam Mail" (Turn 2) attacks, let the blue Spamton heads into the graze range and then shoot them to get some free TP. Shoot out only 1 row of stacked blue Spamton heads in "Spam Mail" and let the other one graze the SOUL for even more TP.
- In "Slow Heart Attack", (Turn 3) the player can gain a lot of free TP by just not shooting the heart and grazing on the bullets for as long as possible .
- In the beginning of "Phone Hands" (Turn 5), the player can rub up against Spamton for a few seconds to gain some easy TP. Make sure to back away once he begins moving , obwohl. Firing charged shots in the center of the bullet board of this attack will do a great job of keeping Spamton away.
- For "Spamton's Face" (Turn 6), destroy the mouth as fast as possible (4 charged shots will do it) and leave the nose and eyes intact . This creates the easiest pattern of this attack to dodge.
- The eye lasers in "Spamton's Face" and the small hearts in "Triple Heart Attack" (Used when Spamton NEO is at <30% health) always aim for where the SOUL currently is , meaning their movements are 100% manipulatable.
- Just as Spamton NEO is about to be defeated, he will boost his defenses to monstrous levels and become invincible, as he will heal off what minor damage is done to him. The player is required to use ACTs to finish this part of the battle and return to Hometown .
At the end of Chapter 2 in the Snowgrave Route, Hometown will be mostly identical to the Normal Route except for Rudy's hospital room. The player must go there to see the final cutscene of the Snowgrave Route. The chapter ends when they return to Kris' House.
Deltarune:Chapters 1 and 2 are available now on Nintendo Switch and for PC via itch.io and Steam.
