
Dies ist eine spoilerleichte Komplettlösung für die Haruspex-Route von Pathologic 2 für den PC.
Vorwort
Dies ist eine spoilerleichte Komplettlösung für Pathologic 2 für den PC. Aufgrund der Offenheit des Spiels berücksichtigt dieser Leitfaden nicht alle möglichen Spielzustände. Ich entdecke immer noch neue Dinge nach vier Durchspielen, also lasst mich gerne wissen, was ich verpasst oder falsch gemacht habe. Detaillierte Kommentare, die die Schritte zum Auslösen übersehener Spielzustände beschreiben, sind für mich nützlich; allgemeine oder vage Kommentare sind es nicht. Im Allgemeinen beschreibt dieser Leitfaden meine Ansicht über den optimalen Weg durch das Spiel – aber es gibt viele gültige Spielstile neben meinem eigenen.
Dieser Leitfaden gibt an, wann Quests zum ersten Mal verfügbar werden; diejenigen, die zuerst zwischen 00:01 Uhr und 7:29 Uhr verfügbar sind, finden Sie im Abschnitt „Früher Morgen“ eines Tages, während alle anderen unter „Quests“ und „Points of Interest“ erscheinen. Points of Interest beschreiben verschiedene Vignetten und Nebenquests, die oft durch Kreise auf der Karte gekennzeichnet sind, während Quests die Hauptaufgaben detailliert beschreiben, die mit eindeutigen Symbolen auf der Karte und der Mindmap gekennzeichnet sind.
In gewisser Weise steht dieser Leitfaden im Gegensatz zu der beabsichtigten Erfahrung von Pathological:einer, die das Überwinden überwältigender Widrigkeiten und das Akzeptieren von Fehlern beinhaltet. Ice-Pick Lodge hat eine wirklich bedrückende, aber zum Nachdenken anregende Erfahrung fein abgestimmt, mit einer Kernerzählung über die menschliche Verbindung untereinander und mit der Welt um uns herum. Wenn Sie dieses Handbuch überhaupt verwenden, hoffe ich, dass Sie dies sparsam tun.
Da Pathologic im Kern eine Mystery-Erzählung ist, habe ich diesen Leitfaden so geschrieben, dass er so spoilerfrei wie möglich ist. Um bestimmte Questreihen zu kommunizieren, sind jedoch einige Spoiler unvermeidlich.
Die Zeichenbeschränkungen von Steam haben mich gezwungen, diesen Leitfaden in mehr Abschnitte aufzuteilen, als ich mir gewünscht hätte, und Abschnitte zu kombinieren, die sonst unterschiedlich wären. Ich habe mein Bestes getan, um den Leitfaden trotz dieser Einschränkungen navigierbar zu machen.
Aufgrund der Natur von Pathologic 2 bezieht sich dieser Leitfaden auf Darstellungen des Todes – Erwachsene, Kinder, Tiere und andere – Selbstmord, Verstümmelung, Blut, Epidemie und eine Reihe anderer sensibler Themen. Bitte nach eigenem Ermessen ansehen.
Was Updates betrifft, so hoffe ich, weiterhin bestimmte ungewöhnliche Spielzustände zu untersuchen und einen Index mit spezifischeren Handelsinformationen – Preisen, Tauschwerten und dergleichen – und anderen nützlichen Referenzinformationen zu schreiben. Konkrete Empfehlungen sind hilfreich.
Karte, Inventar, Personen und Mindmap
Karte
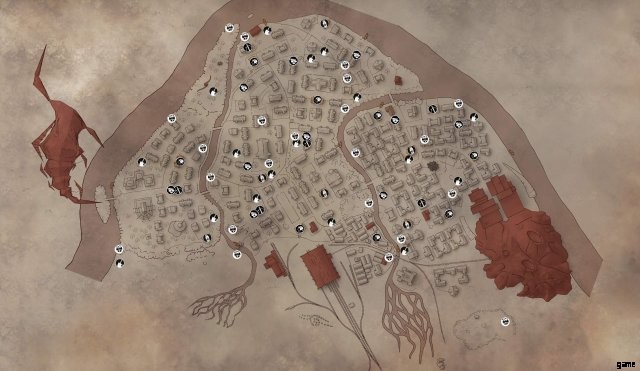
Die Karte ist unerlässlich, um sich in der Stadt zurechtzufinden; In den verwinkelten Gassen kann man sich leicht verirren. Während Sie neue Quests und Hinweise erkunden und erhalten, füllt sich Ihre Karte mit verschiedenen Markierungen, um Ihren Fortschritt zu leiten. Sie können auch mit der rechten Maustaste auf einen beliebigen Punkt der Karte klicken, um eine benutzerdefinierte Markierung zu platzieren.
Questmarkierungen haben ein einzigartiges Symbol, während Points of Interest mit einem Kreis gekennzeichnet sind. Wenn Sie Twyrine trinken, werden durch Strudel markierte Punkte von Interesse sichtbar. Sie können auf Quest-Markierungen klicken, um den entsprechenden Mindmap-Eintrag anzuzeigen.
Geschäfte sind auf der Karte gelb gefärbt; Questspezifische Gebäude und Points of Interest sind braun gefärbt. Wenn Sie die Häuser der Hauptfiguren entdecken, werden ihre Häuser rot gefärbt. Die von toten Charakteren sind grau gefärbt. Die Häuser von Charakteren mit Infektionsrisiko sind orange umrandet, während die Häuser von Infizierten rot umrandet sind. Wenn Sie den Mauszeiger über diese Gebäude bewegen, erhalten Sie einen Tooltip mit dem Namen des Gebäudes und seiner Bewohner.
Wenn Sie den Mauszeiger über einzelne Bezirke bewegen, werden der Name des Bezirks sowie Ihr Ruf dort angezeigt – gehasst, unwillkommen, gleichgültig, respektiert und so weiter.
Sobald die Epidemie beginnt, markieren Sie infizierte Bezirke rot und verbrannte Bezirke grau, sobald Sie sie finden. Alle infizierten Bezirke, die Sie am Vortag gefunden haben, werden am nächsten Tag automatisch als verbrannt markiert. Ab Tag 5 kannst du mit einem Teenager in der Soul-and-a-Half Fortress in den Warehouses gegen eine Karte aller derzeit infizierten Distrikte tauschen.
Während du durch die Stadt läufst, kannst du die Strg-Taste gedrückt halten, um dich zu konzentrieren, was dir die Richtung deiner Kartenmarkierungen relativ zu dir anzeigt.
Inventar
Pathologic 2 verwendet ein Grid-basiertes Inventarsystem. Gegenstände können nicht gedreht werden, daher müssen Sie sich mit Inventar-Tetris auskennen. Sie können oft Gegenstände, die nur einen Steckplatz belegen, an andere anpassen, die zwei oder mehr Platz beanspruchen. Sie können Stapel von Gegenständen auch teilen, indem Sie bei gedrückter Umschalttaste auf den betreffenden Stapel klicken.
Du beginnst mit einem ziemlich begrenzten Inventar, erhältst aber während einer Quest an Tag 2 ein Upgrade. Später an diesem Tag erhältst du Zugriff auf die Möglichkeit, dein Inventar mit verschiedenen Nähressourcen aufzurüsten und zu erweitern.
Personen
Dieser Bildschirm zeigt Ihnen alle Hauptcharaktere, die Sie bisher getroffen haben, sowie Ihre Beziehung zu diesen Charakteren. Abhängig von ihrem Status wird unter ihrem Porträt angegeben, ob sie ansteckungsgefährdet, infiziert oder tot sind. Wenn Sie einem Charakter eine Prophylaxe gegeben haben, erscheint auch über seinem Porträt ein Häkchen. Da sich Ihre Beziehung zu bestimmten Charakteren im Laufe der Geschichte ändert, werden einige Porträts möglicherweise in andere Bereiche dieses Bildschirms verschoben.
Mindmap
Anstelle eines traditionellen Tagebuchs oder Questlogs haben Sie die Mindmap – eine Sammlung von Gedanken und Erinnerungen, die aneinandergereiht sind, um Artemys Eindrücke von der Geschichte und seinen Wunsch, bestimmte Aufgaben zu erledigen, zu bilden. Quests sind auf diesem Bildschirm rot umrandet; Wenn Sie darauf klicken, wird die entsprechende Markierung auf der Karte angezeigt. Verpasste Gelegenheiten werden gelb angezeigt. Beachten Sie, dass eine verpasste Gelegenheit nicht unbedingt bedeutet, dass Sie etwas falsch gemacht haben; Bestimmte Entscheidungen oder Story-Beats werden natürlich verschiedene Möglichkeiten unterbinden.
Statistiken
Gesundheit
Wie in vielen Spielen sinkt die Gesundheit durch erlittenen Schaden. Dies kann passieren, weil ein Feind Sie verletzt hat, Sie aus einer bestimmten Höhe gefallen sind, Sie verhungern oder infiziert sind. Feindliche Angriffe, Stürze und der Verzehr von Kaffeebohnen oder Zitronen werden Ihre Gesundheit in Pauschalbeträgen rauben, während Infektionen und Hunger sie allmählich auslaugen.
Mit Bandagen und Tourniquets können Sie Ihre Gesundheit sofort wiederherstellen. Durch Schlafen (solange Sie nicht infiziert sind) wird die Gesundheit allmählich wiederhergestellt. Morphium und gebraute Schmerzmittel erholen sich auch ein wenig, wenn sie eingenommen werden, und eine größere Menge, wenn Sie schlafen.
Hunger
Der Hunger nimmt im Laufe des Tages allmählich zu. Sie müssen über den Tag verteilt mehrere Mahlzeiten zu sich nehmen, um Artemy fit zu halten; Wenn deine Hungeranzeige bis zum Maximum gefüllt ist, beginnst du, an Gesundheit zu verlieren.
Sie können den Hunger reduzieren, indem Sie etwas essen oder eine Yas + (weiße) Tinktur konsumieren. Beachten Sie, dass viele Lebensmittel – Toast, geräuchertes Fleisch und Fisch und dergleichen – Ihren Durst erhöhen und dafür den Hunger verringern. Der Konsum einer einfachen Yas (weißen) Tinktur oder Kaffeebohnen steigert den Hunger.
Ausdauer und Durst
Deine Ausdaueranzeige bestimmt, wie lange du rennen, springen und kämpfen kannst. Laufen verbraucht allmählich Ausdauer, während Springen und Angriffe Pauschalbeträge erfordern. Die Größe Ihres Ausdauerbalkens wird durch Ihren Durst bestimmt; Während du rennst, springst und kämpfst, wirst du allmählich durstiger, was wiederum deine Leistungsfähigkeit zu einem bestimmten Zeitpunkt verringert.
Wenn dir beim Laufen die Ausdauer ausgeht, gehe ein bisschen zu Fuß, um deine Ausdauer wieder aufzufüllen. Alternativ können Sie „joggen“, was erfordert, dass Sie Ihre Fäuste oder eine Waffe bereithalten, als ob Sie kämpfen würden; Artemy bewegt sich etwas schneller als beim Gehen, gewinnt aber keine Ausdauer zurück. Auch sein Durst wird weiter zunehmen.
Wenn dir im Kampf die Ausdauer ausgeht, werden Artemys Angriffe wirkungslos. Halten Sie die rechte Maustaste gedrückt, um zu blocken, bis er seine Arme wieder hochhebt; dann hast du genug Ausdauer für mindestens einen weiteren Schwung.
Trinken Sie Wasser, Milch oder eine Zürkh + (Orangen-)Tinktur, um Ihren Durst zu reduzieren und somit Ihre Ausdauer zu steigern. Das Essen von geräucherter oder trockener Nahrung oder der Verzehr einer einfachen Zürkh-Tinktur (Orange) erhöht Ihren Durst.
Erschöpfung
Die Erschöpfung nimmt allmählich zu, solange Sie wach sind; Es erhöht sich auch um einen Pauschalbetrag, wenn Sie Morphium, gebraute Schmerzmittel oder eine grundlegende Medrel-Tinktur (grün) einnehmen. Sie können es schrittweise durch Schlafen oder pauschal durch den Verzehr von Kaffeebohnen, Zitronen oder einer Medrel + (grünen) Tinktur verringern.
Immunität und Infektion
Ihre Immunitätsanzeige ist standardmäßig halb gefüllt; Wenn es darunter eintaucht, füllt es sich allmählich, bis es wieder in der Mitte zur Ruhe kommt. Sie können Ihre Immunität erhöhen, indem Sie Immunitätsverstärker oder Tinkturen konsumieren. Die Immunität nimmt in infizierten Bezirken und in der Nähe einer infizierten Person allmählich ab; Es wird auch pauschal verringert, wenn Sie von einer Seuchenwolke getroffen werden oder wenn Sie schlammiges Wasser oder verdorbene Lebensmittel zu sich nehmen.
- Ich empfehle, nur + Tinkturen zu konsumieren; Basistinkturen verstärken Ihren Hunger, Ihre Erschöpfung oder Ihren Durst, während +-Tinkturen ihn verringern.
Wenn Ihr Immunitätsmesser auf Null sinkt, werden Sie infiziert. Eine Infektion führt dazu, dass Sie allmählich Ihre Gesundheit verlieren. In der Zwischenzeit wächst Ihre Infektion allmählich und beschleunigt so Ihren Gesundheitsverlust. Sie können diesen Prozess verlangsamen, indem Sie weiterhin Immunitätsverstärker einnehmen; Wenn Ihre Immunität Null erreicht, wird jede Interaktion mit der Seuche Ihre Infektion verstärken.
Wenn Sie sich das erste Mal infizieren, wachen Sie auf der Station auf. Sie erhalten einzigartige Dialoge von Notkin und einem seiner Kinder, die Ihnen einige kostenlose Immunitätsverstärker geben.
Sie können Infektionen reduzieren, indem Sie Antibiotika konsumieren – ob in Pillenform oder gebraut. Wenn Sie sich mit Feuer verbrennen (von Brandbombern, Lagerfeuern oder Flammenwerfern), wird Ihre Infektion auch auf Kosten Ihrer Gesundheit reduziert. Zu guter Letzt kannst du dich selbst von einer Infektion heilen, indem du entweder ein Shmowder (auf Kosten deiner gesamten Gesundheit bis auf einen Bruchteil deiner Gesundheit) oder Panacea konsumierst.
Ruf
Der Ruf bestimmt, wie die Leute Sie behandeln; Auf der „unwillkommenen“ Ebene handeln die Menschen in einem bestimmten Bezirk nicht mit Ihnen, die Geschäfte verkaufen nicht an Sie und die Menschen lassen Sie nicht in ihre Häuser. Auf der Stufe „Gehasst“ werden Sie von Wachen sofort angegriffen.
Sie können Ihren Ruf verbessern, indem Sie mit Stadtbewohnern sprechen, kranke Menschen behandeln (ob Hauptfiguren oder solche, die Sie in infizierten Bezirken finden) und Straßenräuber und Plünderer töten. Mehrere Quests belohnen auch Reputationsschübe.
In der Zwischenzeit verlieren Sie den Ruf, unschuldige Menschen anzugreifen, ihre Körper zu plündern, Organe außerhalb des Krankenhauses zu entnehmen oder Häuser in regulären Bezirken zu plündern. Einige Questergebnisse können auch zu Rufverlust führen.
Obwohl Artemy das Spiel mit niedrigem Ruf beginnt, kehrt es an Tag 1 um 20:00 Uhr in den neutralen Zustand zurück. Bevor sein Ruf wiederhergestellt ist, können Sie frei Verbrechen begehen, ohne sich um langfristige Folgen für den Ruf sorgen zu müssen.
Kinder handeln unabhängig von Ihrem Ruf mit Ihnen. Du kannst auch Essen im Shady Shop und im Broken Heart kaufen, unabhängig von deinem Ruf.
Reisen, Handeln, Plündern und Handwerk
Reisen
Neben Laufen und Joggen gibt es verschiedene Fähren, die von Odongh in der Stadt betrieben werden. Auf Kosten von Zeit und Bootsmarken können Sie mit der Fähre zu mehreren verschiedenen Docks entlang des Flusses fahren. Eine Fahrt kostet normalerweise einen Token, aber der Fahrpreis erhöht sich an Tag 8 auf zwei.
Ein Fehler, den Spieler oft machen, ist, ohne ein anderes Ziel zu reisen, als nach Vorräten zu suchen. Zeit ist eine kostbare Ressource; Sie sollten auf Ihrem Weg zu einem Questziel Mülleimer plündern, mit Menschen handeln und Geschäfte bevormunden, anstatt dies ziellos zu tun. Du solltest nur herumwandern, wenn du keine aktiven Questziele hast.
Handel
Wie im Original ist Tauschhandel in Pathologic 2 überlebenswichtig. Trotzdem wird es von vielen Leuten vernachlässigt. In den ersten Tagen sollten Sie mit jeder – und ich meine jeder – Person handeln, der Sie begegnen, es sei denn, Sie wissen, dass Sie nichts Wertvolles zum Tauschen haben. Besonders die ersten beiden Tage sind entscheidend für die Bevorratung von Lebensmitteln, Medikamenten und Handwerksmaterialien; Wenn Sie in dieser Zeit effizient handeln, werden Sie in den kommenden Tagen viel weniger Zeit und Geld damit verbringen, nach Lebensmitteln zu suchen.
Solange Ihr Ruf unwillkommen ist, können Sie mit allen Stadtbewohnern Handel treiben. Jeder Townsperson-Typ trägt unterschiedliche Gegenstände, nimmt unterschiedliche Gegenstände an und weist Gegenständen unterschiedliche Werte zu. Handeln Sie oft und lernen Sie ihre Vorlieben kennen.
- Zum Beispiel tragen kleine Kinder oft unschätzbare Shmowders, die Sie gegen haufenweise Stecknadeln und Nüsse eintauschen müssen. Kinder tragen auch Bootsmarken, die Sie mit anderen Stadtbewohnern gegen Kaffeebohnen eintauschen können. horte Kaffeebohnen bis Akt III und IV und verkaufe sie dann für jeweils Hunderte von Münzen.
Neben dem Tauschhandel können Sie Lebensmittel, Ausrüstung, Reparaturartikel und Medikamente in Geschäften in der ganzen Stadt kaufen. Die Preise beginnen nach Tag 1 zu steigen und bestimmte Vorräte werden knapp; Es kann eine gute Idee sein, Lebensmittelgeschäfte am ersten Tag auszuräumen, wenn Sie es sich leisten können. Neue Artikel – wie Schutzkleidung, Antibiotika oder Näh- und Reparatursets – werden erst nach bestimmten Tagen verfügbar sein.
Der Dead Item Shop nimmt ansonsten nutzlose Gegenstände wie blutige Verbände, zerbrochene Ampullen, Schrottnamen und ähnliches. Im Gegenzug gibt Ihnen der Mitreisende wertvolle Gegenstände wie Shmowders, seltene Lebensmittel, Kugeln, Twyrine und Schmuck. Achten Sie besonders auf Schmuck, der in Geschäften für Hunderte oder Tausende verkauft werden kann. Shmowders sind ebenfalls ein Muss, wenn Sie so viele Menschen wie möglich am Leben erhalten möchten.
Aufräumen
Müllcontainertauchen ist ein weiterer Kernaspekt der Spielökonomie. In Mülltonnen und Müllcontainern in der ganzen Stadt findest du tonnenweise nützliche Gegenstände; Solange dies sicher ist, sollten Sie jeden einzelnen plündern, den Sie sehen. Sie können jedoch erwägen, Mülltonnen in infizierten Bezirken auszulassen; Die Zeit hört nicht auf, wenn du plünderst, also wird deine Immunität weiter schwächen, während du durch Müll wühlst. Achten Sie auch auf Ihre Umgebung in verbrannten Bezirken, damit Sie nicht von Plünderern angegriffen werden.
Sie können auch mehrere Schränke voller Beute in der ganzen Stadt finden, insbesondere in den Hintervierteln, den Skinners und dem Crude Sprawl. Diese werden jeden Tag aufgefüllt.
Kinder haben in der Stadt Beuteverstecke voller nützlicher Gegenstände wie Bootsmarken, Kugeln, Shmowders, Nüsse und Stecknadeln versteckt. Du wirst an Tag 2 offiziell in das Loot-Cache-Spiel eingeführt, kannst sie aber jederzeit plündern.
Sie können auch in Häuser einbrechen, sollten dies jedoch als letzten Ausweg tun. Lebensmittel und andere nützliche Gegenstände finden Sie zwar in Häusern, aber der Kompromiss lohnt sich oft nicht.
- In regulären Distrikten kannst du Häuser betreten, indem du an die Tür klopfst (wenn dein Ruf neutral oder höher ist) oder indem du einen Dietrich verwendest. In der Regel finden Sie mehrere Personen im Inneren, mit denen Sie wie gewohnt handeln können. Jeder gestohlene Gegenstand kostet Sie eine kleine Menge Ansehen. Mieterinnen, die dich beim Stehlen sehen, handeln nicht mit dir.
- Du verlierst deinen Ruf nicht, wenn du Gegenstände aus Häusern in infizierten Bezirken nimmst. Aber Ihr Immunitätsmesser wird weiter fallen, wie er es getan hat, als Sie draußen waren. Häuser können auch Wachposten und umherziehende Seuchenwolken sowie infizierte Menschen haben; Die Nähe macht es äußerst schwierig, diese zu vermeiden. Es besteht auch die Möglichkeit, dass eine Seuchenwolke aus jedem Schrank oder jeder geöffneten Schublade in einem infizierten Haus austritt. Zu guter Letzt kannst du in infizierten Häusern auf Betten und Fußböden kranke Menschen finden, die du behandeln kannst, um deinen Ruf zu stärken.
- Ähnlich wie bei der Plünderung infizierter Häuser verlieren Sie dabei nicht Ihren Ruf in abgebrannten Bezirken. Diese Häuser haben jedoch normalerweise eine schlechtere Beute als normale und infizierte Häuser. Sie enthalten normalerweise auch zwei oder drei Plünderer, die Sie mit Fäusten oder Messern angreifen, wenn sie Sie sehen. das kann in unmittelbarer Nähe tödlich sein.
Herstellen und Reparieren
Schutzausrüstung, Waffen und chirurgische Instrumente haben alle Haltbarkeitsmesser, die sich bei Gebrauch entleeren. Alle können mit einer Kombination verschiedener Gegenstände repariert werden; Je schlechter ihr Zustand ist, desto mehr Gegenstände müssen repariert werden.
Verschiedene Stadtbewohner können verschiedene Gegenstände für Sie reparieren. Wenn du Zugang zum Unterschlupf erhältst, kannst du die Werkbank verwenden, um alle deine Gegenstände zu reparieren.
Das Versteck hat auch eine Station zum Aufrüsten Ihres Inventars sowie ein Destillierkolben und eine Brauerei. Die beiden letzteren müssen repariert werden, bevor sie verwendet werden können.
Du kannst Wasserpumpen in der ganzen Stadt mit jeweils einer Feder, Schrott und Meißel reparieren. Pumpen geben schlammiges Wasser in infizierten Bezirken ab und gehen kaputt, sobald ein Bezirk abgebrannt ist. Wenn Sie die Ressourcen haben, ist das Reparieren von Pumpen in späteren Tagen, wenn die Wasserfässer knapp werden, äußerst nützlich.
Du kannst in der Höhle Tinkturen herstellen, indem du Wasser mit zwei verschiedenen Arten von Kräutern kombinierst. Brown, Black und Blood Twyre werden kombiniert, um grundlegende Tinkturen herzustellen; kombiniere eines dieser Kräuter mit White Whip, Ashen Swish oder Swevery, um Plus-Tinkturen herzustellen.
Mit der Brauerei können Sie Schmerzmittel und Antibiotika herstellen, indem Sie entweder gesunde oder infizierte Organe mit Tinkturen mischen.
- Heben Sie sich die Kräutersuche für den Abend auf; Kräuter leuchten im Dunkeln, daher ist es einfacher, sie zu finden, als tagsüber nach Geräuschen zu suchen.
- Shekhen – das verlassene Dorf ganz im Südosten der Karte – ist eine großartige Quelle für Twyre. Es gibt drei Gartenbeete voller Brown, Black und Blood Twyre sowie Swevery. Ein Lauf hin und zurück, während Sie unterwegs Kräuter pflücken, kann Ihnen normalerweise zwischen dreißig und fünfzig Kräuter einbringen; Diese Fahrt dauert jedoch normalerweise mindestens zwei Stunden. Heben Sie sich diese Ausflüge für den Abend auf, wenn Sie sonst nichts zu tun haben.
Sobald Sie Zugang zum Unterschlupf erhalten haben, ist es eine gute Idee, Upgrade- und Reparaturmaterialien in Ihrem Schrank zu horten. Dazu gehören Federn, Altmetall, Pinzetten, Fäden, Knöpfe, Sicherheitsnadeln, Nadeln, Fingerhüte, Meißel und Schleifsteine.
Sie benötigen Nähsets für jedes Inventar-Upgrade nach dem ersten. Außerdem benötigt jede Stufe entweder einen Umhang, einen medizinischen Umhang oder einen Armeeumhang. Um die Brauerei aufzurüsten, benötigen Sie Reparatursätze. Sowohl Nähsets als auch Reparatursets sind ab Tag 4 in Bekleidungsgeschäften erhältlich.
Heilung
Prophylaxe
Hauptcharaktere, die in infizierten Gebieten leben, können prophylaktisch behandelt werden, um die Wahrscheinlichkeit einer Infektion zu verringern. Twyrine und Tinkturen können verschrieben werden; Sie können immer nur eine verschreiben. + Tinkturen sind am wirksamsten – wenn möglich, versuchen Sie, Ihren Patienten nur + Tinkturen zu verschreiben. Verwenden Sie andernfalls als letzten Ausweg normale Tinkturen oder Twyrine.
Diagnose
Bevor Sie einem Patienten Antibiotika geben, müssen Sie feststellen, welche Art er benötigt. Geben Sie ihnen dazu Tinkturen, bis die Lösung offenbart wird. Das geht am einfachsten, indem man ihnen von jeder Grundtinktur eine gibt. Obwohl + Tinkturen für die Diagnose effektiver sind, rate ich davon ab, sie zu verwenden, es sei denn, Sie müssen es unbedingt tun. Wenn sich die Lösung nicht zeigt, wird die Verabreichung einer Tinktur, die der Farbe einer entfernten Schicht entspricht, dem Patienten oft die richtige Farbe zeigen. Wenn der Schmerz des Patienten das Maximum erreicht, können Sie ihm keine weiteren Tinkturen geben, bis Sie ihm Morphium oder Schmerzmittel geben.
Rezept
Sobald Sie die Ursache der Krankheit eines Patienten ermittelt haben, geben Sie ihm entweder Pillen oder gebraute Antibiotika der entsprechenden Farbe. Schmerzmittel, die mit Gehirn gebraut werden, sind am effektivsten (Herzen etwas weniger effektiv, Leben und Nieren weniger und so weiter), obwohl sie am schwersten zu bekommen sind. Sie können den Patienten auch mit Shmowder oder Panacea heilen.
Wenn Sie eine Hauptfigur behandeln, empfehle ich, sie nach Möglichkeit immer zu heilen. Wenn Sie nicht können – oder Shmowder und Panacea für andere Charaktere rationieren – verschreiben Sie ihnen Ihre besten Antibiotika. Wenn Sie kranke Menschen auf der Straße behandeln, halten Sie sich an Antibiotika und bewahren Sie Ihre Heilmittel für Hauptfiguren auf.
Chirurgie
Sofern Sie nicht anders aufgefordert werden, dürfen Sie Operationen nur an Leichen durchführen. Doing so outside the hospital comes with a huge reputation drop, so make it count if you must. Note, however, that draining blood loses you no reputation.
You can extract a person’s liver, kidney, heart, and brain; in that order, there is a progressively higher durability loss to your scalpel and a higher chance of destroying the organ by accident. You may also drain a person’s blood if you have an empty bottle.
Corpses of infected people have a chance to contain infected organs and blood.
The Hospital and the Public Fund
You’ll have access to both daily hospital tasks in the Theatre and public fund rewards starting on Day 4. The Public Fund is essential to your survival—maxing out the meter each day will reward you with thousands of coins, medicine, food coupons, and almost enough food to get you through an entire day.
The hospital task changes each day, but will always boost your reputation and public fund meter upon completion. Usually the hospital task alone is not enough; you must prescribe antibiotics to ill people in the street as well to fill the meter to max. This may seem like a lot when you start out, but the reward far outweighs the cost.
Plague
Spread
After the outbreak begins, new districts will become infected each day. Typically, districts adjacent to those that were infected the previous day will become infected themselves. Districts that were infected the day before will become burned districts on the next day.
Main characters residing in infected districts will be in danger of infection; at midnight, they have a random chance of becoming infected depending on the quality of prophylactics you’ve given them.
Navigating Infected Districts
While in an infected district, your immunity will gradually drop.
Infected districts are home to plague clouds, of which there are three types:sentries, roamers, and roadrunners.
- Sentries stay in one spot; they typically manifest in doorways and gates as well as inside houses. If you see one manifesting, you can usually run through it before it finishes appearing and avoid losing immunity. Otherwise, sentries can be dispelled by lighting your lantern near them.
- Roamers slowly wander like regular NPCs. These are usually found only in houses, where the tight quarters make it difficult to avoid them.
- Roadrunners rush down sidewalks in a straight line, although they’ll deviate from your path and rush towards you if you get too close. They usually begin their route far enough away that you can run out of their paths. You can often avoid these by walking through yards and other areas adjacent to sidewalks instead of directly on the sidewalk. Roadrunners are found only outside.
Infected people in bandages also wander infected districts; they’ll slowly follow you and speed up your immunity loss or infection gain if they get near you. Killing them will drop your reputation. Guards, soldiers, and firebombers will attack them.
After Day 5, firebombers will roam infected districts and attack anyone infected.
Water pumps in infected districts distribute muddy water.
Note that the Warehouses are free of looters and plague clouds regardless of the state of the district.
Navigating Burned Districts
Looters wander burned districts and will attack you with either fists or knives. Their numbers increase on later days, which makes these areas especially dangerous.
Looters are a great source of Twyrine, lockpicks, and jewelry; just be careful in attacking them—aggroing one will usually aggro any other looters within earshot.
Guards and soldiers attack looters on sight.
All water pumps in a district will break as soon as the district becomes burned. They’ll remain that way unless you fix them with a spring, scrap metal, and a chisel.
Combat, Death, and Difficulty
Combat
As befits its survival-horror legacy, combat in Pathologic 2 is desperate and messy. Artemy is neither a soldier nor a martial artist; he has no formal combat training. He has his fists, and sometimes a dull knife or an old gun. Aside from a few select quests, it’s best to avoid direct combat and favor either running or sneaking.
For melee combat, you can jab by clicking left mouse, deliver a charged attack by holding left mouse, and block by holding right mouse. Charged attacks will break an opponent’s (or your) block. If you sneak, Artemy will deliver either a single axe-handle or a backstab. For most fights, you should move forward when attacking; restrict yourself to two or three jabs or one charged attack, then block. Backpedal when blocking. If an enemy breaks your block, turn around and run until Artemy regains his faculties; you won’t be able to defend yourself until then.
A sneak attack from behind will usually stun an enemy for a few seconds; you can stun-lock enemies for as long as you have stamina, which will often be enough to finish an enemy off.
Guns are far more effective and safer—but less reliable—than melee combat. Most enemies will die with two shots from the revolver and one from either the shotgun or the rifle. Odongh take twice as many shots. You can fire from the hip or aim by holding right mouse for more accuracy. Guns have a chance to jam if their durability is below maximum, and will jam more often the worse the gun’s condition. If this happens, turn tail and run while Artemy tries to adjust the gun, then try shooting again.
If you hurt an enemy enough, they’ll submit to you and stop fighting. You can then loot their pockets or kill them.
Death
Don’t shy away from death. Though each one will make the game marginally more difficult, you’ll also learn more of the game’s metanarrative; again, failure is an essential part of experiencing Pathologic. Each death brings unique conversations with Mark. While in the Theatre, you may also speak to any of the main characters who’ve died over the course of the game.
That said, each death will decrease your maximum health by a little bit; this will continue until your twenty-sixth death, at which point you’ll be reduced to a half bar of health. Every several deaths you may also incur additional penalties, including losing all dialogue options involving hugs and increasing the rates at which your exhaustion and hunger meters fill.
After your seventh death, the Fellow Traveler will offer to rescind all penalties; in exchange you’ll lose access to both full endings, and will instead only be able to see the “Deal” ending. You’ll get an achievement for your troubles.
After about three or four deaths, a certain figure will appear in the Theatre square in the Marrow, along with an ominous structure that will slowly grow with each death. It’ll have new dialogue at each stage of the structure’s growth.
Dying will return you to your last save point, so save often.
Difficulty
Still having trouble? Though the essential experience of Pathologic is one of struggle, you may make it as easy as you’d like with the difficulty sliders in the pause menu. Adjusting these at all will prevent you from receiving the Imago achievement.
I recommend against using these unless you’ve dug yourself into a uniquely perilous situation. And if you do adjust the sliders, I also recommend against adjusting the rate that you lose stamina while running; otherwise, you’ll end up completing tasks far too quickly and will end up with a lot more downtime than is intended.
Dismissal and Twilight
Dismissal
Once you’ve come to, head around the stage and speak to Mark.
After the scene jump, speak to the Bachelor and the Changeling, to the Executor upstairs, and then head outside.
- Remember to use Ctrl to concentrate and find characters you can talk to.
Outside, head into the second tent on the left and loot the table for a note. Read it and the continue along the path to the Cathedral. Along the way, speak to the officer near the firing line as well as Aspity on the bridge. Turn around to see Aspity one more time before continuing forward.
After the bridge, enter the yard on the right and speak to the figure there. If you’d like, you can tell it to change the color of the jerboas for the duration of your playthrough.
- Note that some items have unique descriptions during this section. You can loot several trash cans and dumpsters on your way to the Cathedral.
Observe the two children standing beyond the last sandbag barrier. You’ll be seeing them again.
Enter the Cathedral once you arrive. Players of the original Pathologic will recognize this scene; speak to the Inquisitor and Commander Block in any order. Then speak to Mark to finish this section.
Twilight
You’ll wake up in a traincar. Step forward; after a short script, speak to the Fellow Traveler. You’ll begin the tutorial after a scene jump.
Once you come to, follow the on-screen prompts and light your lantern. Follow the train track and speak with the Executor—the person wearing a bird mask and cloak. Then continue following the tracks. Speak to the Fellow Traveler again after waking up.
You’ll come to in a house. Explore the rooms to see several characters you’ll meet soon as well as a woman curled up in pain in bed. Speak with her, then loot the nearby cabinet for empty water bottles. Head out into the yard and fill up the bottles at the barrel. Before heading back inside, speak with the Dogheads and the Fellow Traveler at the traincar. Then return to the woman in bed.
You’ll wake up in the Circle of Suok next. Speak with the member of the Kin and follow the prompts for the combat tutorial and trading tutorials.
Speak with the Fellow Traveler again after waking up. Last, head into the house and go upstairs; enter the backroom and go through the door.
Act I, Day I:General Advice
Day 1 throws a lot at you. After you pass through the Warehouses and enter the Town proper, your reputation will plummet. Guards—roaming men in brimmed caps—will pursue and fight you on sight in districts where your reputation is low. Only children will trade with you, and shops will refuse to sell you anything. Your reputation will return to neutral after speaking to Big Vlad (or going to Town Hall) in the evening. Until then, you can exploit your infamous status to commit crimes (mugging people, burglarizing homes, and harvesting organs) without long-term effects. I discourage this both for role-playing reasons and because it’s unlikely that you’ll have the inventory space for this strategy. Instead, I recommend running from fights, sneaking, and following the guide below as non-violently as possible.
This day is also packed with vignettes and points of interest—circles on your map. Most of them take place on the eastern side of town. Besides that, you’ll find Tragedians scattered about; speak to them to learn about game mechanics and to receive free items.
Almost everyone has something to say today. Concentrate to highlight people with available conversations; most will direct you to points of interest or will give you context about the Town and the day’s events.
Your inventory will also be very limited throughout Day 1. You can drop items wherever you feel you’ll remember them (I usually do so at Lara’s Shelter or at the Lump in the Gut, but it doesn’t matter where), but make sure you pick them back up and have them in your inventory before the midnight bell—otherwise they’ll disappear.
Once you’ve cleared your name, you’ll be free to explore and trade. Trade as much as you possibly can; children often have food that you can trade for with pins, needles, and the like bought from clothes stores and found in garbage cans and dumpsters. Besides food, trade for boat tokens—which can in turn be traded for coffee beans (which will nearly quadruple in value at shops in the coming days)—and bullets for the revolver you’ll soon have.
While you explore the town, you may stumble across—or may be directed to, if you drink Twyrine—certain loot caches maintained by the children of the Town. You’ll discover later that this is part of a game that they play, which involves leaving items that equal or exceed the value of what you take from the caches. It’s unclear whether you can actually participate in the game by leaving items behind or if it makes no difference if you take everything. For role-playing purposes, I’d recommend leaving some items behind, even if they’re only matches.
If you’re gunning for the Dream On achievement, make sure you don’t finish all of the quests involving Lara, Rubin, Grief, and Notkin before 2:30. If you sleep after that time without having finished all of those quests, you’ll get one of the required dreams for the achievement.
Act I, Day I:Introduction
After the scene, you’ll wake up in the Station. Loot the three bodies in front of you for several items, including a boat token, a pocket watch, toast, and some coins. Make sure to hang onto the pocket watch until you can sell it.
Speak to the Doghead sitting in the traincar to the left; he’ll give you a tourniquet. Speak to him again and then head over to the Executors in the field ahead. Speak to the one on the left twice and the one on the right once. Before leaving, speak to the Tragedian sitting behind them.
Head over to the Warehouses beyond the Executors. In the northern half, you’ll find two men and a woman standing around near the north entrance; speak to them. Continue to the eastern side of the northern warehouses and you’ll find Grief’s warehouse.
Head inside and Speak to Bad Grief twice; after the second time, loot the cabinet that appears for a rusty scalpel, a bandage, some food, and some coins. Before leaving, speak to the Reflection perched above Grief’s throne.
- After leaving Grief’s, you’re able to enter Notkin’s warehouse—the Soul-and-a-Half Fortress—in the southern section of the Warehouses and begin his quest. This may save you the trip back here later, but you’ll also miss out on some excellent dialogue and an achievement. See below for Notkin’s questline.
Exit Grief’s warehouse and head back to the tracks; follow them east across the bridge. A man will come running up to you and start a conversation. You’ll receive a boat token. Afterwards, your reputation will start dropping to zero. Continue along the tracks.
From here, you can turn north through the broken brick wall or continue following the tracks. If you follow the tracks, you’ll find a member of the Kin sitting on a box who’ll trade you smoked meat for cheap.
If you head through the brick wall, you’ll come across an Odongh ferryman and a man who’ll offer to sell you a revolver for 3000 coins. To the east, you’ll find a group of men who’ll offer to trade you bandages for water.
The game becomes open-ended from here; you can travel to most locations and complete quests in any order as they become available. For example, you could take the ferry to Lara’s or head into the Hindquarters district on foot. I’ve organized quests and general tips from this point in as logical and efficient a fashion as I can. Though I list quests as they first become available, not all need to be finished on the same day. Aside from a few distinct examples that I’ll highlight, there’s no wrong order to approaching quests. Feel free to go wherever you feel a surgeon’s hands are most needed.
Act I, Day I:Points of Interest
The Town
Around midday, an Herb Bride will track you down and speak to you. This won’t be the last time you see her.
The Factory
You’ll find a man sitting on a box by the Odongh ferryman who’ll offer to sell you a revolver for 3000 coins.
- This is a lot of money on Day 1, but you’ll have it sooner than you think. I recommend buying the revolver if you feel you’re getting enough food from bartering, but you could just as easily use that money to stock up on food during the first few days. If you do plan to buy it, make sure to barter for bullets when possible.
East of the ferry, you’ll find a group of men who’ll offer to trade you tourniquets and bandages for bottles of water. East of them, you’ll find one of the Town’s many water pumps.
- I recommend against trading water for bandages, or at least would recommend you do so sparingly. Water becomes very important later in the game—you use it to make tinctures and need it to sustain your stamina. As the game goes on, it becomes scarcer. You’ll be in a good spot later if you hoard water now.
The Warehouses
One of the Tragedians around Town will direct you to the Shady Shop—a place where you buy food regardless of your reputation. This shop becomes especially useful after Day 7, when other grocery stores stop accepting coins.
The Hindquarters
North of Rubin’s apartment, you’ll find several men fleeing a woman holding a bull skull. Speak to her.
In the northeast part of the district, you’ll find Isidor’s house—greyed out on the map, now that he’s dead. Speak to the Odongh out in the street and then to the members of the crowd in the yard. Before leaving, speak to Sticky, who sits in a chair against the front of the house.
Just before the bridge to the Gut, you’ll find a man selling a bull for three-hundred coins. Buy it for some great dialogue and a chance at an achievement later.
In the alley to the southwest of Isidor’s house, you’ll find a group of men cornering a few others; speak to one of the aggressors.
The Skinners
As you speak to children throughout the day, one will tell you about something happening at the bone stake lot in the Skinners. Head to the large lot behind Isidor’s house to see a cutscene familiar to anyone who played the original. Speak with any of the men walking away from the stake, and then loot the pyre for a charm.
East of the pharmacy, you’ll find two men standing above a figure on the ground. Speak to one of them. You can also extract the figure’s organs at a huge cost to your reputation.
The Flank
East of Lara’s Shelter, you’ll find an Herb Bride by a tree. She’ll instruct you on how to feed blood to the Earth in exchange for Twyre.
If you finish the quests involving Grief, Rubin, Lara, and Notkin before 8pm, a group of Tragedians will appear in front of Lara’s house and you’ll receive an achievement. Speak with them.
The Gut
In the lot to the southeast of Big Vlad’s house, you’ll find three corpses with birds circling overhead. This is an easy way to get organs, although you’ll take a huge reputation hit if you do so.
You’ll find a group of men cornering another man next to the clothes shop. If you tell them you’re Isidor’s son, they’ll attack you; otherwise they’ll attack the man they’ve cornered. Either aggro them and run until they lose interest or run into the nearby clothes shop to despawn them. Head back and talk to the cornered man; you can offer him a bandage, though you won’t receive anything in return.
The Bridge Square
After finishing Grief’s quest, you’ll find Var leaning against the warehouse’s exit. Speak with him; he’ll tell you about his business in the Bridge Square. Head there and speak with the Chemist, and then to Var in the backroom. You can now sell organs to Var.
- Don’t bother buying the nice scalpel from the Chemist unless you plan to do a lot of ripping today; you’ll get one of your own for free tomorrow.
Act I, Day I:Quests
Finding Rubin
Head to the building marked as Rubin’s apartment in the southeast of the Hindquarters. Keep an eye out for the occasional patrolling guard and be prepared to either sneak or run. Once you arrive, head upstairs to find not Rubin, but the Bachelor. Speak with him, and make sure to loot the apartment before leaving.
- Though not part of the quest, you’ll find two kids on the stoop once you leave as long as you haven’t already visited Notkin. They’ll direct you to the Soul-and-a-Half Fortress in the Warehouses. Head back upstairs and talk to the Bachelor again for an achievement.
Saving Grief’s Man
Grief will ask you to find his men in the Tanners. Head to the first house on the left before the bridge to the Chine. Once inside, follow the blood trail to them. Talk to the man in the chair and then perform surgery on the man on the floor. Cut open the bottom-most organ slot and extract the bloody shiv. His friend will talk to you afterwards. If you cut any other part of the man’s body, drain his blood, or insult the man in the chair afterwards, the man will attack you.
- If you feel confident in your fighting abilities (and have low reputation), you can earn a lot of money by extracting the injured man’s organs, killing his friend, and then selling his organs to Var as well. As discussed above, I recommend against this route.
- On your way out, a Tragedian will tell you that you can loot as much as you’d like from this house without repercussion. Buy an extra lockpick from Grief beforehand so you can get into as many rooms as possible.
Return to Grief in the Warehouses and speak with him to finish the quest.
Finding Lara
You’ll find Lara at home in the Flank. Speak to her twice and then rest for a bit; she’ll wake you to check a noise upstairs. Before going, search the large cabinet in the room on the other side of the house for a butcher knife and some food. Upstairs, you’ll find the Changeling; speak to her twice, and then speak to Lara downstairs twice again. Your reputation in the Flank, Chine, and Backbone districts will now return to neutral.
- You can now trade with adults and buy and sell items at shops in these districts. Take this opportunity to sell off the pocket watch you got in the beginning (as well as the extra rusty scalpel, if you found one at Rubin’s). You can use this money to stock up on food, if you’d like. But you’ll get plenty from trading with children, especially if you buy needles, safety pins, and matches from clothes shops and looting garbage cans. If you’re trading efficiently, consider saving your money for the revolver instead.
The Poisoned Halves
Head to Notkin’s warehouse (the Soul-and-a-Half Fortress) in the southern section of the Warehouses district. You can speak to several kids here, including Notkin. Speak to him twice and offer to take care of Lika; Notkin will give you a leash.
- Regardless of how you resolve the quest involving Lika, you’ll receive a leash. Don’t trade it away—you can exchange it for an extremely valuable item in a few days.
- A girl in the warehouse will offer you some food; don’t turn her down. You’ll get free food and the chance at an achievement tomorrow.
From here, go to the series of stones to the southwest of the Station; you’ll find Lika standing beside one of them. Speak to him. You have a choice here:hand him the leash and send him to Notkin, or let him go and use him as an alibi witness.
If you give Lika the leash, head back to the Soul-and-a-Halves’ Fortress. Speak to Lika in the back, then speak to Notkin. Notkin will reward you a new leash and direct you to talk to Murky, who’s sitting on a crate against the wall. Do so to finish the quest.
If you let Lika go, he’ll promise to meet you at Town Hall in the Backbone. Head back to the Soul-and-a-Halves’ Fortress and speak to Notkin. Walk in front of Town Hall (but don’t enter it) to finish the quest.
Saburov’s Mercy
If you walk by Town Hall in the Backbone, Artemy will recall that Alexander Saburov is in charge of Isidor’s murder investigation. Talk to the man on the steps to Town Hall; he’ll advise against going in. You can do so anyway—but Saburov will detain you until 8:00pm. While in detention, you can loot a nearby cabinet for food, knock on the door to talk to the guard, and sleep on a cot until you’re released. Once released, your reputation will return to neutral across town.
- Naturally, I recommend against doing this since you’ll lose valuable time that you could have spent accumulating resources. The food you get isn’t really worth the time loss.
Vlad’s Favor
If you finish the quests involving Grief, Rubin, Lara, and Notkin before 8pm, people around town will direct you to Big Vlad’s house—the Lump—in the Gut when you talk to them. Alternatively, a messenger will come for you at 8pm. Either way, head to the Lump in the Gut and speak to Big Vlad; your reputation will return to neutral in all districts. Speak with him again for another quest. Before you go, loot the cabinet next to the exit for some coins.
In Isidor’s Memory
After you talk to Big Vlad a second time, he’ll direct you to the Broken Heart pub in the Factory. Head there and speak to Andrey and Peter. Peter will give you some Twyrine.
Speak to the bartender as well, who’ll explain that he buys Twyre at different prices each day; this is a good time to sell the herbs you got from the Earth near Lara’s Shelter, since you won’t need them for another day or two and likely won’t have enough inventory space to save them.
Act I, Day II:Early Morning
Dead Item Shop:The Gut
General
Keep an eye out for muggers while you explore town at night. You’ll recognize them by their facepaint; if you sneak up behind them, you can also see paint on their hands. Muggers often drop lockpicks and other items that can be traded in at the Dead Item Shop (as well as Twyrine and valuable jewelry), and killing them awards a reputation boost. Taking a few out is often a lucrative way to spend your first evening, but be careful; some carry knives, and even those who attack with fists can still be dangerous. Try to sneak attack them from behind to stun them and then finish them off.
Chisels and grindstones will appear in trashcans and dumpsters from now on. Once you’ve unlocked a permanent storage solution, you should start hoarding a handful of both so that you can repair your blades.
Points of Interest
After midnight, head out into town. At some point you’ll come across an advertisement for the nightly pantomime lit up by a stage light from the sky; interact with it to place a marker on your map for the Theatre in the Marrow. Enter the Theatre to view the Pantomime for the night. After you leave, you’ll get a map marker for the Dead Item Shop in the Gut.
Speak with the Fellow Traveler at the Dead Item Shop. You can pick up some items from the corpse nearby to trade in. Dead Item Shop items are random each night; among other things, the shop takes bloody bandages, broken ampoules, lockpicks, hooks, boat tokens, and empty bottles. When available, I recommend getting jewelry (pocket watches, rings, and bracelets), Shmowders, food, and bullets.
Act II, Day II:General Advice
With the start of Act II, you no longer need to finish every quest on the same day as you receive them. Some you may finish on another day so long as it falls within the same Act; others you must finish on the same day. Similarly, some quests and points of interest become available during the early morning of some days, but can be finished at any time. This guide generally assumes that you finish quests on the same day, but will note when you need not do so when possible.
You’ll gain access to the Lair today—which means access to a permanent storage cabinet as well as an inventory upgrade station. You’ll also be able to start brewing tinctures with herbs, so you should hang onto any you find. Similarly, you should keep reserves of upgrade and repair items—scrap metal, springs, needles, safety pins, thimbles, thread, tweezers, buttons, grindstones, chisels—for quick access. Keep an eye out for a spindle as you explore as well; you’ll need it for a future quest.
If you can afford one, try to buy a cape from a clothes store today (along with thread and needles) so that you can upgrade your inventory once you gain access to the Lair.
After receiving your inheritance, you can start gathering Twyre that you can distill into Twyrine at the Lair. This is where hoarding water will come in handy—each tincture requires one bottle of water. It’s usually easiest to gather in the evening, when the herbs glow in the dark. The best route is to travel to Shekhen—the village in the far southeast corner of the map—and to collect herbs along the way. Shekhen itself has three herb beds that fill with several herbs each night. All told, this route will net you between thirty to fifty herbs, but will take two hours or so to complete. If you can, try to finish your daily quests early, sleep for a few hours, make the trip to Shekhen and back, and then go about your evening business.
Act II, Day II:Points of Interest
The Spleen
Children around Town will mention that Capella often hangs out around the Nutshell in the Spleen. Head inside and speak to Maria and Capella; outside, speak to Clara. Finish the conversation for an achievement.
You’ll find some Dogheads who’ve chased one of the Soul-and-a-Halves up the Stairway to Heaven. Talk to one of the Dogheads and then to the Soul-and-a-Half on the Stairway. Note that you can find a loot cache further up the stairs.
During the loot cache game, you’ll find a note directing you to the Nutshell in the Spleen. Head there with a piece of scrap metal. Once inside, speak to one of the two kids and then fix the lantern for an achievement. Admire the lantern—players of the original Pathologic will recognize the outlines used for it. Speak with the kids afterwards.
The Bridge Square
Children around Town will mention that someone who may be Isidor’s killer has been participating in the loot cache game. Speak with one of the kids in front of the Cathedral to start the game. Speak as well to the group of kids in the field behind the Cathedral, in the yard north of the Crucible (the Kains’ compound), and east of Nina’s Tomb at the Cape to learn of more loot-cache locations.
- Don’t feel pressed to finish this all in one day. You’ll be able to continue this sidequest tomorrow as well.
Some caches will contain notes that will lead you to new caches; after about five caches, you’ll learn of a game being played in the Marrow. Head there and speak with the kids on the swings to begin a game of tag. Tag three kids to finish the game. One is in the bushes, one is behind a dumpster, and the other is in a corner of a building; you’ll find them all in the same yard. Make sure to trade with each kid right after you tag them—one will offer a Shmowder for cheap.
- Players of the original game will recognize the tag sound effect.
The Hindquarters
While walking through the Hindquarters, you’ll come across a group of children running. Look to what they’re running from and you’ll find a girl crouched behind a bull’s skull. Sprich mit ihr. This event may also occur in the Crude Sprawl.
In the alley to the southwest of Isidor’s house, you’ll find a group of kids cornering another; speak to one of the aggressors.
The Crude Sprawl
While walking through the Hindquarters, you’ll come across a group of children running. Look to what they’re running from and you’ll find a girl crouched behind a bull’s skull. Sprich mit ihr. This event may also occur in the Hindquarters.
The Skinners
On the west side of Termitary Block #1, you’ll find a crowd of people looking up. Do the same and you’ll see a figure leap from the building. Speak with a member of the crowd afterwards. You can loot the body or extract its organs, but will lose reputation for doing so.
On the north side of Termitary Block #1, you’ll find several members of the Kin around a cart. Speak to one; you may accept money from them for a chance at an achievement later.
The Gut
You’ll find a group of kids near a rock in the yard behind the Lump. Agree to help them and then interact with the grave to see a cutscene familiar to those who played the original Pathologic.
Head through the Lump’s back entrance and exit onto the first balcony. You can speak to Yulia there.
After getting the key to the hideout, you can ask Big Vlad if he’s the one who sanctioned the use of the factory. He’ll direct you to Young Vlad.
The Factory
After getting the key to the Lair, you can ask Young Vlad if he’s the one who sanctioned the use of the factory. Speaking to Young Vlad cuts off the opportunity to speak to Big Vlad about the key.
When leaving the Lair in the Factory for the first time, you’ll find the man and the Wonder Bull from Day 1 waiting outside if you bought the bull. Speak to the man and then the Wonder Bull.
When you enter the Lair in the Factory for the second time, you’ll find the Herb Bride who approached you on Day 1 sitting on a crate in the entrance. Speak to her.
The Warehouses
You’ll find two boys and a young girl near the north entrance of the Warehouses. Speak to the girl and then to one of the boys.
Go to the Soul-and-a-Half Fortress with toast in your inventory. Speak to the girl who gave you milk and toast on the first day for an achievement and a reputation boost.
If you backed the Kickstarter at a certain tier, you’ll find a note in the cabinet of the Lair in the Factory. Read it and then head to the southern Warehouses; make sure to bring a bottle of milk with you. You’ll find a group of kids standing around near a water barrel. Talk to one of them and then interact with the nearby bowl with milk in your inventory. Speak to the kids again to receive an Old Shmowder for your efforts. You’ll hear a noise after you walk away. Head back and speak to the kids again.
Act II, Day II:Quests
The Barter Ritual
Around 10am, a woman will run up to you and hand you a charm; she’ll explain the Town’s barter ritual to you. Over the course of the day, trade once with a woman, a man, a teenager, and a child to receive a reputation boost across Town.
Isidor’s Funeral
Head to the Cemetery and speak to Clara and Grace outside the caretaker’s shed to the right of the entrance. Speak with Aspity further down the path and then speak to one of the members of the Kin gathered around Isidor’s grave. Tell them to wait while you inspect your father’s wounds and then interact with the body. Speak with the Kin members again; accept your father’s duty to bury him, or reject it to burn his body. Speak with Aspity again and agree to travel to her house.
You’ll travel to Aspity’s Hospice in the Crude Sprawl. Speak with her again; she’ll give you a pouch—a ten-slot inventory upgrade—filled with herbs and a note. Inspect the note in your inventory and then speak to her twice more.
The List
After you receive the list from Aspity, speak to either Grace in the Cemetery or Notkin at the Soul-and-a-Half Fortress in the Warehouses. They’ll direct you to Capella in the Gut. Head up the Lump’s back entrance to the third floor and speak to her to complete the quest.
After receiving the list from Aspity, children will mention both that Khan hangs around the Polyhedron and that Taya lives in the Termitary. For Khan, speak with the Dogheads in front of the bridge to the Polyhedron in the Bridge Square to complete the quest. For Taya, head over to the entrance to Termitary Block #1 and speak to the guards. Back at the Lump in the Gut, speak to Big Vlad to complete the quest.
Capella’s Brother
Children around town will mention that Capella wants to see you. Head up the Lump’s back entrance to the third floor and speak to her. She’ll direct you to Young Vlad, who’s waiting at the Broken Heart in the Factory. Speak to him to finish the quest.
Grace’s Gift
After you receive the list from Aspity, either Clara or children around Town will mention Grace’s special power. Head to the Cemetery and enter the caretaker’s shed; head downstairs and speak to Grace. You can turn her offer down—and spare her some pain—or ask her to use her gift.
Twyre Hunting
After learning of Grace’s gift, you’ll find Murky pacing among the headstones outside the caretaker’s shed. Speak with her and agree to help her (or tell her to wait so that you can speak to Grace first and then speak to her again). She’ll lead you to a spot out in the Steppe near the Ragi Barrow, southeast of the Cemetery. You’ll need to pick one each of Brown, Black, and Blood Twyre, as well as Swevery. Speak to her again to finish the quest.
I recommend waiting until dark for this quest. It’s usually easier to find herbs by their glow in the dark than by their sound.
The Silent House
One of the men around town will mention that Saburov is hiring patrolmen at the Town Hall in the Backbone. Head there and speak to one of the people in line outside and then to Saburov inside. Speak with him and he’ll give you the key to Isidor’s House.
Head to Isidor’s house; make sure you have a lot of inventory space free—you won’t have access to the contents of the house after leaving.
Head inside and go upstairs to the backroom. Open the box on the table and take the contents. Loot everything you can as you leave; you’ll find some random loot as well as a scalpel in the cabinet on the second floor foyer and some tinctures in the room next to the front door. On your way out, make sure to peek into the rooms that are now open (but don’t walk into the plague cloud in the second floor room). You’ll find herbs in one of the rooms on the first floor and Clara in the room next to the front door; speak to her and then leave. You’ll enter a conversation with the Bachelor outside. On the street, you’ll find a number of people gawking at the sores that have grown on the surrounding houses. Speak to them.
Rubin’s an Idiot
Around noon, Artemy will get the urge to track Rubin down again. Head to his apartment in the Hindquarters and speak to both Rubin and Lara to finish this quest.
Isidor’s Hideout
After getting the key from Isidor’s house, head to the Lair in the Factory. Downstairs, you’ll find an inventory upgrade bench, a repair bench, a broken alembic, a broken brewery, a cabinet full of items, a waterbasin, a bed, and a clock. Sticky is here too; speak to him and then take a spring and a metal scrap from the cabinet. Fix the alembic and follow the tutorials for brewing, diagnosing, and prescribing antibiotics. Afterwards, speak to Sticky; you won’t be able to fix the brewery for a few more days.
Besides the repair items, you’ll also find some money, cloth gloves, some matches, and a + tincture in the cabinet. If you backed the Kickstarter at a certain tier, you’ll also find a Dragonfly Eye (which has the effect of drinking two bottles of Twyrine) and a note which triggers a sidequest in the Warehouses when read.
Train Summoning
One of the women around town will mention that children often gather at the Station after dark. You can also learn of this quest from the Soul-and-a-Half cornered on the Stairway in the Spleen. Head to the train platform in the Station after 6pm to find several kids sitting around. Speak with each to learn about the train summoning game. For an achievement, follow the train track southeast into the Steppe until you come across the end of the track that curves westward. Wait at the end of the track to receive the achievement.
Act II, Day III:General Advice
- Infected Districts:The Tanners, the Hindquarters, the Skinners
- Dead Item Shop:The Marrow
General
The Tanners, the Hindquarters, and the Skinners districts will become infected districts at the beginning of the day. See above for tips on navigating these districts safely. The first time you enter these districts, guards posted at their entrances will give you immunity boosters, a cloth mask, and shoes. It may be a good idea to start carrying tinctures with you to keep your immunity up from now on—and because you’ll need to heal someone today. I recommend using only + tinctures on yourself and saving basic tinctures for diagnosing patients.
Several quests will become unavailable after the Town Hall meeting, which will begin either at 6pm or after you speak with Eva at the Stillwater. Make sure you’ve wrapped up the day’s quests before then.
After the meeting in Town Hall, you’ll become responsible for keeping the main characters healthy. I recommend prescribing + tinctures every time (unless you have none, in which case use basic tinctures or Twyrine as a last resort). If a character becomes infected, I recommend giving them Shmowder (or another cure that you’ll discover later); you can treat them with antibiotics, but this will only lower their chance of death instead of eliminating it. See the Mechanics section for more tips.
If you don’t have much, stock up on morphine today through bartering. You’ll need four for tomorrow’s hospital task.
Act II, Day III:Early Morning
Quests
Sahba’s Counsel
During Day 2, one of the Kin women around town will mention that members of the Kin often gather at Aspity’s after dark. Head there before 7:30am on Day 3 and speak to the various members of the Kin inside. If you accepted money from the members of the Kin outside the Termitary on Day 2, you can return it now for an achievement. Speak to Aspity as well as her Reflection to finish the quest.
Act II, Day III:Points of Interest
The Bridge Square
Outside of Victor’s wing of the Crucible, you’ll find three people looking up. Speak to each of them.
You’ll find a woman loitering outside of Georgiy’s wing of the Crucible. Speak to her.
The Gut
You’ll find a group of angry laborers on the Lump’s doorstep in the Gut. Speak to them before speaking to Big Vlad inside.
The Factory
After healing Patches, Sticky will direct you to return to the Lair. Head there and speak to Aspity.
During the day, you’ll find three members of the Kin outside the Lair; speak to all three.
After the Town Hall meeting, check in on Andrey. If you’ve already given Peter medicine, he’ll give you a bottle of Twyrine as thanks.
Once 9pm rolls around, you’ll find two Odongh standing outside the Lair. Speak with them to receive three random healthy organs.
- You’ll be able to brew painkillers with these after tomorrow, so hang onto them. Those made with a heart or a brain in particular are far more effective than morphine. If you’ve stocked up a lot of morphine, however, it isn’t essential to save these; you can sell them to Var instead if you’re short on cash.
The Skinners
After the Town Hall meeting, check in on Peter and give him some prophylactics. He’ll ask you to check on Anna at home (the Willows) in the Hindquarters. Make sure to loot the dresser in his closet and the chest next to his bed for some Twyrine, empty bottles, and coins.
The Hindquarters
After giving Peter prophylactics, check in on Anna at the Willows in the Hindquarters. Speak with her and give her some prophylactics. Afterwards, loot the cabinets and dressers in the backroom for some food, money, candle stubs, and (curiously) a scrap name.
Act II, Day III:Quests
Mending Ties
At 7:30am, Artemy will get the urge to see how Lara’s doing. Head to the Shelter in the Flank and speak to her. Afterwards, you’ll have to convince Rubin and Grief to meet with you and Lara after dark. Speak to Grief in the Warehouses and Rubin at Maria’s wing of the Crucible in the Bridge Square. You can speak to Maria as well on your way out after speaking to Rubin.
You must speak to both Grief and Rubin before the Town Hall meeting; otherwise, you’ll find only Lara at the meeting place.
Inheritance, Part 2
Big Vlad will send a messenger for Artemy at 7:30am. Head to the Lump in the Gut and speak to Big Vlad. He’ll direct you to speak to Georgiy in the Bridge Square.
- You must complete all parts of this quest before the Town Hall meeting or else the opportunity will be lost.
- Head to Victor’s wing of the Crucible in the Bridge Square and speak to him. He’ll refer you to Georgiy two doors over. He’ll direct you to speak to the Hindquarters district prefect.
You’ll find the prefect on the second floor of an apartment building in the southwest of the district. You’ll find a sentry plague cloud next to the stairs on the first floor, as well as a roaming cloud in the second floor hallway; use your lantern to disperse the sentry if needed. Loot as much as you can from the house, then speak to the prefect to complete the quest.
Patching Patches
Around 11am, Notkin will send a messenger for you. Go to the Soul-and-a-Halves’ Fortress in the Warehouses; make sure you bring some tinctures and morphine. Speak to Aspity outside before speaking to Notkin inside—he’ll give you several antibiotics. Speak to Clara and then treat Patches. Speak to Notkin again; he’ll mention that the Bachelor was looking for you. Outside, speak to Sticky, who’ll hint that you should return to the Lair when you can.
- You must complete this quest before the Town Hall meeting. If you don’t, Aspity will perish.
- If you have a Shmowder in your inventory, Clara will have different dialogue.
- Head to the Stillwater in the Bridge Square and speak to the Executors outside. Inside, speak to Eva. For some unique dialogue, suggest that the Bachelor is upstairs, check if he is, and then speak to Eva again. Regardless, she’ll direct you to Town Hall.
For Whom the Bell Tolls
Either at 6pm or after leaving the Stillwater during the Patches questline, the town alarm bell will begin ringing. Follow the Tragedians to the Town Hall in the Backbone; speak to everyone gathered there. On your way out, Georgiy will ask you to check in on the Stamatins.
The House of Death
After the Town Hall meeting, you’ll find Notkin and Khan on the second floor of the Broken Heart in the Factory. Speak to both.
Before midnight, head to the designated house in the Crude Sprawl; the door will lock after you enter. Loot everything you can throughout the house (and note any candlestubs you see around) before speaking to Notkin and Khan. You now must either wait until morning (which you can do by sleeping on a nearby cot) or must light six candles throughout the house. While searching, you’ll be pursued by an entity that manifests on the walls; your immunity will begin to drain whenever it appears, so be swift in lighting candles and run to a different room if needed. Once you light all candles, speak to the boys and then leave.
One candle is next to Notkin, while the second is in the adjacent room. Head down the hallway and find a third candle on a shelf to the left. You’ll find another candle in the furthest room down the corridor. On the first floor, another candle is in the room to the right of the stairs. Head down the hallway and find the last candle in the first room on the left.
- For the best ambiance, I recommend saving this quest for after nightfall.
- If you do not enter the House of Death, the Crude Sprawl will become an infected district on Day 4.
Act II, Day IV:Early Morning
- Infected districts:The Gut, Warehouses, the Factory, the Chine, the Crude Sprawl (optional)
- Burned districts:The Tanners, the Hindquarters, the Skinners
- Dead Item Shop:The Tanners
General
Notkin will become infected at the beginning of Day 4; this is inevitable. You’ll get a chance to heal him later in the day.
All districts that were infected yesterday will now turn into burned districts (and will do so each day from now on). See the mechanics section for tips on navigating burned districts.
Districts adjacent to infected districts (and others) will become infected during successive days throughout the rest of the game. You’ll be responsible for making rounds and providing either tinctures or antibiotics to characters who reside in the infected districts.
Kids will start to carry antibiotics that you can barter for.
Clothing shops will start carrying toolkits (which you need to upgrade the brewery) and sewing kits (which you need to upgrade your inventory). You’ll get a chances to get both for free today, but I still recommend buying a sewing kit if you come across one—the next two inventory upgrades will be very useful for the coming days.
Pharmacies will begin carrying antibiotics. Stock up on these—you’ll need them to treat ill people in infected districts to boost your public fund reward. Stock up on Feromycinium in particular, if possible; you’ll likely need it for the hospital task on Day 5.
Points of Interest
The Fellow Traveler at the Dead Item Shop will have some new dialogue.
Quests
Mending Ties, Part 2
Head to the Station after midnight. If you managed to speak to all three yesterday before the Town Hall meeting, you’ll find Lara, Grief, and Rubin around a fire southwest of the Station; otherwise, only Lara will be here. Speak to all present.
Act III, Day IV:General Advice
- Infected districts:The Gut, Warehouses, the Factory, the Chine, the Crude Sprawl (optional)
- Burned districts:The Tanners, the Hindquarters, the Skinners
General
You’ll have access to the public fund and daily hospital tasks at the Theatre in the Marrow starting today. Do not neglect these; though you can survive without engaging with either, they will make your playthrough infinitely easier. Maxing out the public fund meter each day will usually reward you with several thousand coins, antibiotics, and nearly enough food to make it through the day.
Act III, Day IV:Points of Interest
The Factory
Speak to Sticky in the Lair in the Factory; he’ll ask you to meet him in front of the clothing store in the Bridge Square. Head over and speak to him outside the shop. Agree to his plan and speak to the shopkeeper inside. Speak with Sticky outside and loot the bag next to him for a toolkit, and (if you kept the conversation going) a gauze mask, a bottle of Twyrine, and some sewing supplies.
- For the best result, tell him:that it’s a sanitary inspection, that there’s been an outbreak, that he might be infected, that you’re not joking, that you’ll need to check, that miracles happen, and then proceed to tell him a story.
- When you return to the Lair in the Factory for the first time today, you’ll be treated to a vision. Speak to the Executor to dispel it. Note that this involves a fairly graphic depiction of child death.
After leaving the Lair for the second time today, you’ll find Murky sitting on a barrel next to the door. Speak to her.
The Cemetery
Speak to one of the members of the Kin around Town today; they’ll tell you that the Herb Bride who has been following you is dancing near the Cemetery. Head there and speak to her.
The Spleen
One of the kids around Town will mention that Khan is at the Nutshell. Speak with him there.
The Flank
You’ll find a woman sitting next to the water pump outside the Shelter. Speak with her; she’ll explain that people have taken to breaking the pumps around Town. You can fix the pump next to her (as you can with all pumps around Town) with a spring, scrap metal, and a chisel. You’ll get some unique dialogue with Lara as a result.
Though the resource cost is somewhat high—particularly given how rare scrap metal is—it can be useful to fix at least one pump near the Lair. Pumps will give clean water only in non-infected districts, and will break again the next time the district becomes burned. If you choose to fix a pump, strategize by anticipating when the district will become infected again.
The Chine
When you enter the Chine, you’ll get a map marker for a house near the bridge to the Tanners from which you’ll hear a baby crying. Head in the house, up to the second floor, and follow the sound of crying to the baby in a crib. Speak with Anna and decide whether to take the infant with you.
Note that the infant takes six inventory slots. Make sure you have space to pick it up!
The Bridge Square
Georgiy will have a conversation available today. Find him in his wing of the Crucible in the Bridge Square.
Eva will have a conversation available today. Speak to her at the Stillwater in the Bridge Square. This is one of the conversations needed for the Three Graces achievement.
The Gut
Capella will have a conversation available today. Find her in her room at the Lump in the Gut.
The Hindquarters
At 4pm, a messenger will tell you that Isidor’s house is being robbed. Head to the Hindquarters and enter the front yard to Isidor’s house; a man on the stoop will talk to you and then attack you. Inside, you’ll find three other men—one in the room next to the front door, another in the second-floor room where the plague cloud once was, and a third near Isidor’s bedroom. You can safely kill the first two by sneaking; the third will have to be taken out in direct combat. After you’ve cleared the house, enter the previously blocked room on the second floor to find a chest with a sewing kit, a pocket watch, a ring, a razor, and some plus tinctures. Don’t forget to loot the rest of the cabinets in the house before leaving.
Anna will have a conversation available after you save the infant from the Chine. Speak to her at the Willows in the Hindquarters. This is one of the conversations needed for the Three Graces achievement.
Act III, Day IV:Quests
Victoria’s Trace
As you travel around Town, you’ll sometimes hear a piano being played in nearby houses. Track down the source of the sound and head upstairs; you’ll find Capella standing next to a piano. Repeat this process three more times throughout the day and then speak to Capella at the Lump in the Gut.
You can also speak with her before finding the piano’s source three times and end the quest, but will miss out on an achievement in doing so.
The Public Fund
At Town Hall in the Backbone, speak with the man sitting at the desk in back and then loot the cabinet next to him for your daily reward.
This quest is available every day from now on. Your reward for each subsequent day is dependent on how much you increased the public fund meter the day before. You won’t receive any reward at all if you did not complete the hospital task the day before.
Fixing the Brewery
Speak to Sticky in the Lair to discuss fixing the brewery. You’ll be able to get toolkits starting today—either by following Sticky’s sidequest (discussed above) or by purchasing them in clothing stores. Fix the brewery with a piece of scrap metal and a toolkit to finish this quest.
Once you fix the brewery, you can begin brewing painkillers and antibiotics by mixing tinctures with healthy or infected organs, respectively. If you’re out of morphine, you can brew painkillers with the organs you received from the Odongh yesterday; you’ll need them for today’s hospital task.
Upgrading the brewery further may not be as useful as inventory upgrades. Brewing painkillers and antibiotics requires organs—which, unless taken from the hospital, carry a hefty reputation cost to harvest. Unless you’re playing as a true ripper and brewing a lot, the limited number of brewing slots likely won’t impede your gameplay for much of the game. Though extra brewing slots may be helpful on Day 10, it’s by no means essential.
A Serum?
After fixing the brewery, brew antibiotics with a tincture and an infected organ. They’ll take about two-and-a-half hours each to brew. Once you have one, speak to the Executor in the doorway and then to Sticky. Afterwards, you’ll need to test it on an infected person. You’ll need to test three (each made with a different organ) before Artemy gives up. Speak to Sticky afterwards.
You can feasibly complete this today, but don’t feel pressed to do so. You’ll have plenty of time over the next two days.
Dead End
A few hours after giving up on the serum, Artemy will decide that he should stop by the Broken Heart in the Factory for a drink. Head there and speak to the Bachelor.
You’ll receive this quest only if you test three serum possibilities before getting the bull’s blood on Day 6.
The Hospital
The daily hospital task will be available at 7:30am. Head to the Theatre in the Marrow and speak to Rubin twice. Speak to Lara as well for another quest; then speak to the Executor on stage. Loot the cabinet on the left side of the stage for some free medicine and other items. Use morphine or brewed painkillers on four different patients to complete the quest. You’ll receive a reputation boost as well as a public fund meter boost.
Completing the daily hospital task will raise the public fund meter, but only partially. Give antibiotics to the ill in infected districts to max out the meter.
The hospital is also a safe zone to harvest organs from the dead—you won’t lose reputation for doing so. If you have time and inventory space, take as many as you can today to get a jump on brewing antibiotics.
The Shelter
Speak with Lara at the Theatre and then again at her house. Before heading out, make sure to loot the cabinets in the room across the house for some bread, milk, and raisins.
You’ll need to track down a water barrel with clean water somewhere in Middle Town. There are several throughout; you can find one in the yard behind the Theatre in the Marrow, in the Backbone near the entrance to the Flank, west of the clothes store in the Spleen, and in the park in the Maw. Once you find one, speak to the guard next to the barrel. You’ll need to determine if there are any barrels with infected water; usually the second one you test will distribute muddy water.
You have a few options here. You can do nothing at all, which will prevent the Flank from becoming infected and will leave the water barrels in Middle Town; however, the infected barrel will remain as well. If you take the muddy water to the Bachelor in the Town Hall, he’ll order all water barrels in Middle Town destroyed. You’ll thus prevent the Flank from becoming infected tomorrow, but will lose access to several water barrels. You can also ask the guard to take the infected barrel to Lara’s, which will place it outside the Shelter and will cause the Flank to become infected tomorrow. Regardless of your decision, speak to Lara afterwards.
The Suspect
At 7:30am, a messenger from Saburov will flag you down. Head to the Rod in the Tanners and enter Alexander’s wing. Speak to the detained man and then to Saburov to finish the quest. This quest must be finished by midnight.
Infant Rescue
Rescue the infant from the house in the Chine. Afterwards, turn it in at Town Hall for a few hundred coins and a reputation boost.
Mapping the Epidemic
One of the kids around Town will tell you that a surprise waits for you at the Soul-and-a-Half Fortress in the Warehouses. Head there and speak either speak to the teenager sitting outside or (once you’ve dealt with Notkin’s illness) or to the one sitting in the chair inside. He’ll give you a map of all the infected districts.
Healing Notkin
Either speak to the teenager outside the Soul-and-a-Half Fortress in the Warehouses or enter it after 7:30am; you’ll find that Notkin has been infected. Treat him to finish the quest. Speak to the Executor outside as well for a new quest.
As with all characters who become infected, I recommend using a Shmowder on Notkin. Otherwise, you run the risk of having him die tomorrow. If you have none, give him your best antibiotics.
What’s an Udurgh?
After curing Notkin, speak to Aspity at home in the Crude Sprawl and speak with Rubin in the Theatre in the Marrow. Rubin will direct you to Young Vlad. Head to the Vacant House in the Maw and speak to him.
Chimeras
Around 3:30pm, Young Vlad will send a messenger for you. Head to the Vacant House in the Maw; speak to the Odongh and then to Young Vlad.
Act III, Day V:Early Morning
- Infected Districts:The Marrow, the Maw, the Spleen, the Flank (optional)
- Burned Districts:The Chine, the Gut, the Warehouses, the Factory, the Crude Sprawl (optional)
- Dead Item Shop:The Atrium
General
Men bearing firebombs will start roaming infected districts, attacking all infected—including you, if you’re ill. The fire will actually burn the infection out of you, but at the cost of your health. You won’t lose any reputation for killing them.
Points of Interest
The Spleen – If you held onto the leash you received on Day 1, you can now trade it to a Doghead at the Nutshell in the Spleen for a Shmowder.
Quests
Rubin’s Crime – As you wander around Town, you’ll come across a few Odongh who’ll mention that they’re looking for Rubin. Head to Rubin’s apartment in the Hindquarters only to find two more Odongh; speak to them and then head to Grief’s warehouse.
Speak to Grief (either at Aspity’s or at his warehouse) and then follow the bloodstains outside to Rubin’s hideout around the corner from Grief’s. Speak with Rubin and then head outside; an Odongh will start a conversation with you. Decide whether you want to save Rubin. If so, the Odongh will attack you. There are three other Odongh in the north Warehouses that you’ll have to kill—a lone one south of Grief’s (next to the Shady Shop), and the other two west of Grief’s near the north exit. The southernmost one can be stealth killed. The first of the other two can be stealth attacked, but will aggro the other remaining Odongh.
- You can skip the first few conversations in this questline by speaking to Grief first at Aspity’s and then heading straight to Rubin’s hideout.
Rubin will live even if you don’t speak to him in his hideout or don’t kill all the Odongh. You’ll miss out on a similar quest in the early morning of Day 6 if you don’t speak to him, however. Decide whether it’s worth it to protect Rubin; the Odongh are extremely strong and extremely resilient. It takes about four pistol shots to kill one and nearly twice that many knife attacks. They can often kill you with two to three good punches, so blocking is essential if you’re using your fists or a blade.
- If you kill the Odongh, you can extract their organs without reputation loss.
- This quest must be completed before morning or the opportunity will be lost.
Sahba’s Counsel, Part 2
After midnight, head to Aspity’s in the Crude Sprawl. Speak to the Kin there, as well as Peter and Grief.
Infant Rescue, Part 2
You’ll hear another infant crying while walking through the Maw; head to the house marked on the north side of the district and head up to the second floor towards it. Note that there is a chance that you’ll need a lockpick to unlock the door that the infant is behind. You’ll find Anna and a Kin woman standing next to the bed; talk to both and then decide what you’ll do. If you take the infant, head to Town Hall to turn it in for several hundred coins and a reputation boost.
Act III, Day V:Points of Interest
The Bridge Square
Another conversation with Georgiy will become available today. Speak to him in his wing of the Crucible in the Bridge Square.
The Factory
After 7:30am, you’ll find Murky sitting inside the entrance of the Lair. Speak to her.
You’ll find the Herb Bride who’s been following you outside the Lair after you leave for the first time.
The Warehouses
Speak to the teenager who gave you the map of infected districts yesterday. Going forward, you can trade medicine and other items for a new map each day.
The Town
After finishing the Saburov’s quest, you’ll run into Murky standing around Town. Speak to her.
Act III, Day V:Quests
The Hospital, Part 2
Speak to Rubin at the Theatre in the Marrow; make sure to bring as many basic tinctures and antibiotics as you can. Today’s task is to give correct antibiotics to three patients. Loot the cabinet on the left side of the stage and then treat three patients—if you can. You may find yourself short on Feromycinium (which several patients need), so brew some or buy some if needed. You’ll get a reputation and public trust meter boost for completing this quest.
When you administer antibiotics, run away from the patient immediately; plague clouds will sometimes manifest above them and rush at you.
Bull on Parade
After 7:30am, you’ll find a group of Kin and a bull on the west side of the Hindquarters. Speak to the Odongh. At 5pm, head to the Ragi Barrow southeast of the Cemetery. Speak to the Odongh to receive the Menkhu’s Finger, and then interact with the bull. Speak to the Odongh and then interact with the bull again. Make sure you speak to the Odongh once more after that to receive the bull blood.
Head to the Bachelor with the blood in hand. You’ll find him at the Broken Heart in the Factory if you tested three serums; otherwise, he’ll be at Stillwater in the Bridge Square. You’ll need to wait about two hours before he’s finished with the blood. Speak to Sticky in the meantime.
You must obtain the bull blood before 7:30am on Day 6, or else this questline will end.
Houses of the Dead
Talk with Sticky after 7:30am. Head to the Chemist in the Bridge Square and speak to him as well as Var. Next, speak to Victor Kain in his wing of the Crucible. He’ll give you a piece of chalk for the next part of this quest. Var will have a new conversation available after you’ve reported the Chemist.
- Note that you’ll lose access to the Chemist for the rest of the game if you speak to Victor.
There are three houses in the Bridge Square from which you’ll hear knocking. The first is near the bridge; head inside and speak to Maria for an achievement. The second is to the west of that building, north of the Stillwater. A man will speak to you if you head inside; if you walk past him, he and his friend will attack you. You’ll lose reputation if you kill them, so try to beat them into submission instead. Upstairs, you’ll find a man locked in a room. The third is southwest of the Stillwater; you’ll find the corpses upstairs. A woman will speak to you when you leave.
If you choose not to mark any houses (or mark the wrong houses), the Bridge Square will become infected tomorrow. You can prevent this by marking the house with the corpses, although you lose a marginal amount of reputation if you do so. You may also report Maria to Victor, although this will not affect the outcome if you mark the correct house. The house Maria marked will be free of tenants and fully unlocked, although you’ll lose reputation normally if you loot anything.
House of Troubles
After noon, you may come across the Changeling as you walk around Town. Speak to her and then head to the Rod in the Tanners. Speak to the people outside on both sides of the house, and then head into Katerina’s wing. Speak to the Reflections and then to Katerina. Loot the cabinet before leaving for morphine, a tourniquet, and a broken ampoule. On the other side of the house, speak to the three Reflections and then to Alexander. Head back outside and speak to the crowd.
Act III, Day VI:Early Morning
- Infected Districts:The Atrium, the Tanners, the Skinners, the Bridge Square (optional)
- Burned Districts:The Marrow, the Spleen, the Maw, the Flank (optional)
- Dead Item Shop:The Cape
General
You’ll have plenty of downtime today to catch up on outstanding quests. If nothing else, try your best to have the serum brewed by evening before the Crowstone meeting.
The Factory
Murky will have another conversation for you after midnight. Find her in the foyer of the Lair.
The Warehouses
After midnight, head to the southern section of the Warehouses. Walk up the platform with the row of four warehouses on the southwest side. Walk to the southeast corner of the second warehouse for an easter egg.
The Cape
You’ll find the Fellow Traveler at the north end of the Cape tonight. Instead of his usual Dead Item Shop, he’ll sell “candy wrappers” to you for a few hundred coins each. Buy as many of these as you can; they’re essential for getting food after Day 7.
The Bridge Square
Victor has a conversation available today. Find him in his wing of the Crucible.
Quests
Rubin’s Crime, Part 2 – After midnight, head back to Rubin’s hideout north of Grief’s warehouse in the Warehouses. Speak to the Kin outside and then to Rubin inside. If you agree to help him, head outside. Either kill the three members of the Kin or aggro one and lead them away until your mindmap updates.
Don’t run too far from them or they’ll lose aggro; you’ll need to stay just ahead of them, but not so far that they lose interest.
Killing one of the men is usually enough to finish the quest. You’re free to extract organs from any you kill without a reputation loss as well.
This quest will be unavailable if you missed the first quest on Day 5. Once again, Rubin won’t die if you don’t finish this quest, so weigh the costs and benefits of doing so.
Act III, Day VI:Points of Interest
The Factory
After 7:30am, Murky will have another conversation for you. Speak to her in the foyer of the Lair. She’ll have another conversation for you the next time you return after noon.
The Backbone
You’ll hear piano being played in the grocery store across from Town Hall in the Backbone. Head inside and speak to Big Vlad. If you tell him to keep the store as-is, it’ll close for the rest of the game and you’ll receive an achievement. Otherwise, it’ll remain open and operate as usual.
The Bridge Square
Maria has a conversation available today. Find her in her wing of the Crucible. This is the last conversation needed for the Three Graces achievement.
The Town
After checking on the Saburovs, you’ll find the Changeling around Town. Speak to her.
The Chine
After 8pm, Yulia will send a messenger for you. Head to the Trammel in the Chine. Once inside, speak to the woman sitting in the chair, and then to Yulia. Further in the house, speak to the Bachelor.
Those who participated in the Feverish Feeling ARG that preceded the Kickstarter might recognize the woman at Yulia’s house.
Act III, Day VI:Quests
The Hospital, Part 3
- Speak to Rubin in the Theatre for today’s task. This time, you’ll be extracting organs; you need to place six in the chest on center stage.
- Favor taking kidneys and livers, since the chest has limited space and may not fit larger organs like hearts and brains.
- Once again, plague clouds may manifest when you extract organs from patients, so be ready to run once you’ve finished.
- Make sure to loot the cabinet on the left side of the stage for a rusty scalpel.
- Once you’ve finished, you’ll get a boost in reputation and the public trust meter. Speak with Yulia before heading out again.
The Suspect, Part 2
After 7:30am, you’ll get a messenger from Saburov. Head to Alexander’s wing of the Rod; once again, speak to the detained man to finish the quest. Speak to Saburov afterwards.
The Prophet
Speak to Alexander in his wing of the Rod. Afterwards, head to Katerina’s wing and speak to her. Speak to the figure that appears behind you twice on your way out.
Blood of the Earth
After you’ve tested the bull blood, you’ll have access to a dream involving the Termitary. Once you’ve witnessed the dream, you’ll get a quest marker in Shekhen after 7:30am—the Steppe village on the far southeast of the map. Head there with two empty bottles and interact with the crack in the earth twice.
- Head back to the Lair and brew two serums with the blood you extracted from the Earth.
- This’ll take about four hours, so busy yourself with errands around Town until then.
- Speak to the Executor in the doorway after you retrieve them.
Once finished, you’ll need to test one; I recommend waiting until the evening and using it during Murky’s quest. Make sure you hang onto the other—you’ll need to show it to someone tomorrow.
If you don’t test the serum by 7:30am on Day 7, Rubin will die.
The Umbilical Cord
After 6pm, you’ll find Measly and Thrush at the Station. Speak to both and suggest that you know someone who’ll help you. Speak to Grief in the Warehouses and ask him to help you.
The Crowstone Meeting
Speak with Murky sometime after noon. You’ll also receive a mindmap reminder to do so after 6pm. She’ll ask you to meet her at the Crowstone (southwest of the Cemetery) in the evening. Head there after 10pm—and bring one of the serums (just make sure you save the other for tomorrow!). Before heading there, look to the roof of the factory across from the Lair to see someone watching.
Speak to Murky at the Crowstone, then head around the back of the rock and speak to the Changeling. Go back in front and speak to the Changeling again. You can either turn down Changeling’s offer—and let Murky perish—or get infected in her place. Choose the latter and then cure yourself with the serum.
- Murky will also die if you do not complete this quest by 7:30am. If she dies, you’ll get access to a unique dream that’s needed for the Dream On achievement.
- Head back to the Lair, then head to Murky’s traincar in the Station. Speak to her to finish the quest.
Act III, Day VII:Early Morning
- Infected Districts:The Factory, the Backbone, the Flank, the Warehouses, the Crude Sprawl
- Burned Districts:The Atrium, the Tanners, the Skinners, the Bridge Square (optional)
- Dead Item Shop:The Backbone
General
Medicinal cloaks will become available in clothing stores today. You’ll need these for more advanced inventory upgrades, so pick one (or two) up if you can afford it.
Coffee beans will now be at their most valuable; it’s a good time to sell them if you need the cash.
From here on, most characters will have lowered immunity ratings when you give them prophylaxis, which means that they’re more likely to get sick even if you give them + tinctures. Make sure to give anyone who gets sick a Shmowder or Panacea; otherwise, treat them with the best antibiotics you have to lower their chance of death.
Points of Interest
The Backbone – The Fellow Traveler will have a conversation available tonight. Find him at the Dead Item Shop near the entrance to the Flank from the Backbone.
Quests
The Umbilical Cord, Part 2 – After midnight, speak to Grief at the southern end of the tracks in the Station to complete this quest. You’ll receive an achievement for your efforts.
Act IV, Day VII:General Advice
- Infected Districts:The Factory, the Backbone, the Flank, the Warehouses, the Crude Sprawl
- Burned Districts:The Atrium, the Tanners, the Skinners, the Bridge Square (optional)
General
After the Inquisitor arrives, you’ll only be able to purchase food with coins at the Broken Heart in the Factory and the Shady Shop in the Warehouses. Regular grocery stores will take coupons, which you can get from the public fund as well as the woman sitting next to the fund cabinet at Town Hall. Grief also sells coupons—at exorbitant prices.
Water continues to become scarce, and the few barrels you’ll find around Town will often have limited amounts. This is a good time to fix a water pump near the Lair; otherwise, the water barrels at Shekhen have unlimited water.
Act IV, Day VII:Points of Interest
The Town
If you’ve been following the loot cache game by drinking Twyrine, you may come across a note today that mentions that Isidor’s alleged killer will appear at a certain place in the next few days.
The Bridge Square
The Inquisitor will have a conversation available after you speak with her in the Termitary. Find her in the Cathedral in the Bridge Square.
The Gut
After resolving the Kin’s vendetta against the Olgimskys, both Young Vlad and Big Vlad will have conversations available in both wings of the Lump in the Gut.
Act IV, Day VII:Quests
A Guilty Conscience
People around Town will mention that they saw Anna doing something suspicious recently. Head to her house in the Hindquarters; make sure to bring a spindle with you if you have one. Speak to her there and then trade the spindle for a healthy heart.
If you don’t have a spindle, look for an herb bride; they often carry them and will trade them for tinctures or sewing supplies.
The Hospital, Part 4
Head to the Theatre in the Marrow after 7:30am. Speak to the man sitting in Rubin’s usual spot next to the stage. Today’s task is to look for ill people who’ve been mistakenly placed with corpses. Concentrate to highlight them and then interact with them. There are four in total; some may be outside as well. Check behind the stage, on the second floor, in the foyer, and outside to find all four. You’ll receive a boost in reputation and public-fund meter as a reward.
Where’s Rubin?
After speaking to the man at the Theatre, head to Rubin’s apartment in the Hindquarters. You’ll find him in bed; speak to him to finish the quest.
The Inquisitor Cometh
After 7:30am, a messenger will direct you to the Cathedral in the Bridge Square. Make sure you bring the remaining bottle of Panacea with you. Speak with the people milling about outside and then with the Inquisitor inside the Cathedral.
Feel free to use the Panacea after this meeting.
If you go to the second floor of the Cathedral, you can save by interacting with the large hourglass. You’ll receive an achievement for the short detour.
The Foreman
After showing the Inquisitor the Panacea at the Cathedral in the Bridge Square, head to Shekhen and speak to Oyun three times. Make sure to offer him shelter at Isidor’s house during the third conversation.
After you’ve spoken to Taya in the Termitary, head to Isidor’s house and speak to Oyun as well as his Reflection.
Into the Termitary
After speaking to Oyun at Shekhen, head to Termitary Block #1. Enter through the front entrance and speak to the Inquisitor. Then head up the stairs to the third floor and through the far door. Speak with Taya and then with the Kin who’ve gathered outside her chamber.
You can also enter through the doors on the Termitary’s east side, but you’ll have to climb up several staircases and then down several more to speak to the Inquisitor. On the other hand, you’ll be out of the infected district.
Vlad’s Responsibility
After speaking to Taya in the Termitary, the Kin gathered outside her chamber will ask you to bring them Vlad Olgimsky. You have a few options:
- If you speak with Young Vlad at the Vacant House in the Maw, he’ll go to the Termitary. You can then speak to him in the pit in the Termitary in the Skinners. He’ll perish at midnight.
- If you speak with Big Vlad at the Lump in the Gut, he’ll refuse to go; if you speak to Young Vlad and then to Big Vlad again, Big Vlad will take Young Vlad’s place at the Termitary. He’ll perish at midnight.
- If you speak to neither Vlad before 6pm, both will go to the Termitary and then will die at midnight.
- You can save both by speaking to Big Vlad first at the Lump in the Gut. Afterwards, speak to the Changeling in the Lump’s foyer. Then speak to Big Vlad again; Young Vlad will permanently move to the Lump in the Gut and neither Vlad will die.
Whatever you do, head back to the Termitary in the Skinners and speak to the members of the Kin to finish this quest.
The Schism
After sorting out the Olgimsky’s responsibility, speak to the Kin in the Termitary again. This time, they’ll ask you to settle a schism in the Kin. Speak to Oyun at Isidor’s house in the Hindquarters for his advice. You can finish this quest now, but it’s very challenging—you’ll have to kill the four Odongh running around the Termitary.
You can—and should—solve the schism on Day 9 through nonviolent means. I recommend this path; be patient until then, and save yourself from unnecessary deaths at the hands of the Odongh.
If you do choose to take the violent path, speak to the Kin in the Termitary in the Skinners once you’ve killed the last Odongh. Finishing this quest before midnight will lead to the death of either or both Vlads present at the Termitary.
Maximum Occupancy
Around 11:40am, Artemy will feel like Capella is trying to contact him. Head to her room at the Lump in the Gut and speak to her; she’ll direct you to Grace in the Cemetery.
You can skip speaking to Capella by going straight to the Cemetery.
Head to the Cemetery and speak with Grace in the caretaker’s shed. Head back outside; you have two choices here:
- You can speak with the figure in the bushes next to the caretaker’s shed and agree to let it take care of Grace’s problem.
- You can interact with the mass grave next to the Cemetery’s entrance and decide to burn the bodies. If you do so, you’ll find a factory worker outside the Lair in the Factory later; speak to him.
Regardless of your decision, speak with Grace after you’ve made your choice. On your way out, speak to the woman next to the door of the caretaker’s shed for another choice:
- You can move Grace to Town, which will put her in danger of infection but will give you access to an achievement and unique dialogue.
- You can have Grace remain in the Cemetery, beyond the plague’s reach.
If you choose to move Grace, speak to Dora at Town Hall in the Backbone, then head to Peter’s Loft in the Skinners. Speak to both Peter and Grace.
Grace will perish if you do not finish this quest by the end of Day 8.
Act IV, Day VIII:Early Morning
- Infected Districts:The Chine, the Marrow, the Gut, the Maw
- Burned Districts:The Warehouses, the Factory, the Crude Sprawl, the Atrium, the Backbone, the Flank
- Dead Item Shop:The Chine
General
Time begins moving faster now—meaning that your hunger and exhaustion meters will fill faster as well.
You’ll have a ton of downtime today, so catch up on outstanding quests, rest, and scrounge as needed.
Ferries will start requiring two boat tokens instead of one as of today.
You’ll be able to ascend the Polyhedron in the Bridge Square today if you’d like. You’ll get an achievement for ascending up to a certain point, as well as another one for jumping to your death from the point marked by an origami crane. Curiously, White Whip grows at the base of the stairs; pick some if you can.
Points of Interest
The Marrow – You’ll hear a woman screaming in a house in the Marrow. Follow the noise and speak to the person you find.
The Factory
The Wonder Bull will return today. Speak with it outside the Lair.
Quests
Train Summoning, Part 2 – After midnight, you’ll find several kids—including Capella and Khan—at the train platform in the Station. Speak to all of them.
Sahba’s Counsel, Part 3
After midnight, head to Aspity’s Hospice and speak to the various Kin gathered there.
Act IV, Day VIII:Points of Interest
The Bridge Square
You’ll find body under the gallows in front of the Cathedral. Loot it for a note from a recent acquaintance.
Act IV, Day VIII:Quests
The Hospital, Part 5
After 7:30am, head to the Theatre in the Marrow. Bring as many immunity boosters and (preferably +) tinctures as you can. Speak with Victor and then with the Executors standing where Rubin used to sit.
Your task for today is to survive an hour and fifteen minutes in the Theatre. Several roaming plague clouds will spawn, with more appearing each quarter hour. All will gradually home in on you, and will often coordinate to cut off routes of escape; do your best to avoid them, but expect to get caught by at least one if not more. Once the Executors return, you’ll receive a reputation and public-fund boost.
Though the Executors tell you that they’ll return in an hour, do not leave the Theatre until they return—otherwise, you’ll abandon the quest.
- Don’t go upstairs; there’s no room to navigate, and you’ll be trapped by plague clouds.
An exploit exists that makes this quest very easy. Facing the stage, go on the raised platform with the railing on the right side of the Theatre. You’ll have to jump over bodies to do so. That obstacle seems to confuse the plague clouds’ pathfinding, so they usually won’t be able to reach you.
Barley the Barber
Stop by Grief’s Nest in the Warehouses to find Barley the Barber and his men there in his place. Speak with Barley and then head to the Cathedral in the Bridge Square. Speak with Grief and agree to help, then speak with the Inquisitor.
Head back to Grief’s Nest in the Warehouses and speak with Barley. He and his two men will attack you; dispose of them and loot their bodies. Speak with Grief at the Cathedral in the Bridge Square again to receive a shotgun.
- You can skip speaking to Barley the first time by going straight to Grief at the Cathedral in the Bridge Square.
You’ll find Grief at the Cathedral in the Bridge Square instead of his Nest in the Warehouses from now on.
Capella’s Protection
At 4pm, you’ll receive a message from Capella; head to the Cape and speak with her just south of Victoria’s tomb to complete this quest.
The Loot Cache Game
If you discovered the loot cache note that mentioned Isidor’s alleged killer, you’ll get a map marker to find him at 6pm. Head over to the designated yard (southeast of Peter’s Loft) in the Skinners; the purported killer will attack you. Kill him and read the note on his body.
Head to the Soul-and-a-Half Fortress next. Speak to the kids there to finish the quest.
Act IV, Day IX:General Advice
- Infected Districts:The Bridge Square, The Spleen, the Warehouses, the Flank, the Hindquarters, the Crude Sprawl
- Burned Districts:The Atrium, the Marrow, the Maw, the Gut, the Chine
- Dead Item Shop:The Spleen
General
The Army arrives today after 7:30am. Soldiers will replace guards around town and will shoot (or, in the case of those with flamethrowers, burn) infected people and looters alike. Unlike guards, however, they don’t loot bodies—so you’re free to do so whenever they kill someone.
Soldiers also drop some great items; you can get rations, rifles, rifle ammo, and other random loot from their corpses. You won’t lose reputation for killing them, but doing so is very dangerous—corpsmen can take you out with one or two shots from almost any range, while those carrying flamethrowers are invulnerable and deadly at short range. Aggroing one also usually means aggroing several others. A safer way is to loot corpsmen’s bodies after other soldiers—usually flamethrowers—kill them in crossfire. Ironically, these incidents usually arise because of the chokepoints created by the Army’s barricades.
You’ll only have a few quests today, and will be free to go about your business until 4:30pm, when the Abattoir becomes available. Use this time wisely; you won’t exit the Abattoir until Day 10.
Act IV, Day IX:Points of Interest
The Bridge Square
The Inquisitor will have a conversation available today after 7:30am. Speak to her in the Cathedral in the Bridge Square.
After you speak to the Inquisitor at the Cathedral in the Bridge Square about the Army, speak to Grace outside. Head to the Polyhedron in the Bridge Square and speak to Measly and Thrush on the bridge. Then head up the stairs and speak to Khan.
Make sure to pick any White Whip growing at the base of the stairs.
The Factory
The Wonder Bull has another conversation available today. Speak to it outside the Lair.
Act IV, Day IX:Quests
The Hospital, Part 6
Head to the Theatre in the Marrow after 7:30am; bring either a Panacea or a Shmowder with you. Speak to the Changeling there. Your only task today is to cure one of the hospital patients—use either a Panacea or a Shmowder on one to receive a reputation and public-fund boost.
The Commander Cometh
After 7:30am, head to the Town Hall in the Backbone and speak to the Commander to finish this quest.
The Noose Tightens
Townsfolk will mention the relationship between the Army and the Inquisition. Afterwards, head to the Cathedral in the Bridge Square and speak to the Inquisitor and Grief.
Into the Abattoir
Around 4:30pm, Oyun will send a messenger for you. Head to Isidor’s house in the Hindquarters and speak to him. Make sure you’ve finished everything you need to today before going to the Abattoir. Once ready, head to the Abattoir’s southwestern gate—marked on your map—and enter.
Enter the Abattoir while infected for a chance at an achievement.
Now begins one of the most arresting—and challenging—sections of the game. It’s easy to die here several times if you’re not careful. This guide should help you avoid several needless deaths.
After entering, head forward and speak with the Odongh; then, drink the blood from the fountain next to it.
Continue forward until you see the torch at the end of the hallway; begin sneaking. Inch past the corner until you can see the Odongh patrolling in a circle around the pillar. Sneak up behind it and stun it with a charged stealth punch. Do this one or two more times until you run out of stamina, block until the precise moment that you’ve recovered, then deliver another charged sneak attack. If the Odongh doesn’t die, back up while blocking; wait until it finishes its windmill (which lasts two to three punches) and then hit it with another charged attack. Continue this routine until it dies.
Loot the Odongh’s body and then fill the bottle at the nearby fountain. Press forward until you reach a large chamber with an Odongh in the corridor straight ahead. Sneak across and hide around the corner from the corridor’s opening until the Odongh has its back turned, then sneak forward and kill it. You’ll receive a candle stub; loot it for a bottle.
Return to the chamber and head around the corner to where the stone slab and the Herb Brides are. Fill the bottle at the nearby fountain. Speak to the Brides next, then speak to the figure on the slab. Afterwards, interact with the figure and take the items available.
Equip the Menkhu’s Finger that the Brides give you and head back to the corridor where the second Odongh was. You’ll have to take on two Odongh in this next part; you can sneak up on the first one and dispatch it with the Menkhu’s Finger (using the same method as when you had only your fists), though this will aggro the second. You can also aggro the first one by standing within its eyesight, though this will likely aggro the second one as well. Either way, use the same strategy as above (block until windmill attack is done, get a charged strike in, then block again; repeat) and kill both Odongh. Loot them and then fill your bottles at the two nearby fountains.
It’s possible a third Odongh in the next chamber may get aggroed as well, so take it out if it comes; otherwise, sneak into the next chamber and dispatch it from behind. Loot it for another bottle, then head up the ramp and fill it at the fountain.
Continue forward and speak to the Odongh next to the table. Interact with the table and choose the items from your inventory. Speak to the figure on the table. Then leap into the pit.
Once you awaken, head forward and follow the path on the right. Speak to the entity in the wall, then continue forward. Follow the path until you find a ladder; interact with it to leave.
If you speak with the entity while infected, you’ll earn an achievement.
Act IV, Day X:Early Morning
- Infected Districts:The Maw, the Backbone, the Chine, the Tanners, the Skinners, the Hindquarters, the Factory
- Burned Districts:The Bridge Square, the Spleen, the Warehouses, the Flank, the Crude Sprawl
- Dead Item Shop:The Marrow
General
You’ll come to in the Vacant House in the Maw. Open your map as soon as you do. Then speak to Oyun, who is standing nearby.
You’ll need to cure several people today. Unless you’ve stocked up on Shmowders, you’ll need to make as much Panacea as you can with the blood you took from the Abattoir. They take about four hours to brew, so get to the Lair as soon as you can and start the brewing process.
Gas masks, Army cloaks, and Army gloves become available in clothing stores today. Pick a cloak up if you’d like—you need it for the last inventory upgrade, although you likely won’t need the extra slots at this point.
You won’t need to treat anyone tomorrow, so feel free to use all your supplies save for what you need to keep yourself healthy.
Points of Interest
The Marrow – The Fellow Traveler has some new dialogue. Find him at the Dead Item Shop in the Marrow.
The Backbone
If you stop by Town Hall, an officer standing by the door will have a conversation available.
Quests
The Town’s Future – As soon as you’ve set your Panacea to brew, go to sleep in the Lair in the Factory. You’ll begin a lucid dream.
Speak to the figure in the first corridor, and then again to another two in the chamber where the plague dancers were. Head to the pit (note that you have unlimited stamina) and speak to the figure next to the stone slab.
- Give each of the figures voices and names for an achievement.
Once you wake up, speak with the Executor in the doorway. Grace, Notkin, Capella, and Taya will all become infected; Sticky and Khan will also have a chance of becoming infected (or dying, if they’re already infected).
Follow the map markers around Town and speak with each; then cure them with either Panacea or Shmowders or treat them with antibiotics to finish this quest.
The Schism, Part 2
After witnessing the Abattoir dream, head to the Termitary in the Skinners. On the third floor, speak to the Odongh near the stairs. Then speak to the member of the Kin near the pit on the ground floor.
- Next, head to Shekhen. Speak with Taya and then with the member of the Kin sitting next to the Earth’s ear.
- You can now trade tinctures and bullets to the Odongh at Shekhen for herbs and food.
Answers
After speaking with the member of the Kin at Shekhen, return to the Abattoir. Go to the pit and speak to Oyun. You’ve three choices:
- If you tell Oyun to prepare to die, you’ll see a cutscene and Oyun will perish. You’ll end up in the Cemetery afterwards.
- If you tell Oyun to commit suicide, you’ll be returned to the Abattoir’s entrance. Oyun will perish at midnight.
- If you spare Oyun, you’ll be returned to the Abattoir’s entrance. Oyun will live to see the ending.
Act IV, Day X:Quests
The Hospital, Part 7
Head to the Theatre in the Marrow and speak to the corpsmen outside to complete this quest.
A Convenient Solution
Around noon, Artemy will decide to check in with the Inquisitor. A messenger will soon after flag you down and force you to go to the Cathedral in the Bridge Square. Speak with the Inquisitor to finish this quest. As you leave, speak to the corpsman outside.
To Lose One Parent…
Around noon, Capella will direct Artemy to visit Lara’s Shelter in the Flank. Head there and speak to the men standing in the foyer as well as the Reflection in the room on the left. Check the cabinet in the righthand room for a note and read it.
- Head to Town Hall and speak to Lara to complete the quest. Convince her to hand over her gun for a free revolver as well.
- Lara will perish if you do not complete this quest before midnight.
The Inquisitor’s Flight
At 8pm, Capella will direct you to the Cathedral in the Bridge Square. Head there and speak with the Inquisitor. You’ll have two choices:
- Agree to accompany the Inquisitor for a chance at an achievement later.
- Refuse her offer to gain access to a free revolver and certain lore tomorrow.
- Regardless of your choice, speak to the Reflection before leaving.
Act IV, Day XI:Early Morning
- Infected Districts:The Atrium, the Flank, the Marrow, the Spleen, The Hindquarters, the Crude Sprawl
- Burned Districts:The Maw, the Backbone, the Chine, the Tanners, the Skinners
- Dead Item Shop:The Hindquarters
General
There’s no need to give anyone prophylactics, antibiotics, or any other cures today; if they’re alive today, they’ll live to see the ending (with the exception of Rubin, who you must speak to at the Station). There’s no need to boost the public fund meter either.
Day 11 is relatively short (although you have until 10pm to finish the day’s main task), so there’s no need to stockpile resources anymore. Use everything you can, buy food if you need to, raid loot caches—whatever you need to push yourself to the end.
Quests
The Inquisitor’s Flight, Part 2
If you chose to flee with the Inquisitor, meet her at the train platform in the Station at 2am. Speak with her and then do so again on the train. Speak with the officer during the next scene, then return to Town to finish the quest and to receive an achievement.
Act IV, Day XI:Points of Interest
The Bridge Square
If you chose not to flee with the Inquisitor, Grief will have a conversation available. Find him in the Cathedral in the Bridge Square.
The Backbone
If you chose not to flee with the Inquisitor, look in the grass on the eastern side of Town Hall in the Backbone. You can loot a revolver from the body there, but will lose some reputation if you do so. Perform surgery on the body for a curious sight.
The Factory
Speak to the Wonder Bull outside the Lair in the Factory today for an achievement.
Act IV, Day XI:Quests
The Inquisitor’s Orders
After 7:30am, head to Town Hall in the Backbone and speak to the officer at the table. You’ll now need to investigate the three outposts where the orders may have ended up. I’ve listed them clockwise below.
The Shelter Outpost
First, head to Lara’s Shelter in the Flank and speak to the Bachelor inside. Speak with Lara upstairs as well.
The Steppe Outpost
Next, head to the outpost in the Steppe southwest of the Bridge Square.
- Make sure to save at the Crucible or the Stillwater beforehand.
- While heading to the map marker, note the path on the east side of camp beset by sandbags; this will be your escape route.
Speak to the Changeling. A line of corpsmen will begin approaching the camp from both the north and south.
- It’s possible to sneak past the south line, but you’ll more likely than not end up getting shot and killed.
- Similarly, fighting the soldiers is pointless—there are too many, and all have rifles that will kill you in one to two shots.
To avoid certain death, sprint east through the sandbag path mentioned above until you’ve reached safety. Head back to the Bridge Square by the hill near the Stillwater.
The Station Outpost
Next, head to the outpost in the Station. Speak to the officer there. Make sure to speak to Rubin too—otherwise, he won’t appear in the ending.
On the Trail
Head to the Crowstone southwest of the Cemetery next. Speak to the officer there. Then head to the Broken Heart in the Factory.
Downstairs in the Broken Heart, speak to the man in the chair. Then interact with the man lying next to him. Once finished, speak with the man on the stage.
If you tell him that the world isn’t big enough for both of you, the man on the stage will attack you.
The Final Hunt
Outside of the Broken Heart in the Factory, you’ll speak to a group of Steppe creatures.
You’ll now have to track down the courier yourself—no map markers. No clues.Head to the nearest landmark:the Lair in the Factory. You’ll find him slumped in front of the door. You now have a final choice:
- Don’t loot the courier or pick up the orders at all. Instead, let 10pm come to receive the “Late” ending and an achievement.
- Pick up the orders and destroy them by interacting with the nearby flame barrel. You’ll receive the “Nocturnal” ending and an achievement.
- For the “Diurnal” ending (and its corresponding achievement), pick up the orders and head to Town Hall in the Backbone. Speak to the Changeling and then to the Commander. Next, head to the Bridge Square. Walk to the base of the Polyhedron and interact with what remains.
Whatever your choice, enjoy the ending and speaking with all you’ve saved. You’ve earned it.