Ein Leitfaden für alle Errungenschaften in AI:The Somnium Files.
Geschichtenbezogene Erfolge
Diese Errungenschaften können durch den Abschluss von Somnium oder durch das Erreichen eines der Enden erlangt werden. Spielen Sie für sie einfach die Geschichte normal durch. Beachten Sie, dass schlechte Enden (die im Spiel als Bad Ending bezeichnet werden) keine Errungenschaften bringen.
BRAiN:In Träumen verborgene Erinnerungen
Tag 1:Freitag – Somnium des gelöschten Datums.
PaiN:Mutter, Blut und Geheimnisse
Tag 2:Samstag – Mizukis Somnium abgeschlossen.
VaiN:Dissoziierte Persona
Tag 3:Sonntag – Iris’ Somnium geräumt.
SWaiN:Mein Held
Tag 4:Montag – Otas Somnium abgeschlossen.
SUSTAIN:Unauslöschliche Erinnerungen
Tag 5:Dienstag – Mayumi’s Somnium abgeschlossen.
CAPTaiN:Offenbarte Bindungen
Tag 6:Mittwoch – Somnium des Cleared Date.
CURTaIN:Die andere Seite des schwarzen Vorhangs
Tag 4:Montag – Somnium von #89 abgeschlossen.
REFRaiN:Echos des Mordes
Tag 5:Dienstag – Das Somnium des Bosses abgeschlossen.
VILLaiN:Ausweichende Erinnerung
Tag 3:Sonntag – So's Somnium geräumt.
MaiN1:Antinomischer Konflikt
Tag 4:Montag – Iris’ Somnium beendet.
MaiN2:Die ewige Zeremonie
Tag 5:Dienstag – Iris’ Somnium beendet.
MOUNTaiN:Leichenblume
Tag 5:Dienstag – Hitomis Somnium abgeschlossen.
KETTE:% s ! n k
Tag 6:Mittwoch – Saitos Somnium beendet.
Ota-Route:ENDE
Otas Untersuchung abgeschlossen.
Mizuki-Route:ENDE
Mizukis Untersuchung abgeschlossen.
Vernichtungsroute:ENDE
Untersuchung der Vernichtungsroute abgeschlossen.
Iris-Route:ENDE
Abschluss von Iris’ Untersuchung.
Lösungsweg:ENDE
Schlussuntersuchung abgeschlossen.
Errungenschaften der Dokumentationspflicht
Dafür gibt es 3 verschiedene Errungenschaften, die damit zusammenhängen, das „B“-Foto in den Somniums zu erhalten. Es gibt ein B-Foto für jedes einzelne Somnium für insgesamt 26, und Sie finden sie normalerweise zwischen dem vorletzten und letzten mentalen Lock (obwohl dies nicht immer der Fall ist). Das Foto wird durch Interaktion mit einem KI-aussehenden Augapfel erstellt, der einen funkelnden Effekt um ihn herum erzeugt.
Sie erhalten auch ein zusätzliches Foto mit der Aufschrift „Album abgeschlossen“, sobald Sie die anderen 26 erhalten haben, wodurch sich die Gesamtsumme auf 27 erhöht. Ich werde die 3 damit verbundenen Erfolge auflisten und den Leitfaden mit den Orten aktualisieren, wie es die übrigen Abschnitte sind abgeschlossen.
Traumdokumentationspflicht:Intern
1 verstecktes Objekt in Somnium gefunden.
Traumdokumentationspflicht:Manager
6 versteckte Gegenstände in Somnium gefunden.
Traumdokumentationspflicht:CEO
Alle versteckten Gegenstände in Somnium gefunden.
Schießveranstaltungen-Erfolge
Es gibt 5 Schießereignisse im Spiel, bei denen Sie Quick-Time-Ereignisse (QTE) haben, bei denen Sie entweder eine Taste drücken, eine Tastenkombination drücken, wiederholt auf eine Taste tippen oder auf ein sich bewegendes Ziel zielen und dann einmal STRG drücken Schuss wurde vollständig „geladen“. Die Zeit wird verlangsamt, wenn das QTE stattfindet, aber Sie haben nicht mehr als ein paar Sekunden Zeit, um zu reagieren. Die Errungenschaften erhältst du, indem du keinen einzigen Tastendruck verpasst, denn wenn du das tust, wirst du sowieso ein schlechtes Ende bekommen.
Wenn Sie eine QTE verpassen, gehen Sie zu Menü (Tab), wählen Sie Flussdiagramm aus, vergrößern Sie die aktuelle Untersuchung, klicken Sie auf „Untersuchung erneut öffnen“ und wählen Sie das allerletzte verfügbare Element aus. Dadurch beginnen Sie das Schießereignis von vorne.
Dafür gibt es 5 Erfolge (ich werde wahrscheinlich mit Ereignisdetails aktualisieren, sobald der Barebone-Leitfaden fertig ist):
Das geheime Leben der Yakuza-Ehefrauen
Das Schießereignis im Kumakura-Büro ohne Fehlschüsse abgeschlossen.
Der herzliche Empfang des Sekretärs des Kongressabgeordneten
Das Schießereignis in der Sejima-Residenz ohne Fehler abgeschlossen.
H***y Hausfrauen In H***
Das Schießereignis in der Sagan-Residenz ohne Fehlschüsse abgeschlossen.
Muskeln in Hülle und Fülle! Gymnastikroutinen für Männer
Das Schießen-Event in Golden Yokocho ohne Fehler abgeschlossen.
Die erotische Legende von Atlantis
Das Schießen-Event im Warehouse District ohne Fehler abgeschlossen.
Interrogation Achievements
There will be 4 Interrogation sequences during the story. Note that this ONLY includes the interrogations where you can present evidence. If you and the subject are sitting there and you can talk to them like you would talk to any other character and there is no evidence to present, you will not get an achievement out of this. In order to get the achievements, you have to clear the interrogations with no errors.
If you do make a mistake, go to Menu (TAB), Flowchart, zoom in on the current investigation (or whichever interrogation you need for the achievement), click on reopen investigation and select the ABIS HQ, Interrogation Room. There might be more than one, remember to select the one where you can present evidence.
I will list the achievements, the investigation name where they’re available and the correct responses. To minimize spoilers (although if you’re reading this and haven’t finished the game, it’d be best to stop) I will only list the order and item that you have to present:
Interrogation:Implicate Iris
Confronted Iris with the evidence with no mistakes.
Day 3:Sunday syokubAI (left branch of the flowchart, just before Iris’s Psync on this branch)
On Reopen Investigation, it will appear as the 2nd “ABIS HQ, Interrogation Room”.
- Show Sedation.
- Show Discovery of Renju’s Body.
- Show Renju’s Watch and Oil Drum.
- Show Oil Drum, Renju’s Weight and Elevator Record.
Interrogation:Implicate Ota
Confronted Ota with the evidence with no mistakes.
Day 4:Monday jikAI (left branch, just after Ota’s Psync)
On Reopen Investigation, it will appear as the only ABIS HQ, Interrogtion Room available.
- Show Odoroki-man Chocolate.
- Show Floral Pattern Kitchen Knife.
- Show 2 Cars and Odoroki-man Chocolate.
Interrogation:Implicate So
Confronted So with the evidence with no mistakes.
Day 3:Sunday gyoukAI (right branch, just before So’s Psync)
On Reopen Investigation, it will appear as the only ABIS HQ, Interrogtion Room available.
- Show Iris’s Picture.
- Show So Leaving the Warehouse and Where Iris Was Found.
- Show Iris’s Time of Death.
- Show Iris’s Autopsy Report.
Interrogation:Implicate Hitomi
Confronted Hitomi with the evidence with no mistakes.
Day 5:Tuesday jutAI (right branch, just before Hitomi’s Psync)
On Reopen Investigation, it will appear as the only ABIS HQ, Interrogtion Room available.
- Show Information on Manaka.
- Show Where Manaka was Found.
Analyst Achievements
There’s 3 of them and they’re basically completionist achievements.
Persons Analyst
Collected all the “Persons” files.
This one is easy and should occur naturally as you finish your playthrough. You will meet every single character. I would suggest interacting with every character fully (select all their conversation options and “look” at them, then hover over them and make sure they’re greyed out) as some conversations will explore topics that will help you fill up your Appendix.
Appendix Analyst
Collected 100 “Appendix” files.
You do not have to fully completed the Appendix, as there are 142 entries. After the rest of the guide is done, I will compile a list and where to get them of all items on the Appendix. As a general rule of thumb, interact with everything and everyone as much as the game allows you to do so. This involves repeatedly checking the same objects, or checking objects again if you go back to the same scenario (you will, multiple times) in a later stage of the game. Certain objects will start conversations with the characters on screen. I would suggest also going down certain “bad endings”, like trying to shoot Saito in the True Ending (you have to REPEATEDLY say you’re going to shoot him), as this will give you extra terms for the appendix.
Dream Album Analyst
Collected all the “Dream Album” files.
You will get this once you get the 27th item of the Album (which you get by getting all other 26). Refer to the Dream Documentation section above.
Miscellaneous Achievements Part 1
Finally, the misc. achievements. For these, you will have to complete certain tasks/conversations.
Date’s Atami Date Route:END
Asked out the receptionist to Atami.
Location:Yellow branch (Mizuki route), Day 5:Tuesday seisAI
In Reopen Investigation, this will appear as “Talent Agent Lemnicaste”, highlighted in green (Free Move).
You will have to repeatedly talk to the receptionist.
- Say I want to touch your two…big….
- Say Let’s go to Atami together!.
- Say Let’s go to Atami together!.
- Say Let’s go to Atami together!.
- Say Let’s go to Atami together!.
- Say Let’s go to Atami together!.
Boss Mania
Checked absolutely everything in Boss’s office.
Location:I personally used the very first time you’re in Boss’s office, Day 2:Saturday saikAI, just after the tutorial dream “Psync”.
In Reopen Investigation, this will appear as “Abis HQ, Boss’s Office” (I used the top one).
For this achievement, you will have to interact with every single item of the warehouse also known as “Boss’s Office”. Her room is a hoarder’s dream and you might miss some items just because of the sheer amount of them.
I’d suggest interacting with the item again if you and Boss have a conversation about it, as this will grey the item out and might help you find any missing items. My list should cover all items starting from the far left of the room (as far left as you can pan) and ending at the far right. Note that the list and its order will only grant you the achievement when your camera is positioned looking at Boss sitting on her desk. Results may vary or achievement may be unobtainable from different camera angles, if in doubt, just go to the very first time you’re in Boss’s office and follow the list.
List of items to interact with:
- Bags (the ones hanging on the walls, either side of the room will do)
- Matryoshka (pan all the way left, its on a cabinet)
- Large Key (just next to the matryoshka)
- Cabinet (you can tap the one where the matryoshka and key are, there’s a few around the room but one will count for all)
- Chair (right next to the cabinet with matryoshka and key)
- Shelves (any of the ones around the room will do, just tap the one next to bag/chair/matryoshka cabinet)
- Door (entrance door)
- AC Vent (pan up while facing the door, white square AC Vent-looking object on the roof)
- Tombstone (just below the bags to the right of the door)
- Wine Bottle (next to tombstone)
- Police Officer Mannequin (his name is Mario.)
- RC Car (at the foot, to the left of Mario)
- Broom (easy to miss! in between Mario and the Soccer/Volleyball)
- Soccer Ball (at the foot, to the right of the broom Mario)
- Volleyball (at the foot, to the right of the broom and Mario just below the Soccer Ball)
- Fishing Flag (behind Mario)
- Tanuki (to the right of Mario, just left of Boss)
- Shogi Piece (easy to miss, Boss’s body is covering it, you see the right edge of it and tap it. It is a dark yellow object.)
- Coffee Maker (to the right of the Shogi Piece on the same cabinet, slightly to the left of the computer monitor from your perspective)
- Soba Door Curtain (just above coffee maker, shogi piece, hanging from the roof covering the right top corner of the fishing flag).
- Pumpkin (to the right of the soba door curtain, on top of the bookshelf, in front of the big ol’ happy birthday sign)
- Happy Birthday Banner (to the right of the soba door curtain, just above the pumpkin and bookshelf, hard to miss)
- Bookshelf (where the pumpkin’s at, to the right of the fishing flag)
- Darts Machine (to the right of the bookshelf)
- Computer (sitting on Boss’s desk right next to her)
- Desk (the desk Boss and the computer are on)
- Rug (Boss’s desk is right on top of it, pan all the way down)
- Broken Clock (leaning against Boss’s desk, if you panned all the way down for the rug should be hard to miss)
- Skis (right next to the darts machine)
- Snowboard (right next to the skis)
- Triangular Ruler (leaning against the snowboard on the floor)
- Poster (there’s a few, I selected the one just on top of the snowboard since we’re already there)
- Public Bath Door Curtain (just on top of the skis/snowboard/that poster we just talked about, orange piece of fabric)
- Map (overlayed on top of the public bath door curtain)
- Boy Band Poster (below the map, 4 smiling dudes)
- Stationary Bike (below the boy band poster)
- Cymbal (leaning against the wall just below the boy band poster, from your perspective they’re between the stationary bike and the boy band poster)
- Lifesaver (just next to the cymbals, leaning against wall behind the stationary bike)
- Plaster figure (at the foot of the stationary bike/Christmas tree)
- Coat Hanger (to the right of the plaster figure, from your perspective its in front of the christmas tree and in between the tree and the cabinet, there’s 2 white umbrellas hanging from it)
- Christmas Tree (right edge of the room, pan all the way right, although if you’re following this you should be here anyways)
- Mask (Left) (right on top of the Xmas tree hanging from the wall)
- Mask (right) AKA Boss’s grandpa (to the right of the other mask)
- Pennant (pan all the way up and right, its to the right of Boss’s grandpa’s mask)
Puh!
I Wish Mine Were That Glorious
Admired the Sagan’s stereo equipment.
Location:Day 2:Saturday saikAI, just after the tutorial dream “Psync”.
In Reopen Investigation, this will appear as “Sagan Residence”
Easy achievement, pan all the way to the right of the room (you will be basically looking behind your back) until you see the “Speaker System”. Interact with it 4 times.
Miscellaneous Achievements Part 2
Your Name?
Enjoyed a fulfilling chat with Kagami.
This might be have 2-4 different locations where you’ll have to talk to Kagami in order for the achievement to pop up. I will list all 4. Just in case, talk about all the other topics with him and make sure he’s greyed out when you hover him (might have to use the “look” action).
Location 1:Day 1:Friday sigAI, this is literally the first location in the game.
In Reopen Investigation, appears as the second “Near the Merry-go-round in Bloom Park”
Talk to the police officer wearing a white mask in front of you. He’s crouching and has a notepad on his hand.
- Say What’s your name?.
- Say What’s your name?.
- Say What’s your name?.
- Say What’s your name?.
- Say What’s your name?.
- Say What’s your name?.
- Say What’s your name?.
- Say What’s your name?.
Location 2:Day 3:Sunday syokubAI, red branch just before Iris’s Psync.
In Reopen Investigation, appears as “Maid Cafe Sunfish Pocket”
Talk to the police officer wearing a white mask in front of you. He’s crouching and has a notepad on his hand.
- Say What’s your name?.
- Say What’s your name?.
- Say What’s your name?.
- Say What’s your name?.
- Say What’s your name?.
- Say What’s your name?.
- Say What’s your name?.
- Say What’s your name?.
Location 3:Day 4:Monday youdAI, red branch just before Ota’s Psync
In Reopen Investigation, appears as “Cold Storage Warehouse” green highlight.
Date and Kagami share another conversation about his name, not 100% sure it adds u for the achievement but since the conversation is fairly similar to the other two times, I will list it.
Talk to the police officer wearing a white mask in front of you. He’s crouching in front of a bloodstain and has a notepad on his hand.
- Say What’s your name?.
- Say What’s your name?.
- Say What’s your name?.
- Say What’s your name?.
- Say What’s your name?.
- Say What’s your name?.
Location 4:Day 5:Tuesday seisAI, yellow branch (Mizuki route)
In Reopen Investigation, apperas as “Cold Storage Warehouse green highlight.
Talk to the police officer wearing a white mask in front of you. He’s crouching in front of a bloodstain and has a notepad on his hand.
- Say What’s your name?.
Bonephilia
X-rayed the Mermaid.
Location:Day 3:Sunday gyoukAI, purple (blue?) branch just before So’s Psync.
In Reopen Investigation, apperas as “Maid Cafe Sunfish Pocket” green highlight.
Talk to the blue haired mermaid. You will have to x-ray her several times.
- Say (or rather, select) Introductions.
- Click on mermaid and select X-Ray (or press Q). Analyze her skeleton.
- Click on mermaid and select X-Ray (or press Q). Analyze her skeleton.
- Click on mermaid and select X-Ray (or press Q). Analyze her skeleton.
- Click on mermaid and select X-Ray (or press Q). Analyze her skeleton.
Note:The 4th time might not be necessary, however if you do not get the achievement the first 3 times go for it! And if you want some extra flavor text, go for it anyways.
Cooler Heads Prevail
Kept your cool and did not shoot Saito.
Location:Day 6 Wednesday, hakAI pink route AKA “True Ending”, just before Epilogue / right after Date’s reverse Psync.
In Reopen Investigation, apperas as the 3rd “Kabasaki District, Abandoned Factory”.
- When prompted, select “Don’t pull the trigger”.
Note:Selecting “Pull the trigger” repeatedly will result in a Bad Ending BUT it will also add a few things to the Appendix, so I highly recommend doing so at least once. After you get the bad ending, you can easily reload to this point using Reopen Investigation and press CTRL to fast forward.
Surprisingly Good Together
Discovered the marriage of the yakuza and the nurse.
Location:Three Months Later kassAI, end of pink branch AKA Epilogue.
Its possible that for this achievement you have to talk to characters in 2 different locations.
Location 1:Kumakura Office
Talk to Member B (pan to the right, he’s the skinny blond Yakuza…and apparently a doctor)
- Say Your clothes…Are you wearing the right size?
- Say What’s your name?
- Examine Member B (more than likely not necessary)
Location 2:Matsushita Diner
Talk to the Nurse.
- Say You’re…?
- Say You seem pretty happy.
- Say What’s your name?
The Dream Wanderer
Saw This Man twice in Somnium.
Location:Both of Iris’s Minecraft ShovelForge Psyncs.
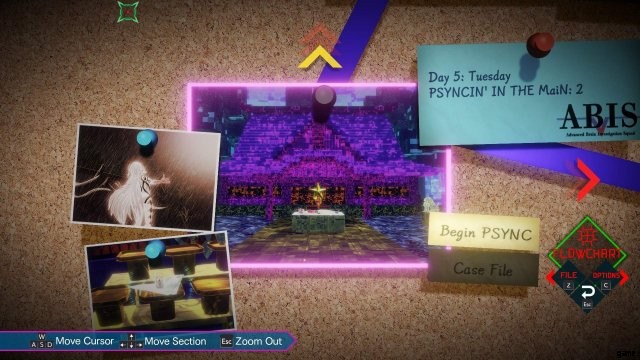
Location 1:Day 4 Monday, PSYNCIN’ IN THE MaiN:1

After you open Mental Lock #2, go past Gate 3 (select Dig), then walk all the way down the hall until you get to Monitor D. There’s an entrance next to Monitor D and you can see a ??? inside.

Walk inside the building and Talk to ???.

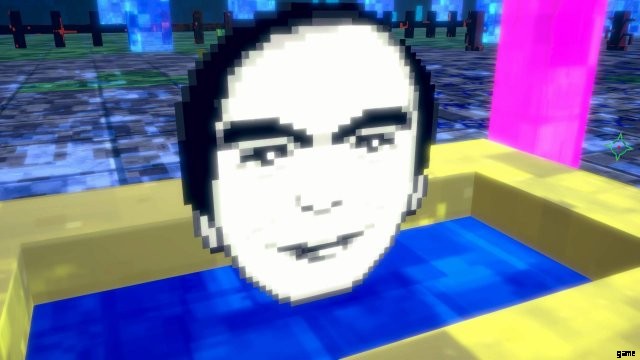
You will see the man for the first time.
Location 2:Day 5 Tuesday, PSYNCIN’ IN THE MaiN:2:

As soon as you enter the somnium, go to the Chozuya and proceed to wash your belly button Investigate it.


You will see the man the second time and get the achievement.
Protect Your Head
Had Aiba wear the basket and the pot in Somnium.
There’s 2 Somniums you will have to enter for this, I would suggest entering them in the same order as the next achievement can also be gained in the 2nd somnium listed here and thus you will be able to obtain 2 achievements at once.
Location 1:Day 4 Monday, PSYNCIN’ IN THE CURTaiN AKA #89’s Psync

After you get past Mental Lock #2, go to the kitchen. There will be a pot on the stove.


Wear it with pride.
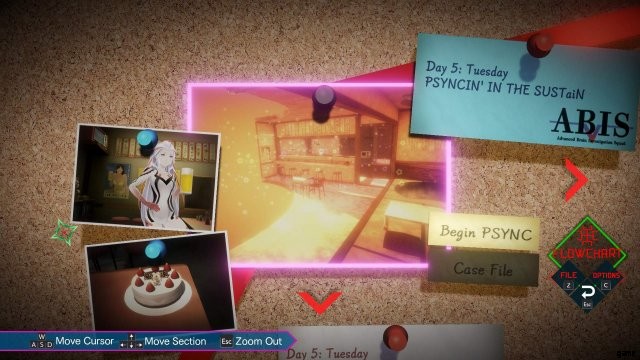
Location 2:Day 5 Tuesday, PSYNCIN’ IN THE SUSTaiN AKA Mayumi’s Psync
Note:The next achievement is obtainable in this somnium, do not exit after you’re done!
Once you get past Mental Lock #1, there will be a bucket on the floor.


Wear it to boost your defense to the max and to get the achievement.
Crazy Awful Customers
Saw three autographs of crazy customers in Somnium.
Location:Day 5 Tuesday, PSYNCIN’ IN THE SUSTaiN AKA Mayumi’s Psync

Note:If you’re following from the previous achievement, go to the opposite wall and interact with the calendar/clock in order to get rid of the 2x timie and gain a positive timie.
Once you get past Mental Lock #1, go to the wall above the bucket and interact with the autographs.


You will have to select all 3:The left, The middle and The right in order to get the achievement. I’d suggest leaving the right for last.
Miscellaneous Achievements Part 3
A…Do…Rab…Bit…
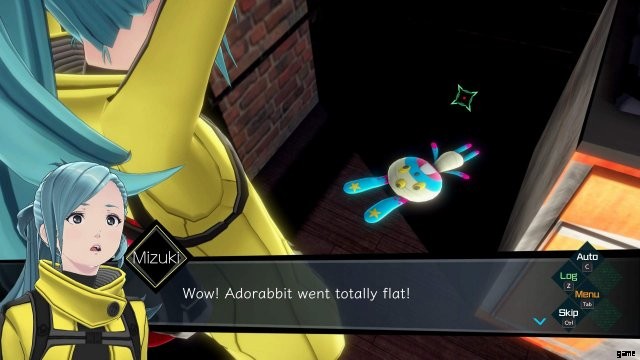
Almost got cursed by Adorabbit in Somnium.
Location:Day 6 Wednesday, PSYNCIN’ IN THE CAPTaiN AKA Date’s Psync

Once you get past Mental Lock #4, go to the Fridge and Lift it.


A pot will appear next to the fridge. Interact with it and turn up the fire.


