Dieser Leitfaden lehrt Sie alles über die Verwendung von info_nodes.
Was ist ein Knoten?
Ein Knoten ist ein Navigationspunkt, der von der KI verwendet wird, um ihr zu helfen, sich auf Ihrer Karte zu bewegen. Möglicherweise haben Sie beim Laden einer neuen Karte die Meldung „Rebuilding Node Graph“ gesehen. In diesem Stadium erstellt die Engine ein Liniennetz zwischen allen Knoten, damit Monster und NPCs wissen, wo gültige Pfade von einem Knoten zum anderen sind.
Knoten und KI
Auch ohne die Knoten weiß die KI in der Goldsrc-Engine, wie man durch den 3D-Raum geht und um kleine Objekte herumnavigiert. Die KI wurde in Sven Co-op im Laufe der Jahre verbessert und kann noch besser selbstständig navigieren. Es ist jedoch immer noch auf Knoten angewiesen, um seinen Weg durch kompliziertere Szenarien zu finden und sein KI-Verhalten auszuführen.
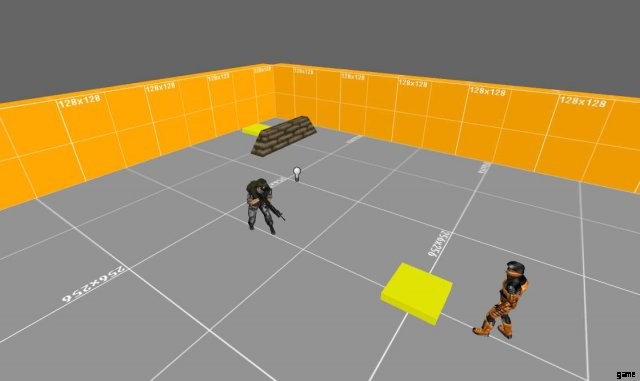
Dieses erste Beispielszenario stellt den Zombie hinter die Theke. Es wird auf den Spieler zulaufen wollen, aber es wird fehlschlagen, da es keinen klaren Weg bestimmen kann. Die KI mag intelligent genug sein, um an kleineren Objekten vorbei zu navigieren, aber dieser große Zähler ist zu viel für sie.

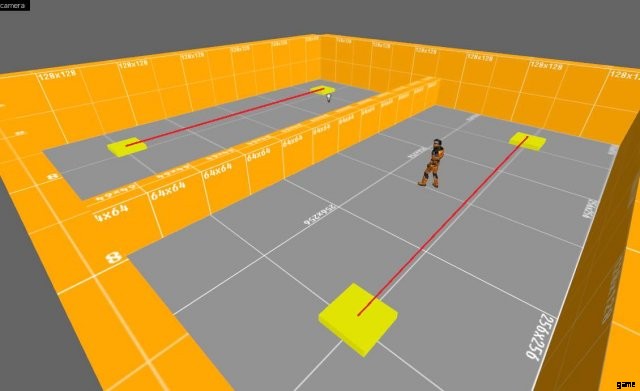
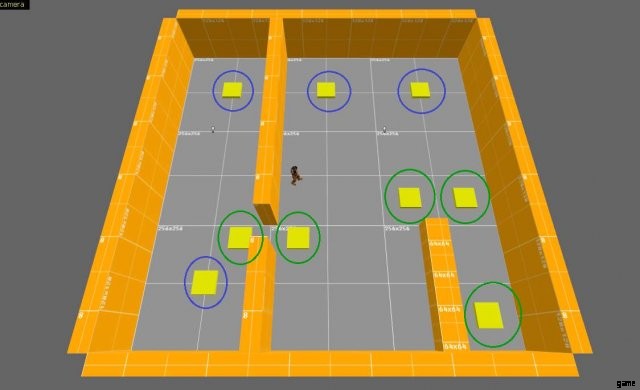
Lassen Sie uns einige info_nodes (gelbe Quadrate) hinzufügen. Diese Punkte erzeugen ein Netzwerk von Pfaden, die der Zombie nehmen kann. Sobald es den Spieler entdeckt und ihn nicht direkt angreifen kann, sucht es nach Anleitung im Knotennetzwerk und bestimmt den schnellsten Weg von seinem aktuellen Knoten zu dem Knoten, dem der Spieler derzeit am nächsten ist (angezeigt durch die rote Linie). .
Ein weiteres Beispiel für die Verwendung von Knoten besteht darin, der KI bei der Ausführung ihres speziellen Verhaltens zu helfen. Der KI-Code dieses Grunt sagt ihm zum Beispiel, dass er Deckung suchen soll, wenn er Schaden erleidet. Es sucht im Knotennetzwerk nach dieser Stelle, also habe ich einen strategischen Knoten hinter dem Sandsack platziert.
Knotennetzwerke
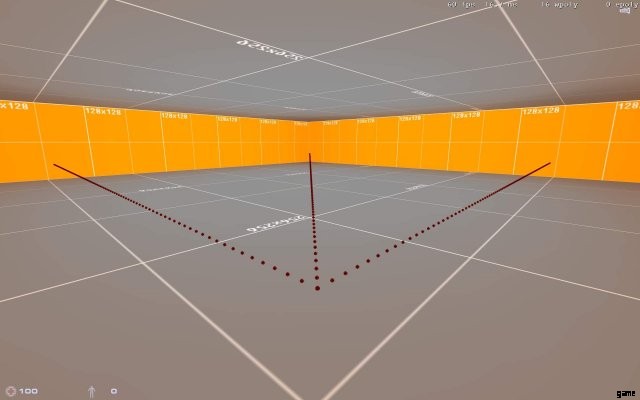
Wie wir festgestellt haben, sind Knoten wichtig, damit die KI richtig funktioniert. Aber wie ist das Netzwerk aufgebaut? Die Engine bestimmt, ob es eine gerade Sichtlinie zwischen zwei Knoten gibt, und wenn ja, wird eine Verbindung hergestellt. Ich habe vier Knoten in diesem Raum platziert, und die Links sehen so aus:
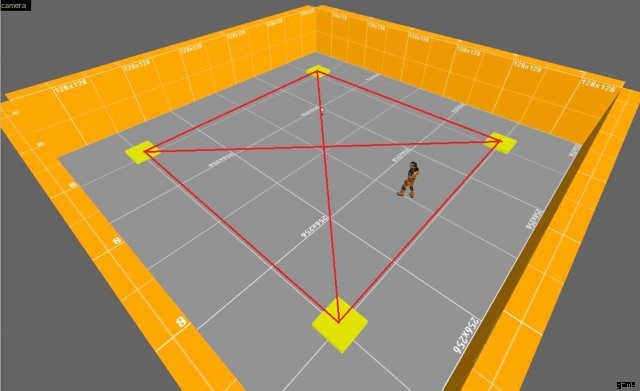
Sie können diese Links tatsächlich im Spiel sehen. Gehen Sie zu einer Stelle, an der Sie wissen, dass sich ein Knoten befindet, und geben Sie „Impuls 199“ in die Konsole ein. Dadurch werden Ihnen alle Links für diesen Knoten für eine begrenzte Zeit angezeigt. Beachten Sie, dass diese Informationen nur für Knoten angezeigt werden, zu denen Sie nahe genug sind, es wird Ihnen nicht das Netzwerk für die gesamte Karte angezeigt.
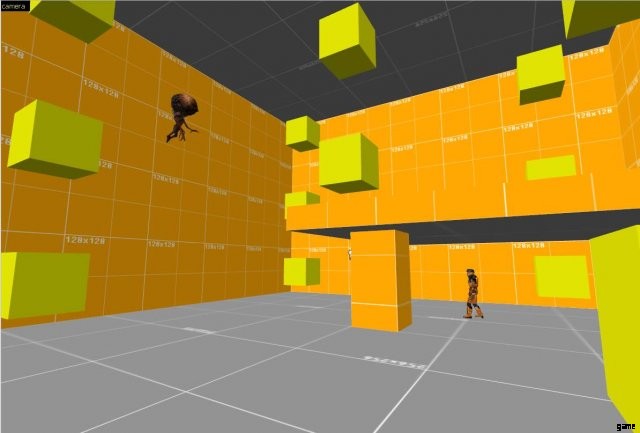
Ein einzelner Knoten kann sehr viele Verbindungen zum Rest des Netzwerks halten. Solange eine Sichtverbindung besteht, soll es einen weiteren Link geben.

Die Sichtbarkeit zwischen den Knoten kann durch Solid-World-Geometrie und auch durch func_walls blockiert werden, solange die Wand höher als 32 Einheiten ist.
Der Punkt, an dem der Knoten erstellt wird, schwebt immer 32 Einheiten über dem Boden. Wenn also eine Wand 32 Einheiten oder niedriger ist, gibt es eine Verbindung. Die Engine erstellt auch Verbindungen durch nicht feste Bürsten, egal wie hoch sie sind.
Four Different Types
Now we know how the network is built, we can expand on this knowledge by introducing the different types of monsters. There are four types:
- Small sized (Headcrab, Chumtoad, etc)
- Normal sized (Zombie, Grunt, etc)
- Large sized (Gargantua, Bullsquid, etc)
- Flying (Alien Controller, Stukabat, etc)
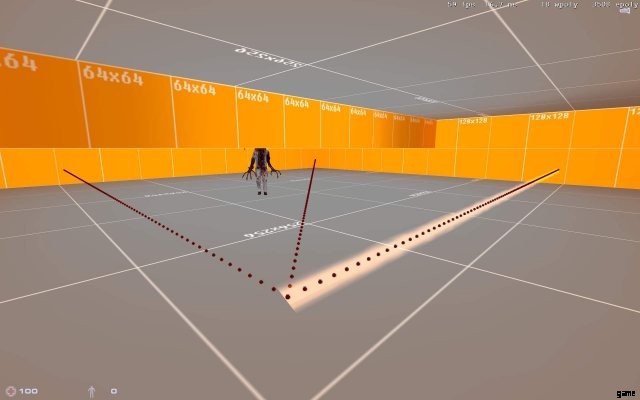
When the node network is built, it will also determine if a certain monster type can actually use the paths. A passage might be too small for a Large sized creature, so it will not establish a usable link between the nodes. You can highlight the different types by use of the other impulse commands. Small creatures will use the default path visible with impulse 199. impulse 197 will show you the paths for Normal sized creatures, impulse 196 for Large sized Creatures and impulse 195 for all airborne creatures (more on them later!).
In the following example you can see how the node network for Normal sized creatures (highlighted as a pink beam) doesn’t extend into the other room, because the brush blocks the way. Small sized creatures would however be able to crawl under it and use the default node link to find their way.
How to Properly Place info_nodes
Now that we know how the node network works, we can move on to placing our nodes. What are good practises to get the most out of our nodes?
When the map starts, all info_node entities will fall to ground level, so it does not matter how high above the ground you place them. Node points will always be created 32 units above the ground where you place your info_node entity. Just make sure that the origin on the info_node is not inside the floor because this might cause the engine to overlook them.
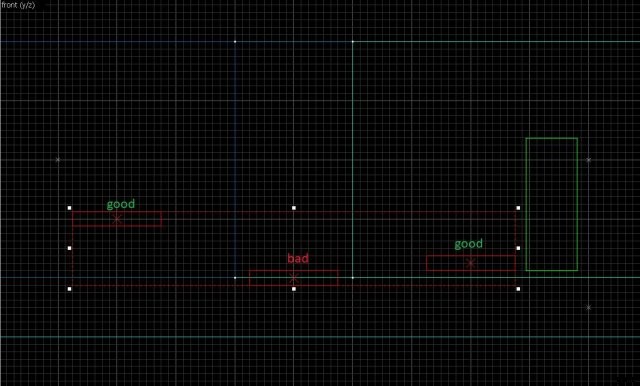
So where to place your nodes? We’ve seen that AI can get into trouble whenever there is an obstacle or no clear line between it and the player. So it’s good to add a few nodes to help them navigate around (green). You can see those nodes at the door and around the counter. Next to that it’s good to place a few ‘anchor points’ (blue) in the room. This will give the AI a starting point to navigate from and it can serve as a spot for special AI behaviour (such as the Grunt running for cover earlier).
Some guides might tell you to place an info_node every X units. This is not strictly necessary. The engine also doesn’t require it. You can place two nodes at a distance of 9000 units from eachother and they will still create a link, as long as they have a line of sight to eachother. You just have to place enough nodes for the AI to have enough anchor points. If you do not have enough, you might encounter undesirable AI behaviour. For instance, if the node a Grunt is falling back to is too far away, it will not resume its normal behavior for a long time. If the node is closer, it will then decide on a new course of action once it has reached the node.
As mentioned before, nodes will only create a link where there is a visual line of sight between two nodes. Luckily, it ignores movable brush entities, such as func_doors, so you can place this door in between the nodes and there still will be a link.
The nodes will link through most brush entities that are movable, such as func_train, func_rotating, func_button, but also func_breakables. Next to that it will go through all non-solid entities such as func_illusionary and everything that uses zhlt_noclip 1.
Info_node_air
Airborne monsters use a special type of node called the info_node_air. Just as regular info_nodes, these are used for navigation and AI behaviour. However, you might find that airborne monsters are not as good as finding their way to the player as land creatures, since they also have to navigate in upward and downward directions. Info_node_air will not drop down to ground level, as the info_node does and info_node_air and info_nodes will not create links to eachother.
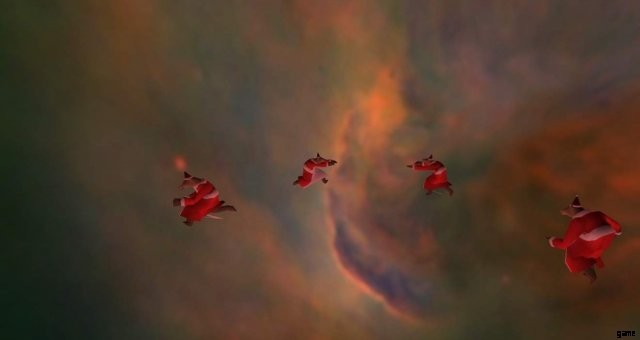
Especially the Alien Controller will hardly move on its own without the help of air nodes. To make sure it will float down or up to engage players on their level, you’ll need enough air nodes on that same level. Without these, the Alien Controller will just hover there, not knowing how to get to the player under the ledge. So when you use these monsters, it’s good to place extra nodes.
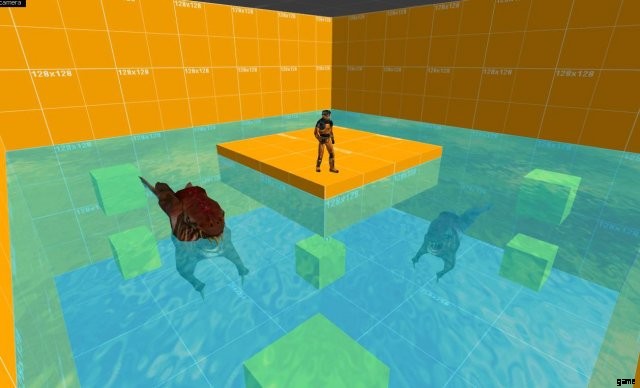
Other flying creatures that use the air nodes are the Stukabat and the Flyer Flock but also swimming creatures make use of them, such as the Leech and the Ichthyosaur. So make sure you place enough info_node_air entities in the waters that house them.
The Apache and the Osprey technically also use the air nodes network for navigation, however, the Osprey will only function with path_corners to guide it (the game crashes without). The Apache will use air nodes to find its way to the player but isn’t very good at it and will just wierdly wobble after the player. Setting up a network of path_corners for the Apache will make it behave for more realisticly and it will then require no air nodes for its navigation.
Less is More
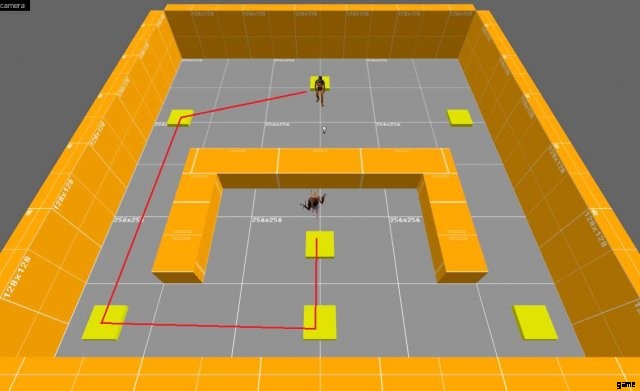
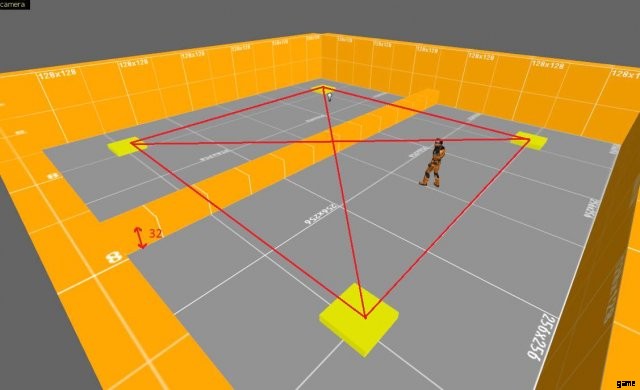
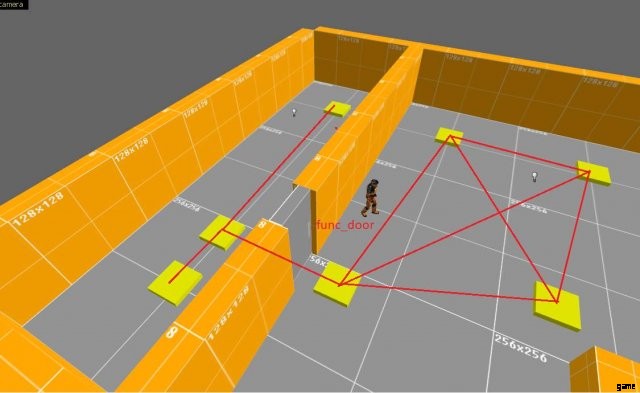
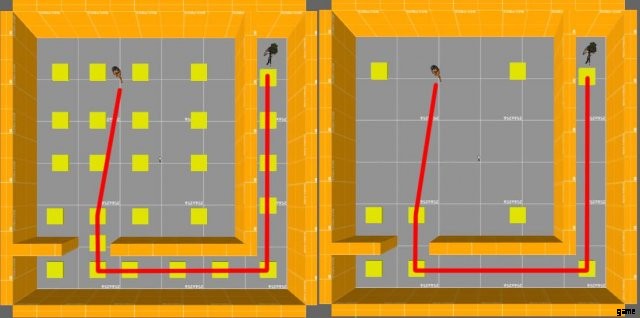
As we’ve established, you just need enough nodes for the monsters to find their way around. But often maps are littered with nodes that serve hardly any function at all. The example below shows you the route (red line) the Grunt has to take to find its way to the player. It only needs those four nodes to get there, so each node in between is just an extra unneccesary step. So if we remove all of those and leave a few nodes as anchor points for navigation and AI behaviour, we can do with almost a third of the nodes we started with.
Having less nodes is good in multiple ways. First, it uses up less entity slots (which are limited). Secondly, it makes the node graph calculation faster and finally, it makes the node network far less complex. This can benefit the performance of your map, since each monster has to do route calculations. For only a handfull of monsters this will not be a problem but imagine a large map with many active roaming enemies accessing the node network constantly.
Misc. Info
In Sven Co-op, the info_node entity also has an Activity and Hint type keyvalue. These currently have no function. Judging from the source code, Valve planned to put extra information into nodes, so the AI could use them for specific purposes. Imagine a node that suggests to a Grunt that this is a place to find cover. These hint nodes actually ended up being used in Half-Life 2. In HL1 the code for hint nodes is only found for the Houndeye, where it can investigate buzzing machinery and blinking lights.