
In dieser Anleitung wird detailliert beschrieben, wie Sie Blender verwenden, um Armatures aus A Hat in Time effektiv zu importieren und wie Sie Armatures effektiv in Ihre Mods exportieren!
Leitfaden zum korrekten Importieren/Exportieren von Armaturen für Blender
Einführung
Dies ist ein grundlegender Leitfaden und behandelt nur den Import und Export von Armaturen. Alles, was hier nicht behandelt wird, fällt höchstwahrscheinlich nicht unter diesen spezifischen Geltungsbereich.
Importieren:Es fehlt ein Wurzelknochen!
Blender hat die unangenehme Angewohnheit, den Wurzelknochen jedes Modells aus dem Spiel zu fressen, wenn Sie es importieren. Das heißt, wenn Sie entweder das Modell bearbeiten und wieder ins Spiel einfügen oder Ihr eigenes Modell mit dem Skelett verwenden möchten (z. B. benutzerdefinierte Kostüme oder spielbare Charaktere), müssen Sie den Root-Bone wieder zu Ihrem hinzufügen Modell! So geht's.
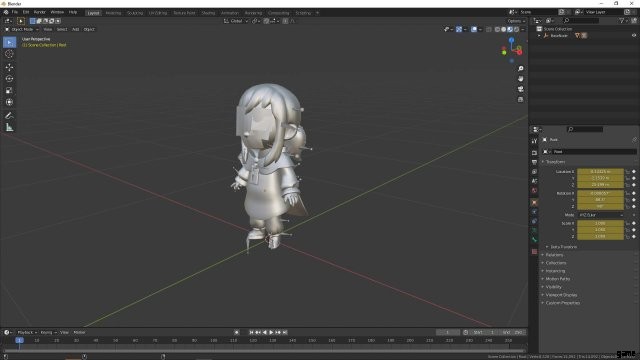
Beginnen Sie mit dem Importieren des Modells in Blender (Datei> Importieren> FBX). Für diese Anleitung werde ich das Modell verwenden, das die meisten Leute wahrscheinlich verwenden werden, Hat Kid.
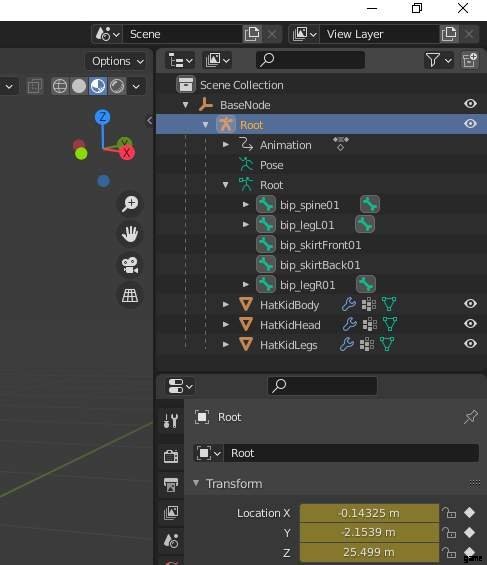
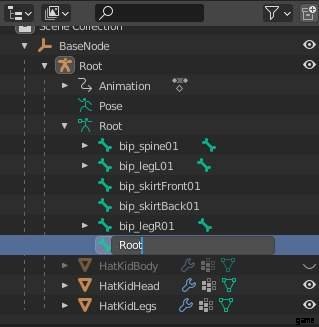
Was wir gerade tun, ist genau zu bestimmen, wo Sie den Wurzelknochen neu hinzufügen müssen. Gehen Sie in die obere rechte Ecke und öffnen Sie die BaseNode-Hierarchie, um die Armatur mit dem Namen „Root“ anzuzeigen.
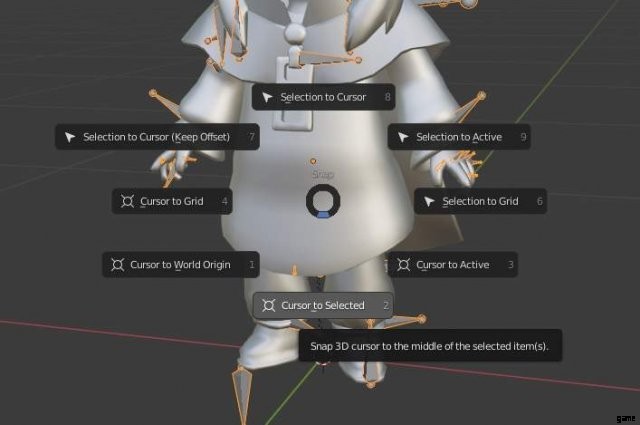
Gehen Sie zurück zur Hauptansicht des Modells. Wir möchten den 3D-Cursor an die genaue Position des Ankers bewegen. Halten Sie dazu Shift+S gedrückt und wählen Sie „Cursor to Selected.“
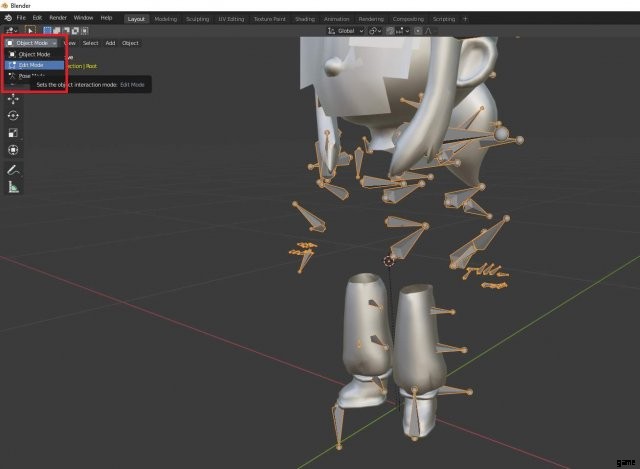
Dieser nächste Teil ist optional, aber ich denke, er macht die nächsten paar Schritte einfacher. Ich verstecke das Netz des Hauptkörpers, indem ich es auswähle und H drücke. Wählen Sie nun die Armatur „Root“ erneut aus und gehen Sie in den Bearbeitungsmodus.
Fügen Sie jetzt einen neuen Bone hinzu.

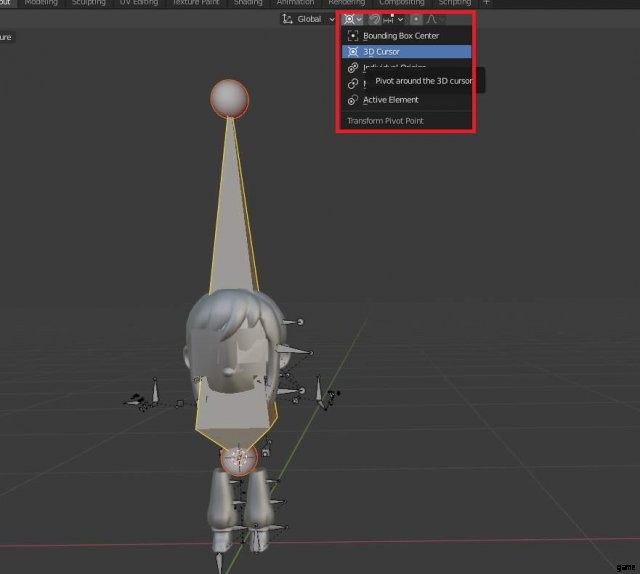
Wow, der Knochen ist viel zu groß! Vielleicht möchten wir es verkleinern, bevor wir mit dem nächsten Schritt fortfahren. Wenn der neue Knochen ausgewählt ist, ändern Sie den Transformations-Pivot-Punkt in „3D-Cursor“ und verkleinern Sie Ihren neuen Knochen. Die Abkürzung für die Skalierung ist S.
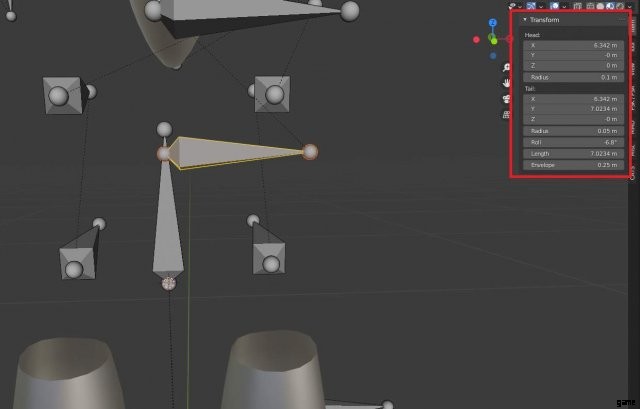
Jetzt, da unser Knochen eine anständige Größe hat, wollen wir ihn richtig positionieren, um mit dem Rest der ruckeligen Armatur übereinzustimmen. Zu diesem Zweck empfehle ich, die Positionen und die Rolle des Kopfes und des Schwanzes eines Wirbelsäulenknochens zu kopieren. Um ihn jedoch in der Wurzelposition zu halten, lassen Sie den X-Positionswert Ihres neuen Knochens gleich und kopieren Sie nur die Y- und Z-Positionswerte des Wirbelsäulenknochens. Ich bin mir auch nicht sicher, wie sehr sich dies auf die Angelegenheit auswirken wird, aber ich kopiere immer auch den Roll des Knochens, der in diesem Fall -6,8 beträgt. Um dieses praktische Menü-Popup im Screenshot anzuzeigen, das Ihnen diese Standortinformationen mitteilt, drücken Sie N.
Okay, unser Knochen sitzt jetzt wunderbar an seinem Platz. Es heißt aber immer noch „Bone“, und das ist nicht gut. Gehen Sie zurück nach oben rechts und benennen Sie es in „Root“ um und denken Sie daran, dass Groß- und Kleinschreibung wichtig ist!
Als nächstes haben Sie der Ordnung halber noch zwei Dinge mit dem Namen „Root“ über Ihrem Knochen, und das kann verwirrend werden. Es ist vielleicht am besten, diese auch umzubenennen, also nehme ich manchmal einfach ein generisches „SkeletalMesh“ oder „Skelmesh“. Solange sie separate Namen haben, mit denen Sie einverstanden sind, sind Sie in Ordnung.
Now, every other bone that is sitting at the same level as your Root bone will have to become children of your Root bone. To do this, select the bone in edit mode (preferably through selecting them in the upper right) and set the bone’s parent to “Root” from the “Bone Properties.” Do this for all of the bones that are on the same level as your Root.

The armature has been successfully repaired! What about the model though? It is missing weight data for the Root bone! Thanks a lot Blender. No worries, we can restore the weight of the Root pretty simply.
Importing:There’s Missing Weight Data!
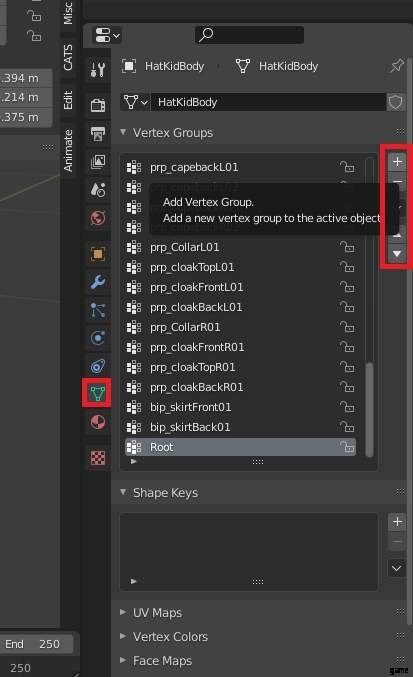
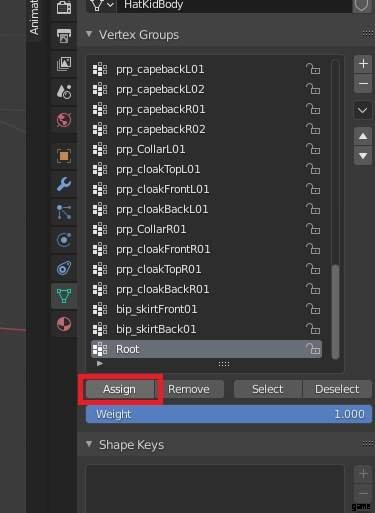
In order to restore weight data to our model, go to the bottom right with your model selected and go to the “Object Data Properties” tab. Once there, you should be greeted by the Vertex Groups in full view. Go to the right and click on the plus icon (+) to add a new vertex group. Name it “Root” to match with your new bone, and remember again that capitalization is important!
In Edit Mode, select every single vertex on the model. The shortcut for that is A. Go back to the vertex groups, and click the “Assign” button while you have the “Root” vertex group selected. For those of you who aren’t completely new to Blender, you may think I am committing a grave crime. Bear with me for a second, I promise this is for a reason.
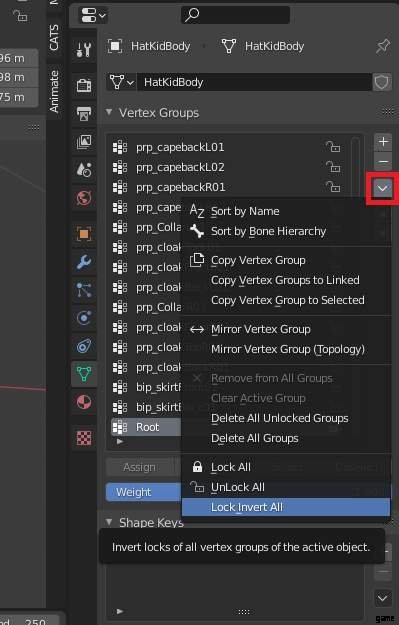
Now, click on the lock icon next to the “Root” vertex group. After you do this, go to the dropdown menu in the screenshot below and invert the locks. This will lock every single vertex group except for the Root.
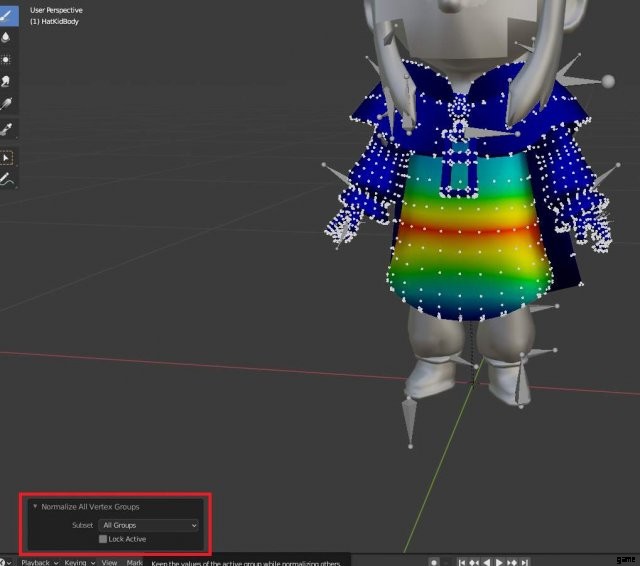
Go into Weight Paint Mode and use the “Normalize All” function (Weights>Normalize All).

If nothing happens, look in the bottom left and make sure that the “Lock Active” box is NOT ticked.
For Hat Kid’s model specifically, part of her leg model is weighted to the Root as well. Repeat all of these steps for any other models that need weight restoration. Congratulations, you have successfully restored the Root bone’s weights to the model!
Exporting:My Model is Not Animating Correctly In-Game!
I am detailing this part for the sake of convenience instead of simply putting a link.
For some odd reason, Blender likes to add a new root bone when you export to FBX. The Modding Tools don’t like that sort of thing, so your models will not animate correctly unless you prevent Blender from doing this. Locate Blender’s FBX export python script by navigating to
- C:Program FilesBlender FoundationBlender”Version”scriptsaddonsio_scene_fbxexport_fbx_bin.py
This is a protected file, so you need administrator permissions to edit it. Open any text editor of your choosing (like Notepad) in Administrator mode. Once you have the specified file open in your text editor in Admin mode, find the following lines:
elif ob_obj.type ==‘EMPTY’ or ob_obj.type ==‘ARMATURE’:
empty_key =data_empties[ob_obj]
connections.append((b”OO”, get_fbx_uuid_from_key(empty_key), ob_obj.fbx_uuid, None))
It is quite a lengthy document, so it helps to simply have the computer to the searching for you. Hit Ctrl+F and search for elif ob_obj.type ==‘EMPTY’, and it should find the necessary lines immediately. Put a pound symbol (#) before each of those three lines. It should now look like this:
# elif ob_obj.type ==‘EMPTY’ or ob_obj.type ==‘ARMATURE’:
# empty_key =data_empties[ob_obj]
# connections.append((b”OO”, get_fbx_uuid_from_key(empty_key), ob_obj.fbx_uuid, None))
Save the file and restart Blender. Blender will no longer add a new root bone by itself. Remember, if you get a new version of Blender or upgrade your current version, you will most likely have to do this again!
Schlussfolgerung
Now you’re an armature-using master! Get out there and show Blender you mean business!