Anleitung explizit für neue Spieler geschrieben.
Startleitfaden für Neulinge
Das Spiel zusammengefasst
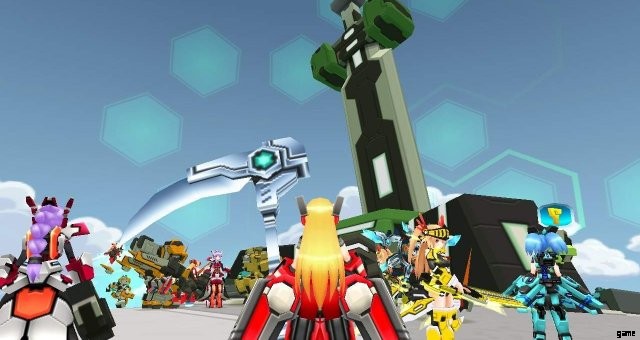
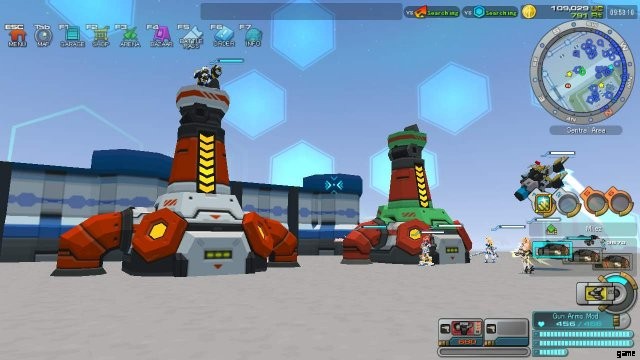
Die Hauptattraktion von Cosmic Break ist sein umfangreiches Anpassungssystem, mit dem Sie Arme, Beine, Köpfe und Booster austauschen können, um Ihren eigenen Charakter zu erstellen. Sie bringen diese Charaktere dann in verschiedene Spielmodi, wie die PvP-fokussierte Arena und den PvE-fokussierten Missionsmodus, wobei jeder dieser Modi seine eigenen Belohnungen hat, die Sie später einlösen können. Charaktere sind eine von vier Klassen, und die PvP-Modi sind in zwei Teams aufgeteilt, die darum kämpfen, das andere Team zu ermorden.
Klassen
Einheiten in diesem Spiel sind in vier Klassen eingeteilt, und ihr Verhalten und ihre verfügbare Ausrüstung bestimmen, wie sie im Spiel funktionieren. Land, Luft, Artillerie und Unterstützung. Lands laufen schneller und haben eine kürzere Flugzeit, Airs haben eine längere Flugzeit, Arts haben bessere vertikale Zielwinkel und Supports haben keine wirklichen Boni. Länder sind schwach gegen Strahlen, Luft sind schwach gegen Sprengen, Künste sind schwach gegen Nahkampf, Unterstützungen sind gegen nichts schwach. Abgesehen von dieser Ausrüstung gibt es auch Klassenbeschränkungen.
Länder haben im Allgemeinen auf Granaten basierende Geschütze, die keiner Klasse zusätzlichen Schaden zufügen, und viele Schilde und Nahkampfwaffen.
Airs haben die meisten Strahlenwaffen im Spiel und sie haben eine ziemlich große Menge an Langstreckenwaffen. Ihr Gimmick sind verlängerte Boost-Zeiten, wodurch sie viel länger fliegen können als jede andere Klasse im Spiel.
Künste haben den größten Zugang zu Waffen in der Waffe, und sie haben die explosivsten verfügbaren Waffen, die Airs zusätzlichen Schaden zufügen.
Supporter haben eine erträgliche, aber nicht angenehme Auswahl an Waffen zur Auswahl. Sie bekommen von allem sehr wenig. Sie gleichen dies mit exklusivem Zugang zu Unterstützungsausrüstung aus, die Verbündete heilen oder Spieler buffen/debuffen kann. Abgesehen davon ist ihre direkte Kampffähigkeit im Allgemeinen gering.
Statistiken
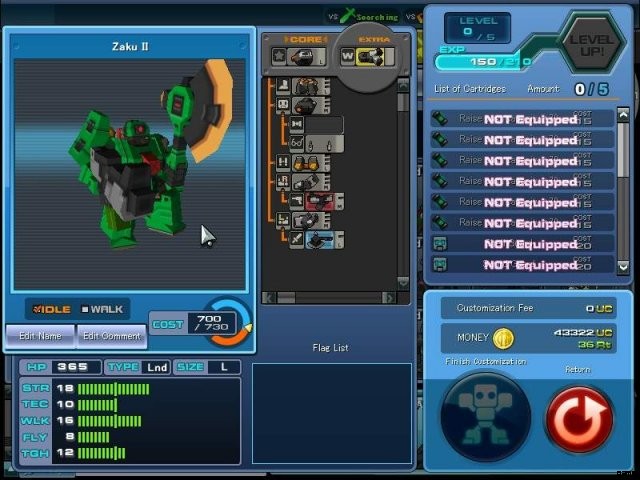
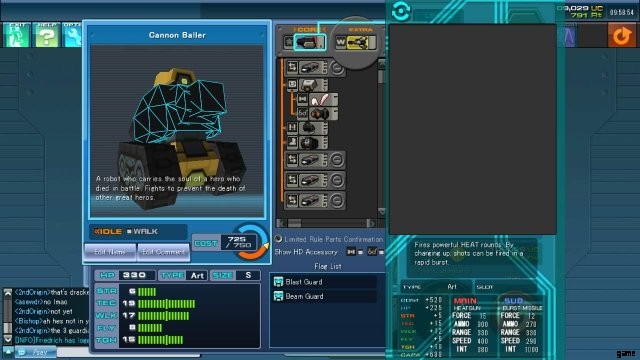
Von oben beginnend, geben die Kosten an, wie viele Punkte Ihre Einheit von der Gesundheitsleiste Ihres Teams entfernt, wenn sie stirbt. Die Kapazität ist der maximale Preis, den Ihre Einheit haben darf. Jedes Teil, jede Waffe und jede Patrone erhöht die Kosten Ihrer Einheit. Kapazitätskarren geben Ihnen mehr Kapazität und Gesundheit. HP ist Ihre Gesundheit. Wenn es Null erreicht, stirbst du. Gegenstände und Heiler können dir Gesundheit zurückgeben.
STR/TEC sind deine Nahkampf- und Waffenstatistiken. Sie bieten nur pauschale Boni für eure auf STR-Schaden und TEC-Schaden basierenden Waffen, ohne zusätzliche Boni. Es ist nur +Schaden. Das Spiel verwendet eine Formel, sodass Sie nicht für jeden Punkt, den Sie in diesen Statistiken haben, 1 Schaden erhalten, sondern nur an bestimmten Haltepunkten Ergebnisse erhalten, je nachdem, wie hoch die Kraft (Schaden) der Waffe ist. Waffen mit höherer Kraft erhalten bessere Boni von den Schadensstatistiken. Um es klar zu sagen, diese „verbessern nicht Ihre Fähigkeit zu zielen“ oder so etwas. Solche Leistungsstatistiken stammen von der Waffe selbst. Es ist nur Schaden.
WLK/FLY sind Ihre Mobilitätsstatistiken. Einer ist für die Bodenbewegung und der andere für das Fliegen. Einige Module wie Boost Run verwenden eine Mischung aus diesen, und einige von ihnen wie Sway verwenden ausschließlich WLK.
Dieses Spiel hat ein System, bei dem je mehr Schaden Sie in kurzer Zeit erleiden, desto mehr wird er reduziert. This resets after several seconds, and TGH dictates how quickly this system kicks in. TGH also increases your resistance to being stunned by damage (only damage, certain weapons will stun you regardless and melee-type damage will always stun you unless you have super armor)
That yellow thing in the corner is your wonder bit, which is like those floating gun things you get in Gradius. Activating and deactivating them makes you invincible during the animation, and while they’re active they’ll attack nearby enemies automatically.
Fight Stats
Weapons have stats on them that are confusing.
Force is the raw damage, TEC and STR are working to increase this number. A weapon’s base damage is it’s force.
Ammo is ammo. You’d think this is straightforward, but there are some weapons that use multiple counts of ammo every time the weapon fires. These are usually obvious though and you’ll notice it when you shoot them.
Range means several things, for guns it means the lock on range, and it’s also generally representative of how far the bullet will travel.
For melee, range generally refers to the range that the weapon will track, but some weapons are weird and range refers to how far out the submelee goes. You’ll have to experiment on these ones.
Speed on guns refers to how many range units the projectile travels in one second. If a gun’s range and speed are the same then the bullet will travel to that range in one second. It used to be that having a speed 1.5x higher than your range made landing hits easy.
On melee weapons, speed can refer to several things, but it generally refers to how fast your unit travels during the time it moves.
INT gets complicated. It refers to way too many things and it flips between which one on a weapon basis. On guns, it generally means the firerate, but on certain guns it seems to refer to the cooldown time. On melee weapons, it’s generally representative of the cooldown time.
Fights
Weapons are split into two categories, main weapons and sub weapons. The short explanation is main weapons are the red ones that you use the left mouse button for, sub weapons are the blue ones you use right mouse button for. Mains are generally guns, and subs are split up into melee weapons, selfbuffs, and lockon projectiles.
Aiming a main weapon at someone will lock on to them and enable aim assist, but aim assist isn’t 100% and you have to lead your shots or else you won’t hit anything.
Sub melees involve pressing the right mouse button and the attack animation will play out. Some sub melees are special snowflakes and will have directional inputs, pressing the left mouse button to do different attacks, etc. Generally the game tells you about this.
Every sub melee has a set combo, or amount of attacks the weapon does on it’s own. If the weapon allows for it, you can combo from one melee weapon into another, which gives a damage bonus when you do this. Some weapons don’t allow for comboing into them, some don’t allow for comboing from them, and some don’t allow comboing at all. After a combo of a certain length, enemies will obtain a flashing melee invincibility. As usual, you’ll have to test these things.
Lockon subs usually refer to things like missiles and debuff shots, but can sometimes refer to certain melee weapons. You activate these by looking at an enemy while in the range of the weapon and waiting for the faint lockon circle to appear. The game will let you know when the subweapon is locked on, and at that point you can activate it. It’s hard to give a description of these because there’s so many lockon sub ranged attacks in the game.
Choose Your Pokemon
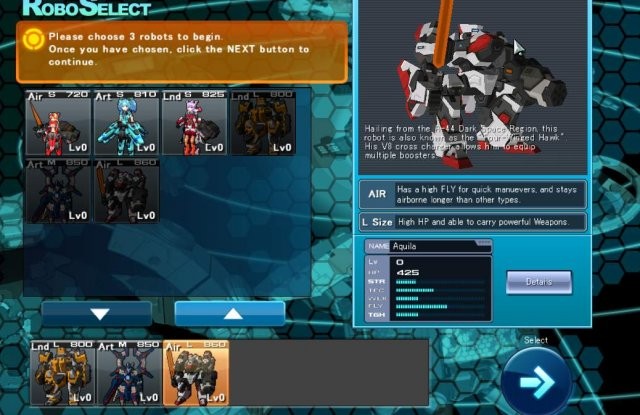
The girls are cute and all, but you can buy them with UC at any point in time. You’ll need parts from mechs to make strong builds later on and every mech here costs paid currency to obtain. Amateus is a direct counter to Baltheon, who is a strong meta viable unit right now and Aquila has decent core weapons and is good for clearing out one of the quests in the game.
Hound Dog exists. He’s not that good so you can replace him with one of the girls if you absolutely want to. His weapons aren’t that good and Mighty Byne is available in the shop as a far superior land unit in today’s balance. Amateus is a decent alpha core and his parts can be repurposed for custom Art builds on units you’ll recieve later. His built in weapons are pretty good too. Aquila has a built in boost regain in his core and his weapon is decent, but not great.
Leveln
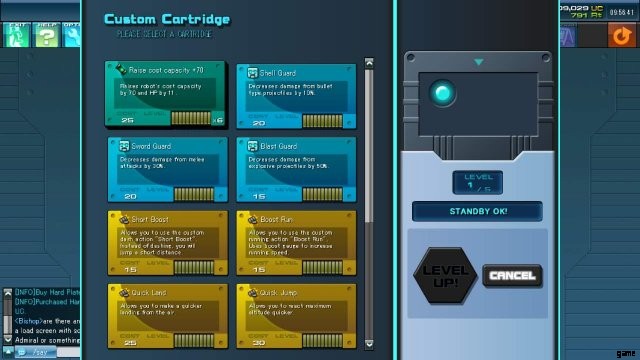
As you participate in activities on the Ark, your units will gain experience and eventually become eligible for leveling up. When you level up, you select one (1) cartridge that grants a benefit to your unit. One of the first thing you’ll need is capacity cartridges, as these increase your capacity and allow you to hold better weapons and tune your unit with higher stats. It’s also generally a good idea to have at least one guard cart. Sword Guard, Blast Guard, and Beam Guard are all really good, but shell guard’s bonus is too low to be worth taking. You can’t take a guard for a damage type your unit is weak to.
Certain units with an internal weapon will have cartridges that usually increase the damage of the built in weapon. In order to see the benefit of these cartridges you’ll have to click on the weapon itself to see the updated stats. In Buff Devastator’s case, it makes his heal bubble heal for 100.

While most cartridges are passive and grant background buffs, like invisibility on radar, some cartridges are active and will cause your unit to do something different. Most of these active carts are dash carts like Short Boost or Assault Step. A lot of the active carts are custom install only, meaning you have to go to the shop to buy and install them. You can even find some of the standard dash carts here, which is good if you want to custom install it and swap in an extra capacity cart or guard into a build.
Tuning
In order for you to not get harvested like a crop in the arena your unit is going to need tunes, and more specifically you’re going to need mobility as soon as possible. Throughout the game there are activities like Arena or Mission that will give out tuning materials that you can use to increase the stats on your unit. Once you have a supply of materials from doing Legion missions and your rank up rewards, you can find the Cosmos Pot which is located in several areas in the game.
Tunes are split up into several categories. +1 tunes have a 100% success rate, but because of slot limitations, no viable build is using exclusively these. High tunes give +2 to a stat and have a chance to fail, although High Alphas are going to be the main tune you use in this category due to cost reasons. A straight High is 15 cost while a High Alpha is 10 and gets rid of a stat point you weren’t using anyways. High Betas and Gammas are cheaper and will deduct a second stat if your build doesn’t require it. These are good for freeing up cost in a build for more stats or parts, but you have to be careful with them because you can easily bring a stat in the negative by doing this.
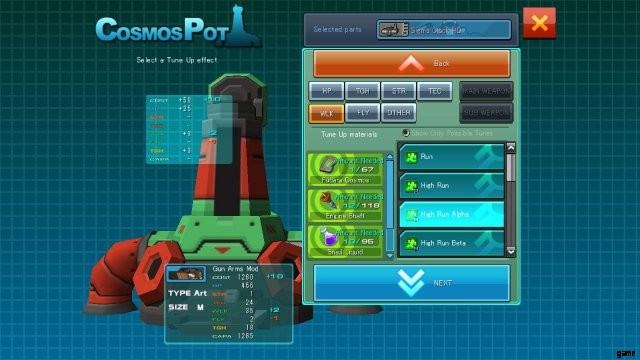
Mobility tuning got simplified, so every point in a mobility stat will increase your movement speed by a small amount. You want your mobility stat to be upwards of 30, because everyone else in arena is tuning their mobility to numbers like 38 or 40.
Hitting zero in either of your mobility stats will severely cripple the unit.
- Details on movement speed here.
STR and TEC tuning are pretty much straightforward and you want as much of it as you can get. The more of it you have the higher your damage will be with weapons that scale off of that stat. Hitting zero in either damage stat will cause your wonder bit duration to end in a matter of seconds.