Willkommen zurück, Held!
Unter Göttern hat viele Helden – insgesamt 71 zum Zeitpunkt des Schreibens – und jeder von ihnen hat eine Rolle zu spielen. Und zwangsläufig werden einige Helden in bestimmten Rollen besser sein als andere. Aus diesem Grund habe ich diese Ranglisten-Aufschlüsselung der Charaktere entwickelt, um Ihnen zu helfen, Entscheidungen darüber zu treffen, wen Sie verwenden sollten, sowie meine eigene persönliche Rangliste für jeden Helden.
Hinweise und Einschränkungen
Ein paar Dinge, die Sie beachten sollten, bevor wir beginnen.
Helden der B-Rarität werden hier nicht berücksichtigt. Als Faustregel in Heldensammlern wie Among Gods gilt, dass Helden mit allgemeinen Namen es überhaupt nicht wert sind, verwendet zu werden. Ihre einzige wirkliche Rolle besteht darin, als Futter für deine anderen Helden zu dienen.
Helden werden nur durch Hauptrolle getrennt (Krieger/Panzer/Attentäter/Waldläufer/Weise/Magier) und keine Spezialisierung. Dies würde zu viel Spaltung erzeugen und wahrscheinlich zu einem Szenario führen, in dem jeder der Beste in *etwas* ist, was den Zweck der Rangfolge zunichte macht.
Alle Heldenfähigkeiten haben 3-4 Stufen und die numerischen Schritte werden als 1 / 2 / 3 / 4 bezeichnet, wobei jede Klammer diese Stufe darstellt. Zum Beispiel wird eine Fertigkeit, die auf Level 1 100 % Schaden verursacht und 10 % mehr pro Level hinzugewinnt, als 100 % / 110 % / 120 % / 130 % bezeichnet. Wenn Upgrades nicht linear sind, werden sie separat gekennzeichnet. Wenn eine Fertigkeit einen ungleichmäßigen Fortschritt hat (d. h. Schaden auf Stufe 2 und 4, Dauer auf Stufe 3), bezeichne ich jede Stufe separat. Fertigkeiten werden auch als Wut-, 1-, 2- und 3-Fähigkeiten bezeichnet.
Verwandt: Among Gods Anfängerleitfaden:Tipps, Tricks und Strategien, um sich einen Platz unter den legendären Helden zu verdienen
Für Fertigkeiten, die sich auf den Helden selbst beziehen, der eine Fertigkeit verwendet, verwende ich den Begriff Zauberer. Anstelle von „Joe of the Green Forest gewinnt 20 % ATK“ sage ich beispielsweise einfach „Caster gewinnt 20 % ATK“. Wenn ich das Wort Caster nicht verwende, vermeide ich zweideutige Formulierungen mit Fähigkeiten, z. B. dass es so klingt, als würden getroffene Ziele einen Buff erhalten.
Da es keine Möglichkeit gibt, Statistiken in der Vorschau anzuzeigen (nein, nicht einmal Basisstatistiken), von denen ich weiß, dass diese Rangliste ausschließlich unter Berücksichtigung der Fähigkeiten eines Helden erstellt wird. Es gibt auch keine Möglichkeit, eine Vorschau eines Helden anzuzeigen um zu versuchen, einige zweideutig formulierte Fähigkeiten zu verstehen, also habe ich nur versucht, einige Fähigkeiten mit gesundem Menschenverstand zu verstehen. Sollte mir dabei ein Fehler unterlaufen, entschuldige ich mich im Voraus.

Schließlich ist diese, wie alle Ranglisten, subjektiv. Ihre eigene Erfahrung kann und wird höchstwahrscheinlich variieren. Nichts hindert Sie daran, zu verwenden, wen Sie verwenden möchten (was wahrscheinlich der beste Ratschlag in jedem Sammlerspiel ist), und zum Teufel, Sie können sogar selbst auf einige ziemlich verrückte Strategien kommen!
Vor diesem Hintergrund ist hier meine Rangliste aller Helden in Among Gods, die keine B-Rarität sind.
Liste der Kriegerstufen
| S | Edward |
| A | Boudicca, Arthur, Spartacus, Miyamoto Musashi |
| B | Xiang Yu, Cú Chulainn, Tutanchaten, Alfred |
| C | Tutanchamun, Mori Yoshinari |
S-Stufe
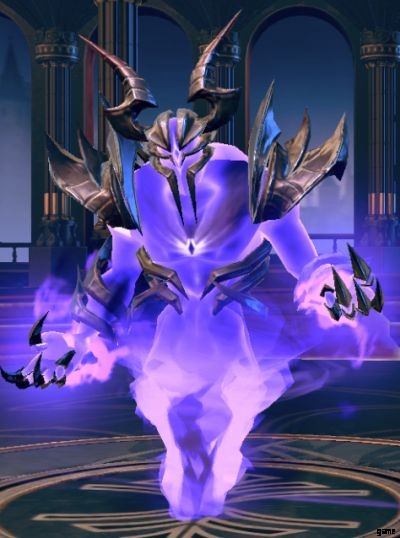
Edward

SS Korrupter Krieger/AOE
| Massive Unterdrückung | Erhält einen Blutschild , was den Schadenswiderstand um 30 % erhöht und Immunität gegen Massenkontrolle gewährt. Erhöht die ATK- und Leech-Wertung des Zaubernden 8 Sekunden lang um 25 % und fügt einem Feind dann 252 % körperlichen Schaden zu. Stufe 2: Jeder verflucht Ziel gewährt dem Zaubernden 5 % ATK und Leech Rating. Stufe 3: Der am weitesten entfernte Verfluchte Der Feind wird vor den Zaubernden teleportiert. Stufe 4: Schaden auf 297 % erhöht. |
| Rake | Nullt und bringt Feinde zum Schweigen, die verflucht sind oder weniger als 35 % / 40 % / 45 % / 50 % der max. HP für 5 Sekunden haben. Ein Held kann nicht von Rake beeinflusst werden mehr als einmal alle 12 Sekunden. |
| Blutschild | Flüche einen zufälligen Feind für 8 Sekunden, verursacht 205 % körperlichen Schaden, verringert sein Tempo um 30 % und fügt ihm jede Sekunde 20 % ANG als Schaden zu. Der Zaubernde erhält einen Blutschild für 5 Sekunden. Stufe 2: Jeder verflucht Feind erhöhte Edwards Schadensresistenz um 5 %. Stufe 3: Beim Wirken wird die Dauer dieses Effekts für alle Feinde, die ihn haben, erneuert. Stufe 4: Anfangsschaden auf 243 % erhöht. |
| Fesseln des Krieges | Flüche der Feind mit der höchsten ATK zu Beginn des Kampfes, fügt ihm 141 % körperlichen Schaden zu und erhöht das Tempo des Zaubernden 8 Sekunden lang um 30 %. Stufe 2:Flüche ein zusätzliches Ziel. Stufe 3: Der Eile-Effekt bleibt nun während des gesamten Kampfes bestehen. Stufe 4: Schaden auf 170 % erhöht. |
Wenn der echte Edward der Schwarze Prinz diese Ausrüstung hatte, ist es kein Wunder, dass er während des Hundertjährigen Krieges so viel Erfolg hatte.
Die Version von Edward aus Among Gods ist ein Titan auf dem Schlachtfeld, der mit seinen Flüchen Zwietracht in den feindlichen Reihen sät die sowohl seine Feinde schwächen als auch ihn stärken. Diese Flüche verleihen Edward sowohl einen behelfsmäßigen AOE-Effekt als auch eine Möglichkeit, über seinen erzwungenen Teleport auf Feinde mit hoher ATK/niedriger DEF zu schießen – und er hat die Ausrüstung, um den Schaden für jeden, den er zieht, zu maximieren. Magier, ich sehe dich an.
Je länger der Kampf dauert und je länger du Edward am Leben halten kannst, desto stärker wird er. Es ist wichtig zu beachten, dass Sie mit genügend Unterstützung theoretisch jede feindliche Einheit verfluchen können, wodurch Edward satte 25 % passive Schadensresistenz erhält. Verfluchte Feinde werden zusätzlich dadurch geschwächt, dass sie ihre Fähigkeiten nicht einsetzen können, während sie sich vor dem Ansturm des Schwarzen Prinzen ducken.
A-Stufe
Boudica

S Justice Warrior/Panzer
| Keltische Wut | Trefft einen Feind fünfmal:Die 4 Treffer verursachen 102 % körperlichen Schaden, während der letzte Treffer 229 % körperlichen Schaden verursacht und das Ziel 2 Sekunden lang niederschlägt. Die Verwendung dieser Fertigkeit beherrscht auch die Vision um es zu benutzen. Stufe 2: Die Verwendung dieser Fertigkeit heilt außerdem 5 % der max. HP für den Zaubernden. Stufe 3: 4-Treffer-Combo-Schaden auf 117 % pro Treffer erhöht; Der Schaden des letzten Treffers wurde auf 270 % erhöht. Stufe 4: Die Verwendung dieser Fertigkeit heilt außerdem 10 % der maximalen HP für den Zaubernden. |
| Blutig | Der Zaubernde wird alle 2 normalen Angriffe um 280+35 % ATK / 1800+45 % ATK / 2400+55 % ATK / 4000+60 % ATK geheilt. |
| Rachsüchtiger Kampfgeist | Beschwört eine Vision wenn der Kampf an der Position des am weitesten entfernten Feindes beginnt, verursacht er 61 % körperlichen Schaden in einem AOE, wenn er landet. Die Vision hat 60 % von Boudiccas Werten und erleidet 336 % Schaden. Bei Recast während es eine aktive Vision gibt , die derzeit aktive Vision verbraucht und der Zaubernde erhält 300 Wut, bevor er eine weitere Vision. beschwört Visionen können Boudiccas Fähigkeiten nutzen, aber nicht selbst Wut erlangen. Stufe 2:Vision erleidet jetzt 264 % Schaden. Anfangsschaden auf 75 % erhöht. Stufe 3:Vision erleidet jetzt 216 % Schaden. Stufe 4: Anfangsschaden auf 94 % erhöht. |
| Verteidigungswall | Während die Gesundheit über 50 % liegt, hat der Zaubernde 15 % zusätzliche physische Resistenz. Stufe 2: Wann immer eine Vision stirbt, Zauberer heilt um 5 % max. HP. Stufe 3: Stärkung der physischen Resistenz auf 35 % erhöht. Stufe 4: Wann immer eine Vision stirbt, heilt den Zaubernden um 10 % der maximalen HP. |
Ja, Boudicca in diesem Spiel wird mit zwei C geschrieben. So wurde ihr Name in einigen Geschichtsbüchern geschrieben. Aber dieses Mal hat sie auch einen Stand. Sehen.
Boudiccas Ausrüstung dreht sich um ihre Vision:Sie dupliziert ihre Wut-Fähigkeit, wenn sie sie einsetzt, was ihren Schadensausstoß erheblich verbessert. Wenn Boudicca andere Offensivfähigkeiten hätte, wäre die Vision kaputt, aber so wie sie ist, ist sie sehr schön. Selbst ohne die Wut-Skill-Duplizierung dient ihre Vision als zusätzliches Ziel und Ablenkung – und wenn sie lange genug am Leben bleibt, kann sie ihr als letzter Wutausbruch dienen, um ihre Fertigkeit zu aktivieren.
Arthur

S Justice Warrior/Panzer
| Wirbelwind des Königs | Fügt Gegnern in der Nähe 6 Mal 92 % körperlichen Schaden zu. Der Zaubernde heilt sich um 50 % des pro Treffer verursachten Schadens. Stufe 2: Der Schaden wurde auf 105 % erhöht. Stufe 3: Der Zaubernde ist für die Dauer der Fertigkeit immun gegen Massenkontrolle. Stufe 4: Schaden auf 105 % erhöht. |
| Blutig | Der Zaubernde wird alle 2 normalen Angriffe um 280+35 % ATK / 1800+45 % ATK / 2400+55 % ATK / 4000+60 % ATK geheilt. |
| Macht von Excalibur | Verursacht 3 Treffer mit 82 % physischem Schaden, dann einen letzten Treffer mit 132 % physischem Schaden, der außerdem die Angriffsgeschwindigkeit von getroffenen Zielen 5 Sekunden lang um 25 % verringert. Stufe 2: 3-Treffer-Combo-Schaden auf 92 % erhöht; Der Schaden des letzten Treffers wurde auf 153 % erhöht. Stufe 3: Die Dauer des Angriffsgeschwindigkeits-Debuffs wurde auf 7 Sekunden erhöht. Stufe 4: 3-Treffer-Combo-Schaden auf 107 % erhöht; Der Schaden des letzten Treffers wurde auf 179 % erhöht. |
| Licht von Avalon | Arthur erhält zu Beginn des Kampfes 10 Sekunden lang 40 % / 60 % / 80 % / 90 % Schadensresistenz. |
König Artus profitiert aufgrund seiner Seltenheit von soliden Werten sowie einer unkomplizierten, sachlichen Ausrüstung, mit der er in fast jeder Situation glänzen kann. Seine Wut-Fertigkeit hat den doppelten Zweck, sowohl Schaden zu verursachen als auch ihn für einen sehr respektablen Teil des verursachten Schadens zurückzuheilen, und seine Schadensresistenz von 90 % stellt so gut wie sicher, dass frontalgeladene Angriffe vor ihm zusammenbrechen.
Spartakus
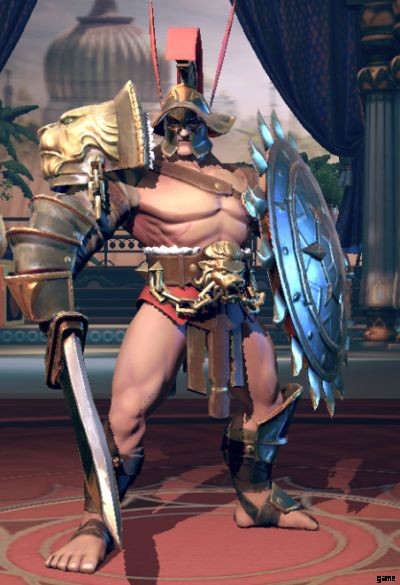
S Justice Warrior/Panzer
| Ewiger Widerstand | Fügt Gegnern in der Nähe 182 % körperlichen Schaden zu und verleiht Spartacus die Resistenz 15 Sekunden lang buffen. Widerstand gibt 20% kritische Rate und kritischen Schaden. Stufe 2: Wenn Sie einen Kill oder einen Assist erhalten, der Widerstand Buff dauert 10 weitere Sekunden. Ebene 3: Buff gibt jetzt 25 % kritische Trefferquote und kritischen Schaden. Stufe 4: Buff gibt jetzt 30 % kritische Trefferrate und kritischen Schaden. |
| Blutig | Der Zaubernde wird alle 2 normalen Angriffe um 280+35 % ATK / 1800+45 % ATK / 2400+55 % ATK / 4000+60 % ATK geheilt. |
| Unaufhaltsam | Stürmt vorwärts, rammt den Gegner und verursacht 121 % körperlichen Schaden, während er ihn zurückstößt und ihm eine 2-sekündige Betäubung zufügt. Stufe 2: Der Schaden wurde auf 136 % erhöht. Stufe 3: Betäubungsdauer auf 3 Sekunden erhöht. Stufe 4: Schaden auf 152 % erhöht. |
| Unnachgiebiger Kampfwille | Wenn Spartacus das erste Mal im Kampf stirbt, erhält er stattdessen das Unnachgiebige b uff für 4 / 5 / 6 / 8 Sekunden, was seine minimalen HP auf 1 setzt und eingehende Heilung um 150 % erhöht. Jeder erlittene Schaden, während der Buff aktiv ist, wird als Gesundheit wiederhergestellt, wenn der Buff abläuft. |
Spartacus setzt den Trend von Nahkämpfern fort, die das Beste aus Krieger- und Panzerbaum herausholen. Im Fall von Spartacus liegt es an seiner 3-Fähigkeit, die ihm im Wesentlichen ein zweites Leben auf dem Schlachtfeld ermöglicht. Das macht ihn unglaublich störend, da Feinde, die einen Feind ins Visier nehmen, absolut nichts davon haben, Spartacus anzugreifen.
Der Rest seiner Ausrüstung ist nicht besonders bemerkenswert, aber auch nicht schlecht. Es ist einfach da.
Miyamoto Musashi

S Neutraler Krieger/AOE
| Blutabnahme | Greift Ziele in einer geraden Linie an und verursacht 77 %, 77 % und 112 % physischen Schaden. Entfernt Blutungsstapel von getroffenen Zielen und vernichtet sie mit 100 % * der Anzahl der entfernten Stapel. Stufe 2: Der Schaden von Kombotreffern wurde auf 87 %, 87 % und 130 % erhöht. Stufe 3: Jeder Combo-Treffer betäubt für 1 Sekunde. Von der Explosion betroffene Ziele werden ebenfalls 1 Sekunde lang niedergeschlagen. Stufe 4: Der Schadensbonus für das Entfernen von Blutungsstapeln beträgt jetzt 140 % * entfernte Stapel. |
| Blutig | Der Zaubernde wird alle 2 normalen Angriffe um 280+35 % ATK / 1800+45 % ATK / 2400+55 % ATK / 4000+60 % ATK geheilt. |
| Blattschnitt | Greift umstehende Feinde 4 Mal an. Jeder Treffer verursacht 43 % Schaden und hat eine Chance von 30 %, Blutungen zu verursachen. Blutende Helden nehmen 8 Sekunden lang 8 % der ATK des Zaubernden pro Sekunde. Stufe 2: Blutungschance auf 50 % erhöht. Stufe 3: Der Blutungsschaden wurde auf 12 % der ATK des Zaubernden erhöht. Stufe 4: Jeder blutende Feind fügt dem Zaubernden 10 % zusätzlichen Schaden zu, bis diese Fertigkeit erneut verwendet wird. |
| Iai | Trifft einen frontalen fächerförmigen AOE, der 121 % physischen Schaden verursacht und getroffenen Zielen 1 Stapel Blutung hinzufügt. Stufe 2: Fügt 2 Stapel Blutung hinzu. Stufe 3: Der Schaden wurde auf 160 % erhöht. Stufe 4: Das Schlagen von blutenden Zielen heilt den Zaubernden um 30 % des verursachten Schadens. |
Miyamoto Musashis meisterhafte Schwertkunst ist eine seltene und angenehme Überraschung – er ist ein Krieger, der nicht abtankt, sondern sich dafür entscheidet, sowohl mit seinen Fähigkeiten als auch mit seinem Blutungsstatus-Effekt Schaden zu verursachen. Und das ist etwas, was er sehr gut kann:Bluten stapelt sich mit sich selbst, und jeder Stapel von Bluten löst großen Schaden aus, wenn er seine Rage-Fertigkeit auslöst. Insgesamt ein sehr solider Charakter.
B-Klasse
Xiang Yu
S böser Krieger/AOE
| Aura der Herrschaft | Verursacht 244 % physischen Schaden in einer geraden Linie; Zieltreffer werden niedergeschlagen. Chance von 50 %, den Speer zu fangen, der getroffenen Zielen Penetration zufügt und ihren physischen Widerstand 10 Sekunden lang um 20 % verringert. Stufe 2: Das Fangen des Speers gibt dem Zaubernden 300 Wut. Stufe 3: Verursacht 287 % Schaden. Stufe 4: Verursacht 340 % Schaden. |
| Blutig | Der Zaubernde wird alle 2 normalen Angriffe um 280+35 % ATK / 1800+45 % ATK / 2400+55 % ATK / 4000+60 % ATK geheilt. |
| Speer des Overlords | Greift mit einer 3-Treffer-Kombo an, verursacht 102 %, 102 % und 145 % physischen Schaden und heilt den Zaubernden um 150 % ANG. Wenn die Gesundheit des Zaubernden unter 30 % liegt, wird das Ziel außerdem 10 Sekunden lang verlangsamt, wodurch seine Angriffsgeschwindigkeit um 15 % verringert wird. Stufe 2: Der Zaubernde heilt um 250 % ATK. Stufe 3: Der letzte Treffer verursacht 228 % Schaden. Stufe 4: Der letzte Treffer verursacht 297 % Schaden. |
| Unbesiegbarkeit | Der Zaubernde tritt in den Overlord-Zustand ein. Jeder Angriff oder jede Fertigkeit, die in diesem Zustand verwendet wird, erhöht die ATK um 5 % für 8 Sekunden. Stufe 2: Buff dauert 10 Sekunden. Stufe 3: ATK-Erhöhung auf 8 % erhöht. Stufe 4: ATK-Erhöhung auf 10 % erhöht. |
Xiang Yu ist fast, fast ein guter Charakter. Er hat eine solide Ausrüstung, aber das Problem ist, dass sie im Gegensatz zu Kriegern der A-Stufe nicht ausreicht. Seine Verteidigungsreduzierung basiert auf Zufall und seine Verlangsamungen töten den Feind nicht schneller. Theoretisch ist seine ATK-Ramping-Fähigkeit nett, aber es ist wirklich einfach, sie abzuschalten, da Xiang Yu keine Kontrollimmunität oder Unverwundbarkeit bietet.
Cú Chulainn

S böser Krieger/AOE
| Schattenfluch | Der Zaubernde heult, erschreckt Gegner in der Nähe und lässt sie 1,5 Sekunden lang davonlaufen. Caster verwandelt sich dann für 20 Sekunden in einen Werwolf. In Werwolfgestalt haben Zauberer und Beschworene 20 % Bonus-ATK. Der Caster kann auch nur normale Angriffe verwenden, die in einem fächerförmigen AOE treffen und eine Niederschlagswahrscheinlichkeit von 15 % haben. Normale Angriffe in diesem Modus haben eine kritische Grundrate von 40 %. Stufe 2: Der Furchteffekt dringt auch 1,5 Sekunden lang in Feinde ein und verringert P.Def um 50 %. Stufe 3: ATK-Buff für Zauberer und Beschwörungen auf 30 % erhöht. Stufe 4: ATK-Buff für Zauberer und Beschwörungen auf 30 % erhöht. |
| Blutig | Der Zaubernde wird alle 2 normalen Angriffe um 280+35 % ATK / 1800+45 % ATK / 2400+55 % ATK / 4000+60 % ATK geheilt. |
| Bündnis der Fruchtbarkeit | Greift mit einer 5-Treffer-Combo an und verursacht 66 % physischen Schaden pro Treffer in einem Frontalbogen. Der letzte Treffer verlangsamt getroffene Ziele und verringert ihre Angriffsgeschwindigkeit 10 Sekunden lang um 10 %. Beschwört außerdem einen schwachen Schneewolf-Diener. Schwache Schneewölfe werden für ihren Beschwörer kämpfen, können aber nur normale Angriffe einsetzen und verlieren mit der Zeit Gesundheit. Stufe 2: Schaden pro Treffer auf 72 % erhöht. Stufe 3: Beschwört stattdessen einen mächtigen Schneewolf, der Fähigkeiten einsetzt und beim Angriff eine Chance hat, niedergeschlagen zu werden. Stufe 4: Schaden pro Treffer auf 79 % erhöht. |
| Versuchung des Blutes | Gibt allen Verbündeten 150 Blutegelwertung. Stufe 2: Caster und Summons haben zusätzliche 200 Leech Rating zusätzlich zu den 150 Base. Stufe 3: Verleiht allen Verbündeten 250 Blutegelwertung. Stufe 4: Caster und Summons haben einen zusätzlichen Leech-Rating von 300 zusätzlich zu den 250 Base. |
Cú Chulainn (fast wie Coo-cullen) ist ein weiterer Gimmick-Charakter, dessen Shtick sich auf seine Beschwörung verlässt, um Schaden zu verursachen. Er hat auch eine optisch ordentliche, aber spielerische Meh-Transformationssache am Laufen. Sie können die Wölfe zugunsten seiner Temptation of Blood vollständig ignorieren , das Ihrem Team ein wenig mehr Durchhaltevermögen verleiht, indem es jedem Lebensraub gibt. Aber das allein reicht nicht aus, um diesen Helden zu retten.
Tutanchamun
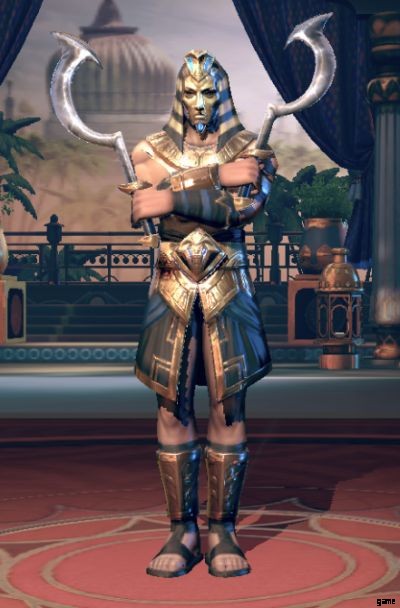
Ein Gerechtigkeitskrieger/AOE
| Echo-Zap | Verursacht 179 % physischen Schaden in einem frontalen AOE-Bogen und betäubt getroffene Ziele für 1 Sekunde. Fügt abgeschirmten Gegnern 18 % mehr Schaden zu. Stufe 2: Der Schaden wurde auf 193 % erhöht. Stufe 3: 25 % mehr Schaden an abgeschirmten Feinden. Stufe 4: Schaden auf 234 % erhöht. |
| Blutig | Der Zaubernde wird alle 2 normalen Angriffe um 280+35 % ATK / 1800+45 % ATK / 2400+55 % ATK / 4000+60 % ATK geheilt. |
| Tödlicher Schnitt | Greift mit einer 4-Treffer-Kombination innerhalb eines AOE an und verursacht 65 % physischen Schaden pro Treffer. Getroffene Ziele erhalten ebenfalls Blutung, wodurch sie 6 Sekunden lang 4 % der ATK des Zaubernden als Schaden pro Sekunde erleiden. Stufe 2: Angriffsschaden auf 76 % erhöht. Stufe 3: Der Blutungs-Debuff wird jedes Mal um 1 Sekunde verlängert, wenn betroffene Feinde eine Fertigkeit verwenden. Stufe 4: Angriffsschaden auf 93 % erhöht. |
| Staubsturm | Der Zaubernde umgibt sich 7 Sekunden lang mit einem Staubsturm. Während der Sturm aktiv ist, ignorieren die Angriffe des Zaubernden 20 % / 30 % / 40 % / 50 % von P.Def und M.Def |
Tutanchaten ist ein guter Krieger, der von seinen von Natur aus niedrigeren Statistiken im Stich gelassen wird, weil er nur ein Held der A-Rarität ist. Seine Ausrüstung ist überraschend solide, obwohl der Bonusschaden für Schilde und der winzige Multiplikator auf seinem DOT super enttäuschend sind. Nichtsdestotrotz ist Tutanchamun ein geradliniger, einfach zu handhabender Held und wird dir gute Dienste leisten, bis du einen Ersatz für ihn findest.
Alfred
Ein korrupter Krieger/AOE
| Brennender Seelenschlag | Verbraucht 10 % der aktuellen HP des Zaubernden, um 298 % / 326 % / 356 % / 389 % physischen Schaden um ihn herum zu verursachen. Erhöht die ATK des Zaubernden 10 Sekunden lang um 10 %. |
| Blutig | Der Zaubernde wird alle 2 normalen Angriffe um 280+35 % ATK / 1800+45 % ATK / 2400+55 % ATK / 4000+60 % ATK geheilt. |
| Seelenbrecher | Fügt einem Ziel 189 % physischen Schaden zu und durchdringt es 10 Sekunden lang, wodurch seine P.Def um 25 % verringert wird. Stufe 2: Der Schaden wurde auf 205 % erhöht. Stufe 3: P.Def-Debuff auf 50 % erhöht. |
| Dunkle Inferno-Rüstung | Wenn die Gesundheit des Zaubernden unter 50 % liegt, erhältst du 50 % / 60 % / 70 % P.Def. |
Abgesehen vom albernen Namen ist Alfred ziemlich anständig. Der Verlust von 10 % HP bei seinem Rage-Skill ist seltsam fehl am Platz (vielleicht um seinen 3-Skill auszulösen?), aber er hat gute Multiplikatoren. Seelenbrecher ist auch eine gute Möglichkeit, einen Gegner niederzuschlagen, da der Verteidigungs-Debuff sowohl kräftig als auch garantiert ist.
C-Stufe
Tutanchamun
Ein neutraler Krieger/AOE
| Echo-Zap | Verursacht 179 % physischen Schaden in einem frontalen AOE-Bogen und betäubt getroffene Ziele für 1 Sekunde. Fügt Gegnern mit weniger als 35 % Gesundheit 18 % mehr Schaden zu. Stufe 2: Der Schaden wurde auf 193 % erhöht. Ebene 3: 30 % mehr Schaden an Feinden mit weniger als 35 % Gesundheit. Stufe 4: Schaden auf 221 % erhöht. |
| Blutig | Der Zaubernde wird alle 2 normalen Angriffe um 280+35 % ATK / 1800+45 % ATK / 2400+55 % ATK / 4000+60 % ATK geheilt. |
| Tödlicher Schnitt | Greift mit einer 4-Treffer-Kombination innerhalb eines AOE an und verursacht 65 % physischen Schaden pro Treffer. Heilt den Zaubernden um 10 % des verursachten Schadens. Stufe 2: Angriffsschaden auf 76 % erhöht. Stufe 3: Heilt den Zaubernden um 18 % des verursachten Schadens. Stufe 4: Angriffsschaden auf 93 % erhöht. |
| Staubsturm | Der Zaubernde umgibt sich 7 Sekunden lang mit einem Staubsturm. Während der Sturm aktiv ist, erhöht sich die P.Def des Zaubernden um 5 % / 10 % / 15 % / 20 %, wenn er angegriffen wird. |
Obwohl es sich um eine Neufärbung von Tutanchamun handelt, ist Tutanchamun irgendwie schlimmer. Seine Multiplikatoren sind aus irgendeinem Grund niedriger als Tuthankhaten. Er hat auch diese seltsame Off-Tank-Sache, die einfach nicht funktioniert. Und seinen Staubsturm ist objektiv schlechter, da es ihm nicht hilft, schneller zu töten. Wenigstens hatte Tutanchamun einen satten 50 % Def-Debuff auf seinem Sturm.
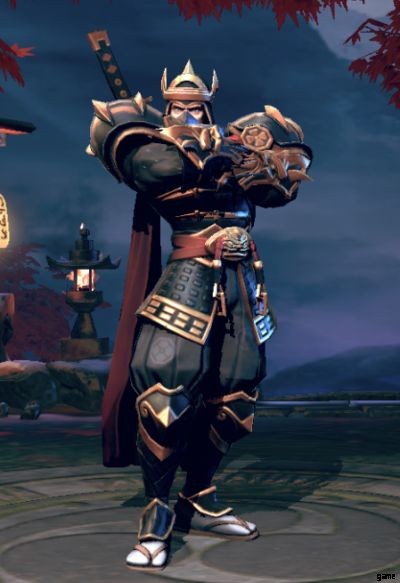
Mori Yoshinari

Ein böser Krieger/AOE
| Battleline Breach | Fügt Zielen vor dem Zaubernden 195 % physischen Schaden zu. Ignoriert 10 % der P.Def von Zielen unter dem Effekt Rüstungsreduzierung. Stufe 2: Schaden auf 220 % erhöht. Stufe 3: Ignoriert 20 % P.Def der Ziele unter Rüstungsreduzierung. Stufe 4: Ignoriert 30 % P.Def der Ziele unter Rüstungsreduzierung. |
| Blutig | Der Zaubernde wird alle 2 normalen Angriffe um 280+35 % ATK / 1800+45 % ATK / 2400+55 % ATK / 4000+60 % ATK geheilt. |
| Smite | Fügt Zielen vor dem Zaubernden dreimal 100 % physischen Schaden zu. Jeder Treffer hat eine Chance von 20 % / 25 % / 30 %, Rüstungsminderung zuzufügen , wodurch P.Def für 5 Sekunden um 20 % reduziert wird. |
| Kritische Vorausschau | Alle 8 / 6 / 5 normalen Angriffe lösen einen Bonusangriff aus, der 164 % physischen Schaden verursacht und 20 % ihrer P.Def. ignoriert. |
Mori Yoshinari macht nicht viel alleine. Er ist besser in einer unterstützenden Rolle … aber selbst das ist zweifelhaft, da sein Debuff von einer niedrigen Auslösechance von 30 % abhängt, die an seine 2-Fähigkeit gebunden ist. Er ist einfach in Ordnung. Es gibt nicht viel über ihn zu sagen, außer zu ersetzen, wenn Sie die Gelegenheit dazu haben.
Panzerstufenliste
| S | Harald, Roland |
| A | Erich |
| B | La Hire, Bayard, Darius, Maeda Keiji, Lucullus |
| D | Lucius |
S-Stufe
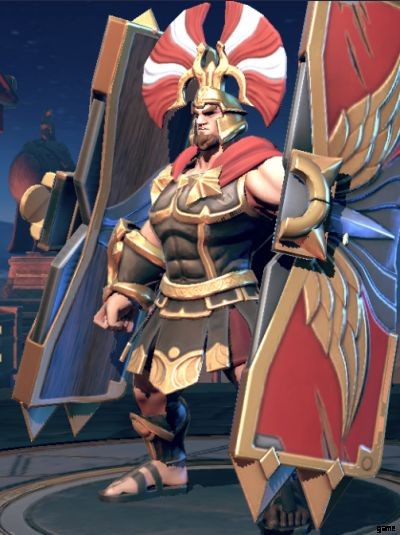
Harald

SS Korrupter Panzer/Kontrolle
| Endlose Folter | Erhält einen Schild in Höhe von 10 % der maximalen LP des Zaubernden und ist 50 % stärker, wenn der Zaubernde 50 % oder weniger seiner maximalen LP hat. Stößt den am weitesten entfernten Gegner innerhalb von 3 Metern zu Boden, zieht ihn zum Zaubernden und verursacht 13 Mal körperlichen Schaden bei 72 % ANG über 6 Sekunden. Der Zaubernde ist während dieser Fertigkeit immun gegen Niederschlag und Betäubung. Stufe 2: Der Zauberer hat 40 % körperlichen Widerstand, während er diese Fertigkeit wirkt. Stufe 3: Die Grundgesundheit des Schilds wurde auf 15 % der maximalen HP des Zauberers erhöht. Stufe 4: Die Grundgesundheit des Schilds wurde auf 20 % der maximalen LP des Zauberers erhöht. |
| Todesvertrag | Gewinnt 30 % / 40 % / 40 % / 50 % Schadensresistenz für 8 / 8 / 10 / 10 Sekunden, wenn der Kampf beginnt oder wenn die Rage-Fähigkeit verwendet wird. Der Zaubernde wird um 10 % der maximalen HP geheilt, wenn ein Feind getötet wird. |
| Höllenschatten | Verursacht 122 % körperlichen Schaden in einem Frontalbogen-AOE und beschwört einen Höllenschatten in diesem Bereich für 12 Sekunden. Der Höllenschatten verbrennt Feinde in seinem AOE für 10 % von Haralds ATK jede Sekunde und reduziert ihre ATK um 20 %. Stufe 2: Harald heilt alle 2 Sekunden 1 % der maximalen HP für jeden Feind, der im Höllenschatten steht AOE. Stufe 3: ATK-Debuff auf 30 % erhöht. Stufe 4: Harald heilt alle 2 Sekunden 2 % der maximalen HP für jeden Feind, der im Höllenschatten steht AOE. |
| Beerdigungen nach dem Tod | Verursacht 102 % körperlichen Schaden in einem frontalen AOE. Getroffene Feinde können 8 Sekunden lang keine Wut erlangen. Stufe 2: Verringert außerdem den physischen Widerstand bei getroffenen Zielen für 10 Sekunden um 10 %. Stufe 3: Physischer Widerstands-Debuff auf 20 % erhöht. Stufe 4: Schaden auf 118 % erhöht. |
Warnung hier:Viele von Haralds Fähigkeiten sind sehr zweideutig formuliert, also habe ich versucht, das Beste daraus zu machen, was die Mechanik angeht.
Was SS-Raritäten-Helden angeht, ist Harald der am wenigsten beeindruckende von ihnen. Das macht ihn nicht schlecht, da er immer noch Panzerhelden im Spiel überschattet, und (gut für ihn) Angel Joan wird nicht als Panzer eingestuft.
Haralds Wut-Fähigkeit wurde speziell dafür entwickelt, diese lästigen Waldläufer und Magier in die Reichweite der Nahkampfangriffe Ihres Teams zu ziehen. Das macht Harald zu einem Pseudo-Attentäter; In Verbindung mit seinen vielfältigen Möglichkeiten, sowohl Schaden zu mindern als auch feindliche ATK zu reduzieren, sollten Sie mit diesem Riesen kein Problem haben, die Hinterreihe des Feindes zu schnappen. Zusammen mit seiner Schadensresistenz (zumindest glaube ich, es ist Schadensresistenz …) Buff zu Beginn des Kampfes und jedes Mal, wenn er seinen Haken wirft, bedeutet Haralds inhärenter Bulk, dass er die Bemühungen überlebt, ihn zu fokussieren, und er ' wird wahrscheinlich ein paar hintere Feinde töten, bevor er zu Boden geht. WENN der Feind das schafft.
Roland

S Justice Tank/Panzer
| Lob des Engels | Verleiht sich selbst und allen Verbündeten einen Schild in Höhe von 200 % der ATK des Zaubernden. Schild gewährt Immunität gegen magischen Schaden und hält 6 Sekunden lang an. Stufe 2: Die Gesundheit des Schilds wurde auf 300 % der ATK des Zaubernden erhöht. Stufe 3: Schild dauert 7 Sekunden. Stufe 4: Shield entfernt alle Debuffs bei Anwendung. |
| Aktivierung | Zu Beginn des Kampfes erhält der Zaubernde einen Schild mit Gesundheit in Höhe von 1400 + 8 % / 8000 + 10 % / 14000 + 12 % / 20000 + 14 % der max. HP. |
| Heilige Barriere | Erzeugt einen Schild um den Zaubernden in Höhe von 380 % / 440 % / 500 % / 550 % ATK. |
| Himmlische Gerechtigkeit | Beschwört einen Hammer, der einen Zielbereich zerschmettert, 163 % magischen Schaden verursacht und getroffene Ziele 1,8 Sekunden lang betäubt. Der Zauberer ist während des Zauberns immun gegen Massenkontrolle. Stufe 2: Getroffene Ziele verlieren außerdem 3 % ATK für den Rest des Kampfes. Stufe 3: Betäubungszeit auf 2,8 Sekunden erhöht. Stufe 4: Getroffene Ziele verlieren außerdem 6 % ATK für den Rest des Kampfes. |
Roland ist der seltene Panzer ohne Schnickschnack oder Gimmicks. Was er auf den Tisch bringt, ist Schadensminderung, schlicht und einfach. Macht ihn das schlecht? Absolut nicht. Im Gegenteil, diese Art von Konsistenz ist überraschenderweise sehr selten, und wenn Sie zuverlässige Schadensreduzierung und Schilde für alle wollen, liefert dieser Paladin definitiv.
Rolands Schilde haben mehrere Zwecke:Sie absorbieren Schaden und löschen magischen Schaden vollständig aus, und Debuffs löschen, wenn du genug in ihn investierst. Als ob das nicht genug wäre, hat er auch Zugriff auf eine zuverlässige Betäubung, die mit einem permanenten Angriffs-Debuff einhergeht! Oh, und diese Betäubung verursacht magischen Schaden auf einen physischen Charakter.
A-Stufe
Erich

S Böser Panzer/Panzer
| Blutaxt-Wirbelwind | Wirft herum und verursacht 5-mal 25 % physischen Schaden in einem Bereich um den Zaubernden herum. Heilt den Zaubernden um 30 % der max. HP. Jede Drehung verbraucht 2 % max. HP, was außerdem 2 % max. HP-Schaden an getroffenen Zielen verursacht. Stufe 2: The first hit also interrupts targets hit and cause them to move towards the caster. Level 3: Heals caster for 40% max HP when cast. Level 4: Each hit has a 50% chance to inflict -15% ATK for 7 seconds on targets hit. This effect stacks with itself. |
| Arming | At the start of combat, caster gains a shield with health equal to 1400 + 8% / 8000 + 10% / 14000 + 12% / 20000 + 14% of max HP. |
| Nordic Bash | Deals 179% physical damage in a small frontal AOE. Stuns targets hit for 1 second. Level 2: Penetrates hit targets, reducing their physical resistance by 40% for 10 seconds. Level 3: Stun maximum time now scales with target’s missing health and can stun for up to 2.5 seconds. Level 4: Deals up to 40% more damage based on target’s missing health. |
| Champion of North Wind | The first time the caster’s health dips below 30%, triggers a regeneration buff that heals 8% max HP per second for 7 seconds. Level 2: Also increases P.Def and M.Def by 300% for the duration of the buff. Level 3: Now heals for 11% max HP. Level 4: Also increases block rate by 50% for the duration of the buff. |
He’s big, he’s disruptive, he gets in the way of enemies and he’s great at keeping himself alive. Eric the Bloodaxe is a highway decent tank who has some extra baggage attached to him, but doesn’t cause him to forget his primary role of shielding allies.
Getting the most out of Eric requires you to level up his rage skill to level 2, as that’s his primary means of disruption. But there’s more:while the damage isn’t necessary, the fact that it scales off max HP means that Eric can chip in when it comes to dealing damage. He can further protect his allies if his rage skill is maxed out, for a potential -75% ATK debuff on foes!
B-Klasse
La Hire

A Justice Tank/Tank
| Wrath of Glory | Deals 99% Physical damage in an AOE and stuns for 1 second. Targets that have Aftershock are stunned for an extra 0.25/0.5/0.75/1 second per stack, and lose all stacks of Aftershock . |
| Arming | At the start of combat, caster gains a shield with health equal to 1400 + 8% / 8000 + 10% / 14000 + 12% / 20000 + 14% of max HP. |
| Punishing Blow | Deals 70% / 76% / 84% Physical damage in a forward arc three times. The last hit has a 40% chance to inflict Aftershock and knock down enemies hit. |
| Force of Deterrence | Every 6 normal attack has a 20% / 30% / 40% chance to knock the target down, and a 10% / 15% / 20% chance to apply one stack of Aftershock zu ihnen. Aftershock reduces attack and movement speed by 10% per stack. Stacks up to 3 times. |
La Hire is the first unit you actually get, and he serves as your main tank for most of the game until you can pull a better one. Tank-wise, La Hire is adequate; his Arming passive skill nets him a large amount of both flat and scaling HP, and his Wrath of Glory rage skill has a guaranteed stun.
La Hire’s main problem is consistency:his Aftershock debuffs are nice to have, but they’re dependent on RNG with his 2 and 3 skills. If I was looking for debuffs, I’d rather have someone with a guaranteed infliction rate as 30% attack and movement speed reduction is nothing to scoff at. Shame.
Bayard

S Justice Tank/Tank
| Unstoppable Sweep | Passively reduces the damage of enemies at least 4 meters away from Bayard by 70%. Stabs an enemy for 57% Physical damage, then rushes across the field dealing 72% Physical damage to targets hit and knocking them back by 3 meters. Creates a 5.6 meter area which reduces incoming damage to allies by 25%, for 4 seconds. Level 2: Damage increased to 68% and 108%. Level 3: Field duration increased to 5 seconds. Level 4: While the field is active, Bayard cannot take damage from enemies outside of it. |
| Arming | At the start of combat, caster gains a shield with health equal to 1400 + 8% / 8000 + 10% / 14000 + 12% / 20000 + 14% of max HP. |
| Decisive Blow | Deals 85% physical damage to an enemy, and reduces its ATK by 30% for 6 seconds. If this hits at least one penetrated target, caster also gains 10% damage resistance for 10 seconds. Level 2: Now hits in a rectangular AOE. Level 3: ATK reduction increased to 40%. Level 4: ATK reduction now lasts 8 seconds. |
| Challenge of the Knight | Stabs an enemy twice for 45% Physical damage per hit, then follows up with a hit that deals 83% Physical damage, knocks the target back by 3.5 meters, and heals caster for 120% of that damage. Level 2: Damage increased to 54%, 54%, and 111%. Self-heal increased to 160%. Level 3: Damage increased to 64%, 64%, and 200%. Self-heal increased to 200%. Level 4: Self-heal increased to 230%. |
Knight Bayard is the knight of super ambiguous wording. If you don’t believe me, pull up the game right now and read his skills. I’ll wait.
Going off basic game sense and the fact that he isn’t an SS hero, I’m going to assume that Bayard’s passives actually only reduce the damage he takes, rather than applying a 70% damage debuff to every enemy. While this does give him great survivability, part of a tank’s kit is also about directing damage to themselves or grabbing aggro, and Bayard’s incredible traveling circus of a rage skill displaces him. While it does provide a damage mitigation field, placing it is a bit iffy, and benefits other melee heroes more than squishy backrow heroes who’ll probably need it more.
Overall, Bayard is an okay, if gimmicky tank.
Darius

S Neutral Tank/Tank
| Rule With Majesty | Pulls nearby enemies towards the caster, then creates a shockwave that pushes them back and deals damage equal to 6% of the caster’s max HP but not exceeding 200% ATK. This also heals the caster for 100% ATK. Also deals bonus damage equal to 1% of max HP to soul drained enemies, and heals caster for 1% max HP. Level 2: Caster has 50% resist while casting. Level 3: Each soul also grants 1% resist for 6 seconds. Level 4: Damage increased to 9% of caster’s max HP. |
| Arming | At the start of combat, caster gains a shield with health equal to 1400 + 8% / 8000 + 10% / 14000 + 12% / 20000 + 14% of max HP. |
| Soul Shock | Deals 136% physical damage in an AOE. Knocks nearby foes back and drains 1 soul from them. Increases caster’s max HP by 2% and generates a shield equal to 175% ATK. Level 2: Damage increased to 158%. Level 3: Shield strength increased to 205% damage dealt. Level 4: Damage increased to 184%. |
| Pulse of Devourer | Hypnotizes enemies in a straight line for 2.2 seconds, dealing 95% ATK as physical damage per second for the duration. Drains 1 soul from each enemy hit. Each soul increases caster’s max HP by 2%. Level 2: Hypnosis duration increased to 2.6 seconds. Level 3: Damage increased to 109%. Level 4: Souls now increase caster’s max HP by 3.5%. |
If you thought Bayard was gimmicky, meet Darius. No matter how I try to make sense of his kit, the end result is the same. Max HP damage is theoretically good if it wasn’t so piddling. Assuming Darius can drain 1 soul per enemy, that’s a cap of 5 souls; and if the heal/max HP damage is per soul, that’s a whopping (no not really) 5% max HP damage. Hoo-rah.
What we have here is a tank that tries to use dark knight-esque mechanics, using HP as a tool to deal damage. The problem with this is that the cap on this damage is absurdly low and actually scales off ATK, not HP. HP is about the only thing Darius can do right – his damage mitigation benefits him and him alone, and he’s trying to prove himself worthy of everyone else’s job.
While warriors that do off-tank duty are acceptable, the opposite is rarely true, and it’s really only thanks to his rarity that Darius gets a higher spot on this list – owing to the fact that rarity more often than not dictates stats. The fact that his skill translations are weird (seriously, Soul Shock first says it generates shield based on ATK, then damage dealt?) and his unique mechanic has zero explanation really doesn’t help his case. Go sit on the bench, Darius.
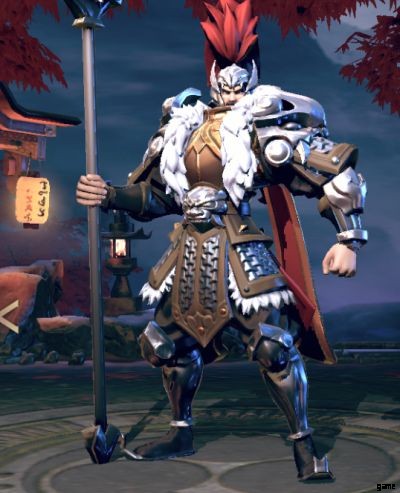
Maeda Keiji

S Neutral Tank/Tank
| Incendi | Jumps to the densest cluster of enemies, dealing 193% physical damage within 4 meters and taunting foes for 5 seconds. Level 2: Caster’s max HP is increased by 10% per taunted enemy for 10 seconds. Level 3: Enemies attacking the caster have a 30% chance to burn for 10% damage per second for 5 seconds. Level 4: While there are taunted enemies, incoming healing is increased by 50%. |
| Arming | At the start of combat, caster gains a shield with health equal to 1400 + 8% / 8000 + 10% / 14000 + 12% / 20000 + 14% of max HP. |
| Heart Flame | Caster gains a 40% max HP buff for 10 seconds, and burns away 1.5% current HP per second to deal 56% physical damage to nearby enemies. Caster heals for 10% of damage inflicted. Level 2: Buff and burn time increased to 15 seconds. Level 3: Burn self damage reduced to 0.75% of current HP. Level 4: Caster heals for 20% of damage dealt by burning to enemies. |
| Born of Fire | Deals 20% current HP damage to self. Stores damage taken for 5 seconds, and at the end of this period, 100% of that damage is restored as health. Level 2: 120% of damage taken is restored as health. Level 3: 140% of damage taken is restored as health. Level 4: Duration increased to 6.25 seconds. |
As if weird “tanks” like Darius weren’t enough, we now have a tank that is actively trying to kill himself. Meet Maeda Keiji, pyromaniac.
To be fair, Maeda Keiji has a slew of ways to recover or boost his own health, and his rage skill is very disruptive, which is fantastic for a tank. The bad thing is that Maeda Keiji doesn’t focus on tank duty:most of his self-damaging skills deal damage instead of boosting his own survivability, or better yet, that of his allies.
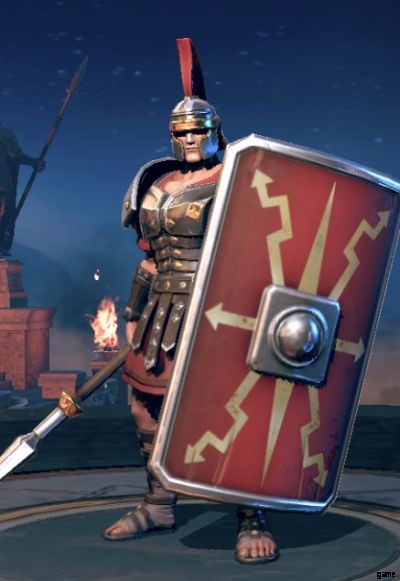
Lucullus
S Neutral Tank/Tank
| Victorious General | Passively takes 5% less damage from burning enemies. Strikes at the enemy’s front row for 5 hits of 63% physical damage, and disarms enemies hit for 5 seconds. Block rate of allies in caster’s row is increased by 20% for 10 seconds. Level 2: Damage increased to 79%. Level 3: Last hit also inflicts a 2 second stun. Level 4: Block rate buff increased to 30%. |
| Arming | At the start of combat, caster gains a shield with health equal to 1400 + 8% / 8000 + 10% / 14000 + 12% / 20000 + 14% of max HP. |
| Legion’s Might | Deals 204% physical damage in a straight line. Targets hit suffer -25% ATK for 6 seconds. Level 2: ATK debuff increased to 40%. Level 3: Damage increased to 204%. Level 4: Enemies hit also lose 200 rage. |
| Shield of Rome | Deals 136% physical damage in a frontal fan AOE. Knocks down enemies hit, and gives caster 30% block rate for 5 seconds. Level 2: Block rate buff increased to 40% and duration increased to 6 seconds. Level 3: Block rate buff increased to 50% and duration increased to 7 seconds. Level 4: Damage increased to 158%. Block rate buff increased to 60% and duration increased to 8 seconds. |
As a tank, Lucullus has some solid foundations only to be let down as the rest of his kit unfolds. His rage skill is pretty great, and I’ll never say no to an AOE disarm that also stuns, as well as a hefty 40% ATK debuff in a line. The trouble with Lucullus is staying power. I’m really not a fan of chance-based defenses, which is what block is. While he’s not bad per se, it’s well worth looking into a more consistent tank.
D-Tier
Lucius
A Evil Tank/AOE
| Legion Assault | Deals 135% / 151% / 170% / 192% physical damage in a straight line. This skill is guaranteed to crit. |
| Arming | At the start of combat, caster gains a shield with health equal to 1400 + 8% / 8000 + 10% / 14000 + 12% / 20000 + 14% of max HP. |
| Shield Breaking | Deals 73% physical damage in a frontal arc AOE twice and reduces their accuracy by 10% while increasing caster’s dodge by 5% / 7% / 10% for 5 seconds. |
| Battlefield Courage | Each dodge also increases caster’s crit damage by 10% / 15% / 20% for 10 seconds. |
If you haven’t picked up on it yet, I don’t like dodge or block-based tanks, as the longer the battle goes on, the more likely RNG will roll against you. Lucius is the epitome of these, skipping C-tier to go straight to D-tier. He has a passive that heals him when he dodges, which makes it seem like he’s got good dodge, right? No, he only has one way to help him avoid damage.
But Lucius does have 100% dodge rate on one thing:being in my formations. Seriously, you get La Hire for free. Why switch to this bozo?
Assassin Tier List
| S | Mata Hari, Chevalier d’Eon |
| A | Guy Fawkes, Hattori Hanzo |
| B | Ashoka the Great |
| C | Gareth |
S-Stufe
Mata Hari

S Justice Assassin/Reap
| Lethal Kiss | Attacks the foe with the lowest health twice for 198% then 285% Physical damage. Adds a Death Mark to targets hit. Targets that die while Death Mark is active give Mata Hari 30% ATK and max HP for 10 seconds. Level 2: Mata Hari does 30% more damage to targets with Death Mark. Level 3: Damage increased to 233% and 337%, respectively. Level 4: Mata Hari has 30% more crit and crit damage against Death Marked targets with more than 50% HP. |
| Strangling | Enemies with less than 40% HP give all allies 20% / 25% / 30% / 35% more crit and suffer an 80 / 600 /1300 / 1700 physical and magical defense reduction. |
| Raid of the Spy | Jumps to a random target, leaving behind mist that decreases enemy accuracy by 20% for 5 seconds. Initial target then takes 3 hits of physical damage at 116%, 76%, and 76% respectively, and 70% of this damage is dealt in an arc. Level 2: Damage dealt to primary target has Cleave, dealing its damage in a small AOE. Also adds Death Mark to primary target. Level 3: 3-hit combo damage raised to 120%, 80%, 80%. Level 4: Last hit of the 3-hit combo also stuns initial target for 1 second. |
| Bloody Storm | Deals 46% damage 6 times to enemies within range. Caster’s dodge is increased by 60% while casting this skill. Level 2: Dodge buff persists for 2 seconds after skill cast. Level 3: Each successful dodge during this skill heals caster for 20% ATK. Level 4: Caster gains 10 rage per enemy hit. |
Mata Hari, despite her real-life fame (or infamy), has a very simple, no-nonsense kit in Among Gods. As befitting her assassin role, Mata Hari can single out a foe with her rage skill, further rewarding her if she lands a kill. Her Strangling passive helps greatly with this, decreasing the DEF and M.DEF of low-health foes and increasing crit rate for both herself and allies. Overall, Mata Hari rocks consistent performance with a solid kit.
Chevalier d’Eon

S Justice Assassin/AOE
| Six-light Sword Formation | Blasts the area with the most enemy heroes , dealing 3 hits of 81% Physical damage and a final blow with 101% Physical damage. The last hit also silences enemies for 3 seconds. Level 2: Last hit also reduces ATK of targets hit by 10% for 8 seconds. Level 3: 3-hit combo now deals 98% per hit; finisher now deals 123%. Level 4: 3-hit combo now deals 120% per hit; finisher now deals 153%. |
| Strangling | Enemies with less than 40% HP give all allies 20% / 25% / 30% / 35% more crit and suffer an 80 / 600 /1300 / 1700 physical and magical defense reduction. |
| Blade Strike | Deals 74% Physical damage 4 times in a frontal arc. Level 2: Also increases caster’s crit rate by 10% for 10 seconds. Level 3: Damage increased to 89%. Level 4: Also increases caster’s crit rate by 25% for 10 seconds. |
| Dragon Thrust | Sends a tornado forward in a straight line, dealing 150% Physical damage and slowing targets hit for 10 seconds. Slow reduces attack speed by 10%. Level 2: Slow duration increased to 15 seconds. Level 3: Damage increased to 174%. Level 4: Slow reduces attack speed by 15%. |
Thankfully the Chevalier d’Eon was knighted, because I can see how saying Charles-Geneviève-Louis-Auguste-André-Timothée d’Eon de Beaumont could get really old really fast.
The Chevalier d’Eon was, at many points of their life, a fighter, a knight, a diplomat, a spy, and a hero. Fortunately, their role in Among Gods isn’t as complicated. What they excel in is damage, and lots of it. It’s important to note how their approach to damage is in combo hits, meaning that they’ll benefit more from crit rate boosts and damage than other heroes. Thankfully, Blade Strike by itself provides a hefty 25% crit rate buff.
The Chevalier’s swordplay comes to a head in their rage skill, which – thanks to its unique targeting – is guaranteed to hit where it’ll likely hurt the most. That by itself is already great, but it also silences and debuffs ATK. This not only paves the way for them to attack with impunity, but also opens up the enemy team to focused assault by your heroes.
A-Stufe
Guy Fawkes
S Neutral Assassin/Reap
| Phantom of Death | Hits target and nearby enemies with 3 hits of 118% physical damage. Caster is invulnerable for the duration of the skill. Level 2: Deals 5% bonus damage per 100 rage that the target has, to a maximum of 40% bonus damage. Level 3: Hits 4 times. Level 4: Damage increased to 137%. |
| Strangling | Enemies with less than 40% HP give all allies 20% / 25% / 30% / 35% more crit and suffer an 80 / 600 /1300 / 1700 physical and magical defense reduction. |
| Blinding Falcon | Deals 151% physical damage in a line and steals 80 rage from each target hit. Level 2: Targets hit take 20% more physical damage for 6 seconds. Level 3: Damage increased to 170%. Level 4: Steals 160 rage from each target hit. |
| Gaze of Death | Teleports behind the enemy with the highest ATK and attacks 3 times for 65% physical damage per hit. Caster gains 25% dodge for 5 seconds. Level 2: Dodge buff increased to 40%. Level 3: Each swing now deals 75% damage. Level 4: Dodges during this skill grant 10% crit rate for 5 seconds. |
Guy Fawkes is a pretty conventional assassin, though I have to say I’m surprised his character design both looks Middle Eastern and does not incorporate explosives in any way. That aside, he’s got a solid kit:guaranteed AOE damage on his rage skill, sniping capabilities with his 3 skill, and defense peeling and most importantly rage steal. While he’s not as flashy as other assassins like Mata Hari or Ashoka, Guy Fawkes does what an assassin does best – picking off targets swiftly and effectively.
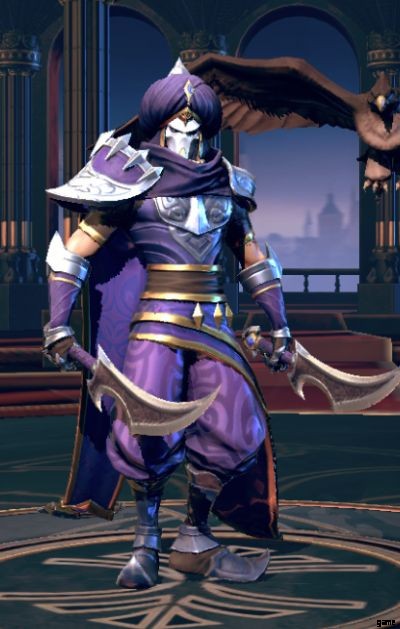
Hattori Hanzo
S Evil Assassin/Reap
| Ninja – Starburst | Deals 231% physical damage to targets, then shoots a shuriken that deals 277% physical damage and has a 50% chance to penetrate target for 8 seconds, reducing physical defense by 30%. Level 2: Initial hit deals 286% damage, shuriken deals 344% damage. Level 3: Initial hit deals 262% damage, shuriken deals 315% damage. Level 4: If this skill does not kill the target, caster gains 20% damage resist until the end of battle. |
| Strangling | Enemies with less than 40% HP give all allies 20% / 25% / 30% / 35% more crit and suffer an 80 / 600 /1300 / 1700 physical and magical defense reduction. |
| Ninja – Flashing | Jumps behind an enemy and deals 389% physial damage to them, while gaining 15% physical pierce for 8 seconds. Level 2: Pierce buff increased to 20%. Level 3: Also increases crit rate by 20%. Level 4: Pierce buff increased to 25%. |
| Ninja – Hidden Fury | Taking damage causes caster gain 10% attack speed and Evasion for 5 seconds. Can only happen once every 18 seconds. Level 2: Lasts 6 seconds. Level 3: 20% more rage generation while buff is active. Level 4: Lasts 7 seconds. |
Hattori Hanzo is the person you think about when you say “ninja”. This master of assassination excels at dealing great burst damage to individual targets and capitalizing on the results of these attempts. Hanzo not only has great damage tools at his disposal, but also has self-sustain and snowball potential, thanks to his rage skill triggering permanent stat gains whether or not he kills with it. He’s also surprisingly slippery and reliable for a dodge-based character thanks to his Evasion buff, though you should still take caution as it has a long cooldown between procs.
B-Klasse
Ashoka the Great

S Justice Assassin/Debuff
| Heaven-Scorching Flames | Passively causes enemies to receive the Phoenix Fire debuff the first time they are burned in combat. Phoenix Fire reduces damage resistance by 20%. Deals 276% Physical damage in a frontal circular AOE, and amplifies Phoenix Fire’s damage resistance debuff to 30% for 10 seconds. This debuff’s timer is reset if enemies are burned while they have Phoenix Fire. Level 2: Caster uses Blazing Peacock immediately when this skill is cast. Level 3:Phoenix Fire debuff amplification raised to 40% damage resistance reduction for 10 seconds. Level 4: Deals 120% Physical damage to all enemies with Phoenix Fire. |
| Strangling | Enemies with less than 40% HP give all allies 20% / 25% / 30% / 35% more crit and suffer an 80 / 600 /1300 / 1700 physical and magical defense reduction. |
| Blazing Peacock | Deals 3 instances of Physical damage for 46%, 67%, and 67% ATK. The last hit burns enemies hit for 10 seconds. Caster gains a shield equal to 300% ATK. The first time Blazing Peacock is used in battle, caster also gains a shield equal to 10% max HP. Level 2: 3-hit combo damage increased to 48%, 71%, and 71%. Level 3: Caster now gains shield equal to 400% ATK. Level 4: 3-hit combo damage increased to 53%, 80%, and 80%. |
| Wrath of Indra | Deals 114% Physical damage in a straight line and stuns targets hit for 1 second. Caster’s next 3 normal attacks deal extra damage equal to 30% ATK, give 30 rage, and have a 50% chance of burning targets hit for 8 seconds. Level 2: Extra damage raised to 60% of ATK. Level 3: Initial damage raised to 131%. Level 4: Targets struck by the initial hit are stunned for 2 seconds instead if they have Phoenix Fire. |
Ashoka is an inconventional assassin who plays more of a supporting role in combat. His unique Phoenix Fire debuff forms the center of his kit.
This debuff inflicts a powerful 20% damage resistance debuff to all enemies, which is incredibly potent and always welcome. This is further amplified by his rage skill, which boosts the damage resistance debuff to 40%:that’s almost a full 50% of extra damage!
In a vacuum, Ashoka isn’t particularly strong. However, he shines when paired with a team – especially other warriors and assassins who can focus down a tough enemy when his Phoenix Fire burns their defenses down, or characters who can reliably inflict burn on their own.
C-Tier
Gareth

A Justice Assassin/Reap
| Victorious Sword | Deals 482% Physical damage in a frontal AOE. Increases Block Rate by 25% for 5 / 6 / 8 / 10 seconds. |
| Strangling | Enemies with less than 40% HP give all allies 20% / 25% / 30% / 35% more crit and suffer an 80 / 600 /1300 / 1700 physical and magical defense reduction. |
| Guardian Sword | Deals 2 hits of 140% Physical damage to 1 target. Increases Block Rate by 10% / 15% / 20% for 5 seconds. |
| Road to Victory | Successful blocks heal Gareth for 1% / 1.5% / 2% max HP. |
Gareth’s got a ho-hum kit that’s perfect with his perfectly generic character design. There’s not much to say about him other than he’s free. He’s theoretically a sturdy assassin thanks to his block buffs, but let’s not mince words:chance-based defenses always lose out to consistent tactics. Besides, an assassin should be killing foes first and protecting themselves second.
Ranger Tier List
| S | Robin Hood, Temujin, Oda Nobunaga |
| A | Tomyris, Agrippa |
| B | Nasu no Yoichi |
| D | Duke William |
S-Stufe
Robin Hood

S Justice Ranger/Debuff
| Rain of Arrows | Passively causes attacks that inflict Poison to inflict an extra stack if hitting a slowed target. Deals 60% Physical damage per hit for 10 hits. Each hit of this skill increases the next hit’s damage by 10%. Level 2: Damage increased to 65%. Level 3: Damage amplification per hit increased to 15%. Level 4: Damage increased to 71%. |
| Sniping | Normal attacks have 240 / 600 / 1200 / 1800 extra ATK. Normal attacks also have up to 20% / 24% / 28% / 30% extra damage, based on how far the projectile travels. |
| Sniping | Deals 267% Physical damage to the enemy with the highest ATK. Level 2: Also inflicts Poison on targets hit. Poison deals Physical damage equal to 10% of caster’s ATK per second for 10 seconds. Stufe 3 :Damage increased to 303%. Level 4: Damage increased to 345%. |
| Split Shot | Deals 133% Physical damage to 2 enemies and gives them one stack of Poison. Level 2: Hits an additional target. Level 3: Damage increased to 187%. Level 4:Poison damage increased to 15% ATK. |
The lack of a trial mode in this game really hurts, as I’d like to run some experiments with our friend from Sherwood Forest. And in usual roguish fashion, he’s left a lot for us to decipher (yes, he has two skills called Sniping). But no matter how you slice it, Robin Hood is an incredible ranger who takes top slot in his class category as there’s no SS ranger (yet).
Rain of Arrows :homing or not, this skill hurts. If it hits an area, you’ll ideally want to pair Robin Hood with someone who can stun, knockdown or lock enemies in place so that they stay in the danger zone longer. And that’s not a typo:the more an enemy gets hit by the rain, the more it’ll hurt.
This skill by itself already makes Robin Hood great, but he had to go and add poison damage to his arsenal, as well as a way to pseudo-AOE by splitting shots and inflicting all his foes with poison. Just like with his rage skill (probably), you’ll want to pair Robin Hood with a merry man (or woman) who can inflict slow as Robin Hood inflicts 2 stacks per hit instead of 1 on a slowed target.
Temujin
S Evil Ranger/AOE
| Hunting Posture | Deals 3 hits of 85%, 85%, and 104% physical damage in a straight line. The last hit also burns targets for 10 seconds, dealing 10% of caster’s ATK as damage per second. Afterwards, switches to Hunting Posture stance for 8 seconds, where caster gains 60% attack speed and 20% more physical damage but can only use normal attacks. Both the 3-hit combo and Hunting Posture shots deal 100% of ATK as bonus damage to shielded targets. Deals 60% Physical damage per hit for 10 hits. Each hit of this skill increases the next hit’s damage by 10%. Level 2:Hunting Posture duration increased to 12 seconds. Level 3: 3-hit combo damage increased to 91%, 91%, 112%. Level 4: 3-hit combo damage increased to 97%, 97%, 121%. |
| Sniping | Normal attacks have 240 / 600 / 1200 / 1800 extra ATK. Normal attacks also have up to 20% / 24% / 28% / 30% extra damage, based on how far the projectile travels. |
| Stamping Arrow | Deals 65% physical damage in a frontal fan-shaped AOE, and marks targets hit. After a marked target is hit by Temujin, they explode after 8 seconds for 85% physical damage. Level 2: Explosion deals 145% physical damage. Stufe 3 :Damage increased to 113%. Each target that explodes heals caster for 25% ATK. Level 4: Damage increased to 183%. Each target that explodes heals caster for 50% ATK. |
| Weakness Revelation | Deals 97% physical damage in a straight line. This skill has bonus 50% crit rate, which also applies to the explosion caused by Stamping Arrow. Level 2: First target hit is knocked down for 2 seconds. Level 3: Damage increased to 133%. Level 4: Damage increased to 187%. |
Where Robin Hood takes the route of a stacking AOE and debuffs, Temujin prefers the more direct approach. The khan uses his arrows to deal impressive amounts of physical damage to his foes, picking them off with ease while his allies are busy on the frontlines. Temujin has a special hatred for shielded targets, so you can leave them to him as he does a ton of bonus damage to them.
As he goes into machine gun mode after his rage skill, it’s a good idea to pair Temujin with someone who can buff his attack or crit rate/damage even more to maximize his damage output.
Oda Nobunaga

S Evil Ranger/AOE
| World Conqueror | Blasts the enemy with the least health for 558% physical damage and burns them, causing them to take 10% of the caster’s ATK as damage per second for 10 seconds. This attack cannot miss. Level 2: If this skill kills a non-summoned unit, caster gains 300 rage. Level 3: Damage increased to 622%. Level 4: If this skill kills a non-summoned unit, caster gains 400 rage. |
| Sniping | Normal attacks have 240 / 600 / 1200 / 1800 extra ATK. Normal attacks also have up to 20% / 24% / 28% / 30% extra damage, based on how far the projectile travels. |
| Demon Daimyo | Deals 212% physical damage in a straight line. Level 2: Caster gains 100 rage and 10% crit rate for 10 seconds. Stufe 3 :Damage increased to 240%. Level 4: Damage increased to 269%. |
| Iron Cannon Barrage | Strafes and fires in a frontal arc, dealing 10 instances of 42% physical damage. Level 2: Last hit slows enemies for 10 seconds, reducing their attack speed by 8%. Level 3: Damage increased to 45%. Level 4: AOE size increased. |
He has a shotgun. 10/10.
Once you’re done admiring the firearms, you can have a realistic look at his kit. And it does not disappoint. Where Robin Hood is the status archer and Temujin the constant DPS, Nobunaga is the sniper, with a whopping 622% damage on his rage skill that can’t be avoided. As if that wasn’t enough, he also has some rage generation buffs and a way to deal with multiple enemies at once, though it’s not as impressive as his rage skill.
A-Stufe
Tomyris

S Justice Ranger/AOE
| Vengeance Strike | Hits the enemy with the highest ATK for 173% Physical damage, then hits them with a spirit for 371% Physical damage. Causes Tomyris to focus fire on that hero for 10 seconds and gain 30% Leech Rating and 25% defense penetration. Level 2: The second hit disarms targets hit for 2.5 seconds. Level 3: Damage increased to 203%/440%. Level 4: Damage increased to 239%/523%. |
| Sniping | Normal attacks have 240 / 600 / 1200 / 1800 extra ATK. Normal attacks also have up to 20% / 24% / 28% / 30% extra damage, based on how far the projectile travels. |
| Flying Axes | Hits frontline enemies for 105% Physical Attack twice. Each hit adds one stack of Wound, increasing damage taken by 8%. Level 2: Damage increased to 121%. Stufe 3 :Wound extra damage increased to 12%. Level 4: Damage increased to 140%. |
| Parasitic Totem | Summons a totem that has 30% of caster’s stats. Each ally within the totem’s radius increases Tomyris’ attack speed by 12%. The totem also grants 35 rage every second for 8 seconds to allies in its radius. Level 2: Each time Tomyris lands a hit, allies within the totem’s AOE gain 15 rage. Level 3: Attack speed boost increased to 16%. Level 4: Rage regeneration per second increased to 50. |
Tomyris is an above-average ranger that serves as both DPS and as support. Her rage skill allows her to deal a hefty chunk of damage to the most dangerous foe on the field while also disarming them, which is more than enough to give her a slot in the upper tiers of rangers.
Apart from this, Tomyris boasts a solid kit that, most prominently, helps her allies out by giving them range while fueling Tomyris’ own attack speed. All in all, she’s a good hero with no particular weaknesses.
Agrippa

S Neutral Ranger/AOE
| Expedition | Gives caster the Expedition buff, which increases caster’s attack speed by 20% and crit by 100%, but isables rage regeneration for 8 seconds. Level 2: Also increases ATK by 20% for the duration of the buff. Level 3: Buff duration increased to 12 seconds. Level 4: Also increases ATK by 20% for the duration of the buff. |
| Sniping | Normal attacks have 240 / 600 / 1200 / 1800 extra ATK. Normal attacks also have up to 20% / 24% / 28% / 30% extra damage, based on how far the projectile travels. |
| Vampiric Strike | Every 3 normal attacks, caster deals 110% physical damage twice to its target. Automatically used at the beginning of combat. Level 2: Now triggers every 2 normal attacks. Stufe 3 :If caster’s Expedition buff is active, this skill has 25% lifesteal. Level 4: Damage increased to 119%. |
| Skyfall | Deals 133% physical damage in a straight line. Level 2: Slows targets hit, reducing their attack speed by 10% for 10 seconds. Level 3: Damage increased to 143%. Level 4: Damage increased to 155%. |
Agrippa is a by-the-books DPS ranger:steroids for boosting his damage (at the cost of removing his own rage regen), augments to his normal attacks, and a fast support AOE. As with other normal attack boosted heroes, Agrippa works best when paired with supports that increase his attack speed, allowing him to proc Vampiric Strike almost constantly. Just watch out for the no rage regen:that can get nasty fast.
B-Klasse
Nasu no Yoichi

A Neutral Ranger/AOE
| Locked and Loaded | Deals 458% / 501% / 549% / 601% physical damage to target. If this damage is not blocked, knocks down and stuns target hit for 2 seconds. |
| Sniping | Normal attacks have 240 / 600 / 1200 / 1800 extra ATK. Normal attacks also have up to 20% / 24% / 28% / 30% extra damage, based on how far the projectile travels. |
| Penetrating Arrows | Deals 284% physical damage to target. Increases Break Rate by 25% for 10 seconds. Level 2: Damage increased to 309%. Stufe 3 :Break Rate buff increased to 50%. |
| Willful Berserk | Killing an enemy or assisting in a kill gives caster 5% / 7.5% / 10% increased Break Rate for the duration of combat. |
I honestly have no idea what Break Rate is, and Nasu no Yoichi is the only character in the game that mentions it. Ignoring all that stuff, what we have here is a great sniper. There are very few heroes, even among S and SS-rarity ones, that have such a huge multiplier on their rage skill. Use this to your advantage:buff Nasu no Yoichi, let loose with a big shot. Rinse and repeat.
D-Tier
Duke William

A Evil Ranger/AOE
| Eagle Eye | Fires a piercing shot at the furthest foe, dealing 163% / 177% / 192% / 208% physical damage to it and enemies in the bolt’s path. The target also receives a guaranteed critical hit that deals 80% / 100% / 120% / 140% physical damage. |
| Sniping | Normal attacks have 240 / 600 / 1200 / 1800 extra ATK. Normal attacks also have up to 20% / 24% / 28% / 30% extra damage, based on how far the projectile travels. |
| Eagle Wings | Deals 111% / 120% / 129% damage to enemies in a straight line. Increases caster’s crit rate by 15% for 6 seconds. |
| Eagle Claw | Landing a critical hit gives caster 5% / 7.5% / 10% ATK for the rest of the battle. |
Snowballing damage is good, but the way Duke William goes about it is incredibly lame. His crit buff barely raises the chance – 15% that doesn’t increase at all, and the only guaranteed crit he lands is his explosion via rage skill. Which, by the way, is dependent on enemies being lined up in a row to maximize damage.
Just use Nasu no Yoichi.
Sage Tier List
| S | Joan of Arc (Angel) |
| A | Caesar, Shizuka Gozen, Galenus, Nostradamus |
| B | Joan of Arc, Julia Vipsania Agrippina |
S-Stufe
Joan of Arc (Angel)

SS Holy Sage/Heal
| Exaltation of Light | Gains high damage resistance for 5 seconds. When this buff expires, 150% of damage taken while the buff was up is converted to healing for caster. Level 2: 200% of damage taken to healing. Level 3: 50% of the healing amount heals allies over 10 seconds. Level 4: Effect lasts 7 seconds. |
| Mark of the Saint | Passively gains 1 stack of Mark of the Saint when the battle begins. Every time caster loses 55% / 50% / 45% / 40% of their max HP, consumes 1 Mark of the Saint and automatically uses Exaltation of Light for free. Marks of the Saint grant 24% / 28% / 32% / 36% damage resistance. |
| Realm of Refuge | Diverts 25% of all damage taken by allies to caster. When caster loses 20% max HP, heals the 2 allies with the lowest health for 70% of caster’s ATK. Level 2: Diverts 40% of all damage taken by allies to caster. Level 3: Heals 3 allies instead of 2. Level 4: Healed allies also gain 15% damage resistance for 5 seconds. |
| Judgment Day | Deals 103% damage in an AOE, which then explodes for 141% damage and reduces the damage resistance of enemies hit by 20% for 6 seconds. The enemies with the highest ATK and the lowest health are marked with Arbitrament. When a unit with Arbitrament kills or is killed, caster gains one stack of Mark of the Saint. Level 2: Heals all allies for 20% of damage inflicted. Level 3: Initial damage increased to 134%, explosion damage increaed to 188%. Level 4: Caster’s health regeneration is increased by 15% for each enemy hit by this skill. |
Did I mention that SS characters are utterly bonkers? Because here’s a great example. Angel Joan is literally too holy to die. While her role is marked as sage/healer, she pulls extra duty as a super durable tank thanks to her ridiculous array of damage reduction abilities. She even passively pulls damage towards herself, allowing you to field squishier allies in Joan’s formation. And to top it all off, she has so many ways to heal both herself and her allies. You probably won’t even need to run a secondary healer in her party.
A-Stufe
Caesar

S Neutral Sage/Buff
| King’s Sacred Wind | Passively gives Caesar 100% rage regen for 6 seconds when the battle begins. Inspires three random allies, giving them 60 rage per second for 6 seconds. The first time this skill is cast, it has a 150% effect. Level 2: Rage per second increased to 75. Level 3: Also gives Caesar 35 rage per second. Level 4: Rage per second increased to 90. |
| Encouraging | At the start of combat, all allies except caster and other Sages gain 4% / 6% / 8% / 10% block rate and 55 / 250 / 400 / 600 physical and magic defense for 12 / 13 / 14 / 15 seconds. |
| Emperor’s Glance | Fires a beam that deals 100% magic damage, reducing the accuracy of enemies hit by 15% for 3 seconds, and giving allies hit 15% damage amplification for 3 seconds. After the beam passes, the path it crossed explodes, dealing 146% magic damage to enemies caught in the blast, and healing allies for 50% of caster’s ATK. Level 2: Damage increased to 114% and 171%. Level 3: Accuracy debuff increased to -22%, damage amplification buff increased to 22%. Level 4: 30% chance to cast this skill again when used. |
| Grace of War | Two random allies gain a 10% ATK buff. Successfully buffing allies with this skill heals caster for 2% of missing HP per second for 6 seconds. Level 2: Attack buff increased to 15%. Level 3: Targets another ally. Level 4: Attack buff increased to 20%. |
Good emperors know how to delegate tasks to those below them, and that’s exactly what Caesar does. As a dedicated support, Caesar inspires his allies to glory and victory while chipping in with some damage and heals from time to time. By spurring his comrades to heroic deeds by feeding them rage and powerful (and potentially permanent) ATK buffs, Caesar can rest on his laurels knowing that he’s welcome in any team.
Shizuka Gozen

S Neutral Sage/Buff
| Divine Dance | Deals 258% magic damage to 3 random enemies. Heals a random ally (except caster) by 30% of caster’s ATK every 2 seconds for 8 seconds, and adds Falling Flowers to the battlefield. During Falling Flowers , caster also receives buffs and healing that they give to an ally. Level 2:Falling Flowers duration increased to 12 seconds. Level 3: Triggers Falling Flowers for 8 seconds at the start of the battle. This does not trigger the magic damage nor the ally heal. Level 4: Damage increased to 304%. |
| Encouraging | At the start of combat, all allies except caster and other Sages gain 4% / 6% / 8% / 10% block rate and 55 / 250 / 400 / 600 physical and magic defense for 12 / 13 / 14 / 15 seconds. |
| Peace of Sleep | Hits a random for with pollen for 10 seconds, dealing 284% magic damage. Random ally (except caster) gains 30% physical resistance for 10 seconds. Level 2: Pollen reduces physical resistance by 30%. Level 3: Ally physical resistance buff increased to 40%. Pollen reduces physical resistance by 40%. Level 4: Damage increased to 322%. |
| Nostalgia | Random ally (except caster) gains 3 petals. A hero with petals consumes 1 petal per normal attack to deal extra damage equal to 40% of their ATK. Level 2: Targets an additional ally. Level 3: Petal count increased to 5. Level 4: Bonus damage is now 60% of ATK. |
I hate random buffs, but the ones that Shizuka Gozen offers are way too good to pass up on. Continuous healing, damage mitigation, and boosted normal attack damage? Ja bitte. What really seals the deal is Shizuka’s Falling Flowers , which essentially doubles the value of her heals and buffs as they’ll always affect her too while the flowers are up.
Galenus

S Neutral Sage/Heal
| Struggle of the Pharmacist | Chucks 2 potions at the targeted area, healing allies for 8% of their max HP per potion. Level 2: Chucks 3 potions. Level 3: Heals for 12% max HP. Level 4: Allies hit directly by a potion gain a 10% ATK buff. |
| Encouraging | At the start of combat, all allies except caster and other Sages gain 4% / 6% / 8% / 10% block rate and 55 / 250 / 400 / 600 physical and magic defense for 12 / 13 / 14 / 15 seconds. |
| Hymn of Life | Gives the ally with the least HP a regeneration buff, healing them for 80% of caster’s ATK per second for 8 seconds. Level 2: Targets an additional ally. Level 3: Healing increased to 90% of caster’s ATK. Level 4: Healing increased to 100% of caster’s ATK. |
| Rejuvenation | Heals all nearby allies for 160% of caster’s ATK. Level 2: Affected allies also gain 10% P.Def and M.Def for 10 seconds. Level 3: Healing increased to 200% of caster’s ATK. Level 4: Healing increased to 240% of caster’s ATK. |
Galenus is one of two dedicated healers in the game. Because of this, he’s automatically placed pretty high on this tier list. A trial mode would have been really nice for him, but I’m going to assume that each potion that his rage skill throws heals for the amount listed. The alternative is that he heals 12% max HP which is probably not the case as that’s an incredibly piddling amount.
There’s not much to say about Galenus, other than he keeps your other guys alive. He does give a 10% (permanent?) ATK buff, as well as a temporary DEF buff, but that’s about it.
Nostradamus

S Evil Sage/Debuff
| Spiritual Fog | Detonates a censer in an area, which spreads fog that deals 51% magic damage to enemies every second and lowers their attack speed by 15%. Allies in the fog gain 30% attack speed. Level 2: Fog lasts 9 seconds. Level 3: Attack speed buff increased to 40%. Level 4: Attack speed debuff increased to 25%. |
| Encouraging | At the start of combat, all allies except caster and other Sages gain 4% / 6% / 8% / 10% block rate and 55 / 250 / 400 / 600 physical and magic defense for 12 / 13 / 14 / 15 seconds. |
| Adrenaline | Gives the ally with the least HP a regeneration buff, healing them for 20% of caster’s ATK per second, as well as 15% ATK, for 8 seconds. Level 2: Heals for 30% of caster’s ATK. Attack buff increased to 20%. Level 3: Lasts 10 seconds. Level 4: Attack buff increased to 30%. |
| Rain of Weakness | Chucks three potions which explode for 63% magic damage and weakening them for 8 seconds. Weakened enemies lose 10% ATK for 3 seconds if they move, and take damage equal to 2% of their max HP but not exceeding 500% of caster’s ATK. Level 2: Duration increased to 10 seconds. Level 3: Movement damage increased to 3% max HP. Level 4: Duration increased to 12 seconds. |
Yes, Nostradamus was a doctor. No, he did not throw explosive potions and censers in real life, but who cares – it’s cool. Know what else is cool? His rage skill. That stuff not only deals respectable damage on its own (totalling to just above 400% for its full duration), but it also serves as both a hefty debuff AND a powerful buff. That alone makes Nostradamus worth using, but no, he also serves as an off-healer and can do some crazy shenanigans with his Rain of Weakness. Pair him either with someone who can lock enemies in place to maximize his rage skill, or someone who seriously displaces enemies to maximize his movement to damage gimmick.
B-Klasse
Joan of Arc

A Justice Sage/Buff
| Victory Flag | Deals 163% Physical damage in a frontal arc. Targets hit are also knocked down. Level 2: Targets hit lose 200 rage. Level 3: Damage increased to 184%. Level 4: Rage drain increased to 300. |
| Encouraging | At the start of combat, all allies except caster and other Sages gain 4% / 6% / 8% / 10% block rate and 55 / 250 / 400 / 600 physical and magic defense for 12 / 13 / 14 / 15 seconds. |
| Power of Freedom | Deals 77% Physical damage in a frontal arc in 3 waves. Level 2: Caster has 10% damage resistance while casting this skill. Level 3: Damage increased to 82%. |
| Advent of the Saint | The two allies with the least rage gain 150 rage. Level 2: They also gain 5% ATK for 10 seconds. Level 3: Rage gain increased to 200. |
Like La Hire, Joan of Arc is one of the first characters you get. And like La Hire, Joan is pretty adequate until you get somebody better.
Her knockdown on rage is particularly nice as it gives you a reliable pseudo-stun that works even well into the game. Joan of Arc’s problem is that despite being a buffer, her buffs are neither particularly impactful nor long-lasting. Extra defense is nice, but other supports come with that skill too. Extra rage in a vacuum isn’t particularly useful either, except on specific heroes – which means that it’s not universally applicable to any team, and the ATK buff is insultingly low.
Julia Vipsania Agrippina

A Neutral Sage/Heal
| Lunar Tear | Heals nearby allies for 115% / 129% / 144% / 162% ATK twice. Increases P.Def and M.Def for healed allies by 10% for 5 seconds. |
| Encouraging | At the start of combat, all allies except caster and other Sages gain 4% / 6% / 8% / 10% block rate and 55 / 250 / 400 / 600 physical and magic defense for 12 / 13 / 14 / 15 seconds. |
| Lunar Wrath | Deals 237% magic damage to one enemy and heals caster for 10% / 15% / 20% max HP. |
| Moonlight | When health is below 50%, caster gains 20% / 30% / 50% P.Def and M.Def. |
There are very few dedicated healers in Among Gods, and you’re guaranteed to get one of them – Julia Vipsania Agrippina – just by playing through the campaign. Despite not having a very flashy kit, she’ll provide adequate healing for your party throughout the campaign. Though replace her with Galenus if you get him.
Mage Tier List
| S | Charlemagne |
| A | Abe no Seimei, Merlin, Nero |
| B | Wang Zhaojun, Gilles de Rais, Morgan le Fay |
| C | Mary I, Cleopatra, Queen Akinny, Ellie |
S-Stufe
Charlemagne

SS Holy Mage/AOE
| Divine Power | Summons 5 / 6 / 7 / 8 rays of light which deal 187% Magic damage to a random target per beam. Intimidated enemies also take 106% Magic damage from each beam. The same enemy can be targeted by multiple beams. Charlemagne also gains a shield equal to 20% of his max HP, and is immune to control skills while casting this skill. |
| Glory of Truth | At the start of combat, Charlemagne’s skill damage is increased by 3% / 5% / 8% / 12%. |
| Gazing Down | Intimidates a random foe, dealing 47% Magic damage per second, draining 50 rage, and reducing their ATK by 30% for 10 seconds. Intimidated enemies take damage from Divine Power , even if the beams don’t target them. Level 2: DOT damage increased to 53% per second. Level 3: Rage drain increased to 50 per second. Level 4: DOT damage increased to 59% per second. |
| Majestic Sword | Deals 283% Magic damage to the enemy’s frontline. Enemies hit are silenced for 5 seconds. Level 2: Silence duration increased to 7 seconds. Level 3: Damage increased to 348%. Level 4: Damage increased to 428%. |
Of course, the rarest heroes have the best toys to play with. Charlemagne is no exception here:his rage skill is a nuke that’s hard to predict but always hits hard owing to its random targeting, and can be further augmented by his Intimidate mechanic. Charlemagne further augments his nuking abilities with a passive that raises his already respectable skill damage even further, as well as a frontline-hitting nuke that not only has a big multiplier, but also silences.
A-Stufe
Abe no Seimei

S Neutral Mage/AOE
| Shikigami:Stray Birds | Passively gains 3 talismans at the start of combat. Deals 174% magic damage to one target, then consumes all talismans to deal 140% magic damage and drain 160 rage from a random enemy per talisman. Level 2: Talismans do 170% damage. Level 3: If this skill burns at least 3 talismans, also inflicts -15% incoming healing for 5 seconds to targets hit. Level 4: Talismans do 200% damage. |
| Foreseeing | Gains 150 / 225 / 300 / 325 rage when battle begins. Gains 150 / 600 / 1100 / 1600 ATK the first time this hero’s rage skill is used. |
| Shikigami:Raid | Deals 189% magic damage to one target and reduces its rage by 160. Also generates 1 talisman. Level 2: 50% chance to generate 2 talismans. Level 3: Damage increased to 243%. Level 4: Stuns enemies for base 0.8 seconds. The less rage a hit enemy has, the longer this stun, to a maximum of 2.4 seconds. |
| Shikigami:Divine Dust | Generates 1 talisman every 8 seconds. Each talisman increases caster’s ATK by 8%, to a maximum of 30%. Level 2: Each talisman increases caster’s ATK by 11%, to a maximum of 40%. Level 3: If caster would take more than 10% of max HP as damage from a single hit, consume 1 talisman to block that damage and gain 10% damage resistance for 4 seconds. Can only trigger once every 4 seconds. Level 4: Generates 2 talismans every 8 seconds. |
This astrologer and spiritualist is certainly a powerful addition to any team in Among Gods. Abe no Seimei presents a constant threat throughout the entire battle:either deal with him quickly, or fall prey to his snowballing rage skill. The longer you keep him alive, the more talismans he can generate – and the more deadly his rage skill becomes. While the random targeting nature of his rage skill can be iffy, it can hit the same target more than once, and the rage drain, while not the primary point of the skill, is a very nice bonus.
Merlin

S Neutral Mage/AOE
| Meteor Fire | Casts 4 waves of meteors, dealing 91% magic damage in an AOE. Burning targets hit receive damage equal to 150% ATK. Level 2: Meteors do 124% damage. Level 3: Now fires 5 waves Level 4: Targets hit are penetrated, losing 20% magic resistance for 10 seconds. |
| Foreseeing | Gains 150 / 225 / 300 / 325 rage when battle begins. Gains 150 / 600 / 1100 / 1600 ATK the first time this hero’s rage skill is used. |
| Flame of Purgatory | Deals 182% magic damage in an area. Level 2: Targets hit have -30% crit rate for 5 seconds. Level 3: Damage increased to 245%. Level 4: Crit rate debuff increased to -50%. |
| Flame Imprisonment | Imprisons an enemy, rendering it unable to move or act for 3 seconds. Level 2: Duration increased to 4 seconds. Level 3: Duration increased to 5 seconds. Level 4: Imprisoned targets can neither regenerate health nor be healed. |
The mighty Merlin proves that his magical prowess is still incredibly formidable. His rage skill, Meteor Fire , isn’t too strong on paper – but it’s 4-5 hits, and at maximum level, spearheads the rest of your team’s magical attacks by shredding 20% magic resistance. The rest of his kit is short and sweet – a fireball that does respectable nuke damage in an area with a crit debuff, and a heavy, long-lasting disable.
Nero

S Evil Mage/AOE
| Song of Loneliness | Deals 385% magic damage to all enemies. Each stack of Nature on an enemy causes it to take 5% more damage from this skill. Randomly paralyzes enemies with Nature stacks, causing them to be unable to act for 0.8 seconds. Level 2: Each Nature stack increases damage taken by 8%. Level 3: Each Nature stack increases damage taken by 12%. Level 4: Paralyze duration increased to 1 second; each Nature stack further increases this by 0.2 seconds. |
| Foreseeing | Gains 150 / 225 / 300 / 325 rage when battle begins. Gains 150 / 600 / 1100 / 1600 ATK the first time this hero’s rage skill is used. |
| Requiem | Deals 268% damage to one target and inflicts one stack of Nature. Level 2: Also penetrates the target, reducing its M.Def and ATK by 20% for 20 seconds. Level 3: Inflicts 2 stacks of Nature. Level 4: Also penetrates the target, reducing its M.Def and ATK by 40% for 20 seconds. |
| Third Sunset | Deals 71% magic damage 3 times in a frontal rectangular AOE. Each hit has a 20% chance to apply one stack of Nature for 20 seconds. Nature stacks up to 10 times. Level 2: Damage increased to 78%. Level 3: Damage increased to 110%. Level 4: Inflicts 2 stacks of Nature . Chance to apply stacks increased to 50%. |
Nero brings respectable AOE damage to the table (it’s not really AOE, it just happens to hit everybody), but that’s not all that the ex-emperor offers. His kit revolves around his unique Nature debuff, which both augments the damage he does and gives his rage skill random micro-stuns. While you shouldn’t be using Nero solely for these stuns – and you should have a dedicated stunner – they are nonetheless incredibly potent in battle.
B-Klasse
Wang Zhaojun

S Justice Mage/Control
| Prideful Plum | Summons a blizzard that deals 100% Magic damage to targets within range up to 4 times. The first hit has a 25% chance to freeze targets for 5 seconds, increased to 30% if the target is slowed. Freeze removes 300 rage once its timer runs down. Level 2: Damage per hit increased to 111%. Level 3: Unslowed freeze chance increased to 35%; slowed freeze chance increased to 40%. Level 4: Damage per hit increased to 124%. |
| Foreseeing | Gains 150 / 225 / 300 / 325 rage when battle begins. Gains 150 / 600 / 1100 / 1600 ATK the first time this hero’s rage skill is used. |
| Winter’s Herald | Gives caster the Ice and Snow Buff for 6 seconds. While this buff is active, the closest ally within 3 meters gains 100 rage every 2 seconds, and the next instance of damage from the caster reduces magic resistance of targets hit by 10%. Level 2: Ice and Snow lasts 10 seconds. Level 3: Rage generation increased to 150. Level 4: Magic resistance debuff increased to 20%. |
| Bone Freezing | Deals 159% Magic damage in a frontal fan-shaped area via 3 icicles. Targets hit lose 200 rage; enemies that are frozen or slowed lose 250 rage instead. Level 2: Also reduces accuracy of targets hit by 10% for 7 seconds. Level 3: Damage increased to 218%. Level 4: Also reduces accuracy of targets hit by 20% for 7 seconds. |
Wang Zhaojun is a debuffer. The problem with her is that while her debuffs are unquestionably good, they’re not universally useful. Sure, rage down is great for disabling enemies, but supposing the enemy team runs a rage-generating composition, what do we do? All in all, I’d rather hit the enemy’s stats directly – at least those are always useful.
Gilles de Rais

S Evil Mage/Control
| Hell of the Blood Pool | Summons a pool of blood which pulls all enemies into it, dealing 292% magic damage and interrupting their movement. This skill has 30% lifesteal. Level 2: Lifesteal increased to 40%. Level 3: Damage increased to 332%. Level 4: Damage increased to 378%. |
| Foreseeing | Gains 150 / 225 / 300 / 325 rage when battle begins. Gains 150 / 600 / 1100 / 1600 ATK the first time this hero’s rage skill is used. |
| Kins of Blood | Summons bats which last for 10 seconds. Bats attack once per second for 56% magic damage with 100% lifesteal. Hit targets also have -3% incoming healing for 8 seconds when hit, which stacks with itself. Level 2: Damage increased to 66%. Level 3: Bats attack 12 times. Level 4: Bats attack 15 times. |
| Nightmare Assault | Teleports the farthest foe to the front of the caster and penetrates them, reducing their magic resistance by 30% for 10 seconds. Level 2: Also reduces physical resistance by 35%. Level 3: Magic resistance reduction increased to 50%. Level 4: Physical resistance reduction increased to 55%. |
I guess all that murder paid off for Among Gods’ version of Gilles de Rais, as he’s somehow become a demonologist? Vampire? Demon vampire.
As a mage, Gilles de Rais has a respectable damage output with his blood pools and bats. But the main reason you’ll be using him is because of his displacement abilities. Both his rage skill and his 3 skill make Gilles de Rais incredibly disruptive – though the 3 skill may also lead to his swift demise, and you have little control over when and where he uses it, which can be a very big liability.
Do note that while his forced teleport is iffy, it also inflicts a huge damage reduction penalty to its target. It’s a good idea to have someone on standby to capitalize on this, as bluebeard himself is ill-suited to take advantage of it.
Morgan le Fay

A Evil Mage/AOE
| Waterspout | Summons a waterspout in the rearmost enemy row, which deals 175% magic damage when it appears, then 43% magic damage every 0.3 seconds until it fades. Level 2: 60% chance to stun for 1 second when activated. Level 3: Initial damage increased to 200%. Damage on secondary hits increased to 46%. Level 4: Initial damage increased to 225%. Damage on secondary hits increased to 49%. |
| Foreseeing | Gains 150 / 225 / 300 / 325 rage when battle begins. Gains 150 / 600 / 1100 / 1600 ATK the first time this hero’s rage skill is used. |
| Rapid Cooling | Fires a projectile in a straight line, dealing 81% magic damage to enemies it touches. At the end of its path, the projectile explodes, dealing 129% magic damage. Enemies hit are slowed, reducing their attack speed by 10% for 6 seconds. Level 2: Travel damage increased to 87%, explosion damage increased to 139%. Level 3: Travel damage increased to 93%, explosion damage increased to 150%. Level 4: Slow duration increased to 9 seconds. |
| Power Gyre | Summons a water elemental. When the elemental scores a hit, 50% chance to increase ATK by 8% for 7 seconds. Level 2: ATK buff increased to 11%. Level 3: ATK buff increased to 13%. Level 4: Duration increased to 9 seconds. |
You get Morgan le Fay for free, and she’s an okay unit. Her Waterspout rage skill is pretty decent, and becomes much better once you unlock her stun. The rest of her kit is also pretty good at dealing AOE damage, and while she’s outperformed by higher rarity heroes, she’ll work just fine until you can get a rarer hero to replace her.
And no, there’s no indication whether it’s her or her elemental that gains the attack buff for her 3 skill.
C-Tier
Mary I

S Neutral Mage/AOE
| Evil Spirit Release | Passively gains 1 stack of Thirst for Blood per normal attack or skill use. At 5 stacks, caster loses all stacks and gains 30% attack speed and leech rating for 4 seconds. Caster teleports behind the rearmost ally and becomes untargetable. Summons a spirit to attack foes every 0.15 seconds for 62% magic damage and healing for 20% of the damage dealt. Level 2: Each attack also stuns for 0.1 seconds. Level 3: Damage increased to 69%. Level 4: Damage increased to 78%. |
| Foreseeing | Gains 150 / 225 / 300 / 325 rage when battle begins. Gains 150 / 600 / 1100 / 1600 ATK the first time this hero’s rage skill is used. |
| Abstinent Bound | Every 3 seconds, caster binds nearby enemies for 3 seconds, dealing 0.7% max HP damage per second and healing caster for 0.7% max HP. A unit can only be affected by Abstinent Bound once every 8 seconds. Level 2: Binds last 4 seconds. Level 3: Damage and health regeneration increased to 1% max HP. Level 4: Bound enemies also lose 20% magic resistance. |
| Thorns of Blood | Creates a path of thorns which deals 1% max HP damage to targets hit and every 2.5 seconds. Enemies in the path take 33% magic damage per second and lose 25% attack speed. Level 2: Thorn damage increased to 1.5% max HP. Level 3: Damage increased to 37%. Level 4: Thorn damage increased to 2% max HP. |
Once again we run into heroes dealing max HP damage (which is good) held back by pathetic amounts of it. Damage-wise, Mary isn’t going to be doing anything worthwhile. She’s better in a support role as micro-stuns can be surprisingly potent, but the lack of targeting options makes even this iffy. All in all, just try to use somebody else.
Cleopatra

S Neutral Mage/AOE
| Pharaoh’s Curse | Summons a portal behind enemy lines, which spawns one mummy every 5 seconds. Mummies have 20% of caster’s ATK and max HP. When a mummy’s health dips below 20%, it explodes, dealing 3% of caster’s max HP as damage in an AOE. Up to 3 mummies can be active at once. Level 2: Up to 4 mummies can be active at once. Level 3: Explosion damage deals 5% of caster’s max HP. Level 4: Explosion damage deals 7% of caster’s max HP. |
| Foreseeing | Gains 150 / 225 / 300 / 325 rage when battle begins. Gains 150 / 600 / 1100 / 1600 ATK the first time this hero’s rage skill is used. |
| Demonic Beauty | Charms the nearest enemy unit, causing them to fight their allies for 4 seconds. Charmed units can only use normal attacks. Level 2: Charmed enemy both deals and takes 20% more damage for the duration. Level 3: Lasts 6 seconds. Level 4: Lasts 8 seconds. |
| Rage of Skygod | Deals 175% magic damage in an AOE. Reduces rage regeneration for targets hit by 50% for 5 seconds. Level 2: Deals 198% damage. Level 3: Debuff lasts 6 seconds. Level 4: Debuff lasts 8 seconds. |
Cleopatra is free for new players. Normally, the free unit you get is an all-rounder unit. Not in this case.
What Cleopatra does well, she does very, very well. Demonic Beauty is a really potent control skill that not only strips your opponent of an ally, but gains you a new friend for a short while. But apart from that, the rest of her kit is lackluster. Her mummies have woefully low ATK and health, and the fact they scale off Cleopatra’s own meh HP doesn’t help their case. While her stats are higher than the A-rarity heroes you’ve been pulling, and she’s a decent nuker, it’s also advised to replace Cleopatra as soon as you can.
Queen Akinny

A Neutral Mage/AOE
| Holy Light | Deals 237% / 268% / 305% / 347% magic damage in a straight line. Caster gains 100% M.Def buff for the rest of the battle if this skill kills. |
| Foreseeing | Gains 150 / 225 / 300 / 325 rage when battle begins. Gains 150 / 600 / 1100 / 1600 ATK the first time this hero’s rage skill is used. |
| Divine Judgment | Deals 144% magic damage thrice to one target. Each hit has a 20% chance to penetrate the target, reducing their M.Def by 20% / 25% / 30%. |
| Holy Sermon | Magic Pierce is increased by 8% / 12% / 16% whenever an ally dies. |
Queen Akinny is…okay. She’s got some questionable things in her kit:the magic defense buff from her rage skill doesn’t help her kill faster, and her comeback mechanic is hilariously bad. While her nuke is pretty good, the rest of her kit doesn’t synergize into what you would deem a “good mage”.
Ellie

A Holy Mage/Debuff
| Light Cannon | Deals 210% magic damage to target and an area around it. Heals caster for 10% of max HP. Primary target loses 5% accuracy for 8 seconds. Level 2: Damage increased to 228%. Level 3: Accuracy debuff increased to 10%. Level 4: Damage increased to 248%. |
| Foreseeing | Gains 150 / 225 / 300 / 325 rage when battle begins. Gains 150 / 600 / 1100 / 1600 ATK the first time this hero’s rage skill is used. |
| Holy Lightball | Deals 206% magic damage to one enemy and reduces its crit rate by 15% for 10 seconds. Level 2: Crit rate debuff increased to 25%. Level 3: Damage increased to 224%. |
| Light Core | If caster’s HP is above 50%, gain 30% / 50% / 70% M.Def. |
For a debuffer, Ellie has really lousy debuffs. At least her rage skill is an AOE, but if it’s a choice of AOE, you have better same-rarity heroes like Akinny (even if the rest of her kit is bad) or Morgan le Fay, who is free.
Make Your Own Judgment Calls
As I mentioned when we started, this list is subjective and based on my own experience. It’s ultimately up to you to pick which heroes you want to use, and if you believe in them enough, I’m certain you can find a way to make them work!