Spiele ohne Energieobergrenzen haben oft nur einen kurzlebigen Erfolg, da die Spieler ihnen normalerweise leicht entwachsen. Bei Art of War:Legions ist das sicherlich nicht der Fall. Seit seiner Veröffentlichung im Jahr 2019 wächst der Strategietitel von Fastone Games weiter und der Fluss der Updates, der auf das Vorhandensein eines sich entwickelnden Metas hinweist, beweist dies nachdrücklich.
Es hilft, dass Spieler schnell und reibungslos vorankommen können; Man muss nur Geduld beim Farmen von Ressourcen haben und beim Aufbau einer Armee weise sein. In diesem Leitfaden möchten wir Tipps, Tricks und Strategien geben, um Ressourcen effizient zu sammeln und das Beste aus den zufälligen Truppen zu machen, die Sie beim Kartenziehen oder Rekrutieren erhalten.
Bevor wir uns mit den eigentlichen Tipps befassen, werfen wir zunächst einen Blick auf das Spiel im Allgemeinen, damit wir den Krieg, in den wir uns stürzen, besser verstehen. Art of War:Legions mag mit dem kastenförmigen 3D-Layout ausgestattet sein, aber wie andere erfolgreiche Spiele mit ähnlichen Details (ähnlich wie Archero und Hunt Royale), lassen Sie sich nicht von der visuellen Einfachheit täuschen, dieser untätige Kämpfer hat eine ziemliche Tiefe .
Fastone Games hat sich für Art of War:Legions eine ziemliche Kombination ausgedacht und zwei allgemeine Modi geschaffen, um die Spieler herauszufordern und zu unterhalten, die Kampfmodi und die Expedition. Konzentrieren wir uns zunächst auf die Kampfmodi, die derzeit fünf allgemeine Typen haben:
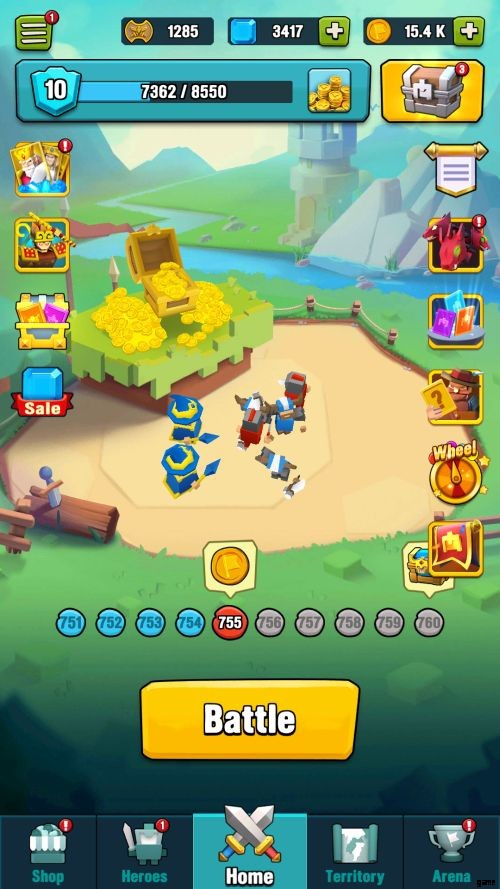
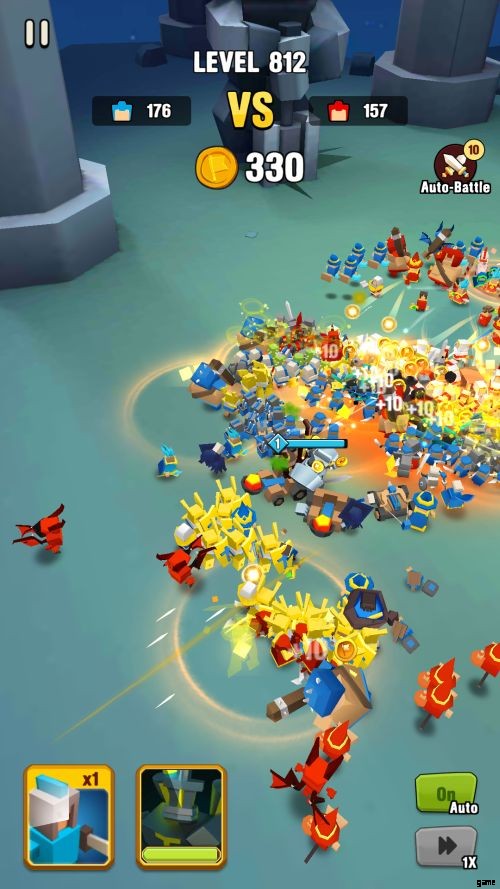
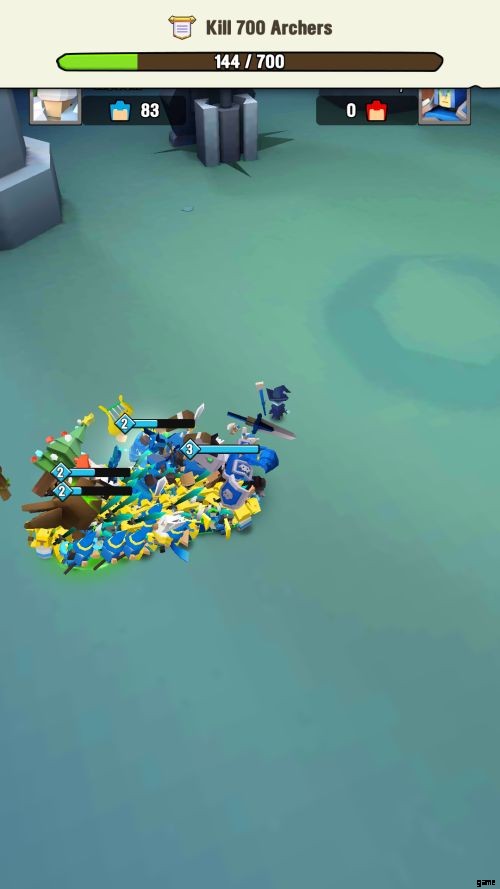
1. Level-Kämpfe – die Standard-Kampfoption, auf die Sie direkt vom Startbildschirm aus zugreifen können, wo Sie gegen immer schwieriger werdende KI-Armeen kämpfen. Dies ist Ihr Hauptfortschrittspfad. Wenn Sie hier durch die Levels vorrücken, können Sie an bestimmten Punkten Truppen freischalten. Abhängig von Ihrer Nennleistung haben Sie die Möglichkeit, zwischen den Schwierigkeitsgraden Normal, Schwer oder Extrem zu wählen. Die Stärke, die Anzahl der Feinde und das Kopfgeld, das Sie von Kills erhalten, skalieren entsprechend.
2. Kopfjagd-Missionen – rundenbegrenzte Kämpfe gegen KI-Truppen mit täglichen Cooldowns. Die beste Farming-Option, die es gibt (wir werden später mehr Details darüber besprechen), in Bezug auf Münzgewinn und Leichtigkeit, Sie können jeden Kampf auch bei niedrigeren Leistungswerten bequem schlagen, da sich ihre Schwierigkeit von dem Moment an, in dem Sie sie freigeschaltet haben, nicht ändert.
3. Arena – das primäre PvP-Feature in Art of War:Legions. In der Arena kannst du deine Armee gegen andere Spieler antreten lassen. Das Setup wäre genauso wie Standardschlachten, außer dass die gegnerischen Truppen auch einen Helden haben werden. Mit Arena-Siegen können Sie in der Rangliste aufsteigen und Boni erhalten, wenn Sie eine bestimmte Anzahl von Gegnern eliminieren.
4. Heldenprüfung – ein weiterer PVP-Ausgang mit einer leichten Variation. Du kannst bis zu 5 Helden gleichzeitig aufstellen, aber sie belegen Truppenplätze. Mit Heldenprüfungssiegen kannst du eine separate Rangliste erklimmen, und wenn du in den Rängen aufsteigst, erhältst du eine festgelegte Menge an Kopfgeld, je nachdem, wie du am Ende jeder Saison (eine Woche) rangierst.
5. Ehrenjagd – ein Kampfmodus, mit dem Sie ein Bossmonster herausfordern können. Der verfügbare Boss ändert sich regelmäßig und das Ziel hier ist es, so viel Schaden wie möglich zu verursachen, bevor Ihre Truppen ausgelöscht werden. Fernkampfeinheiten und Sustain-Potenzial sind hier viel wichtiger, denn je länger deine Truppen überleben, desto mehr Schaden kannst du auf natürliche Weise anrichten.
Wenn Sie mächtige Einheiten erwerben und Ihre Truppen befördern, können Sie in jedem Kampfmodus ziemlich gut abschneiden. Eine hohe Schlagkraft ist ein guter Hinweis auf die Stärke einer Armee, aber niemals eine Garantie für Sieg oder Niederlage. Versuchen Sie trotzdem, Ihre Leistungsbewertung zu erhöhen, da einige Funktionen und Modi bestimmte Mindestanforderungen erfordern, bevor sie freigeschaltet werden.
Es wird etwas Zeit in Anspruch nehmen, Ihre Aufstellungsentscheidungen je nach gewähltem Kampfmodus zu optimieren, aber Sie können nie etwas falsch machen, wenn Sie eine solide Formation, zuverlässige Truppen und ein gutes Gesamtgefühl für das Spiel haben.
Kommen wir nun dem wichtigsten Aspekt eines erfolgreichen Kommandanten in Art of War:Legions auf den Grund, dem Erwerb von Reichtum.
1. STÄRKEN SIE IHRE KRAFT MIT LANDWIRTSCHAFT
Wie es bei der Aufstellung einer Armee üblich ist, müssen Sie fette Taschen haben, wenn Sie eine Macht werden wollen, mit der man rechnen muss. Je früher Sie Reichtum anhäufen können, desto schneller können Sie ein beeindruckendes Bataillon aufstellen, das sich in der Fähigkeit niederschlägt, durch Levelkämpfe zu rasen und in PVP-Kämpfen Erfolge zu erzielen.
Der Fluss an Münzen ist reichlich vorhanden, aber Sie müssen ziemlich hartnäckig sein, um es sich leisten zu können, regelmäßig Truppen zu rekrutieren. Also ja, die erste Aufgabe besteht darin, die Landwirtschaft zu maximieren. Wenn Sie ein Anfänger sind, widmen Sie Ihre Einnahmen aus den ersten 50 Levels dem Kauf von Truppen direkt über die Truppenkarten-Verknüpfung im Kampf, entscheiden Sie sich für die billigste im Wert von 15.000 pro Ziehung.
Beachten Sie, dass Sie Truppenkarten nicht nach jedem Level kaufen können (aufgrund des reinen Preises) und die Tipps, die wir weiter unten teilen, Ihnen helfen werden, so oft wie möglich Soldaten zu rekrutieren.
Nutzen Sie die Anzeigen
Verzeihen Sie uns, dass wir einen aggressiven Begriff verwenden, aber es ist, was es ist; Das Spiel möchte gerne die Möglichkeit bieten, Anzeigen im Austausch für etwas anzuzeigen, und es ist nur „angemessen“, dies zu missbrauchen. Die Fülle an Werbung in Art of War:Legions ist tatsächlich ein Hauch frischer Luft, denn Free-to-Play-Spiele, bei denen es sich um Pay-to-Win handelt, sind normalerweise mit erzwungenen Anzeigensequenzen beladen. nicht dieser. Das Ansehen von Werbung, wo auch immer eine angeboten wird, ist rein optional.
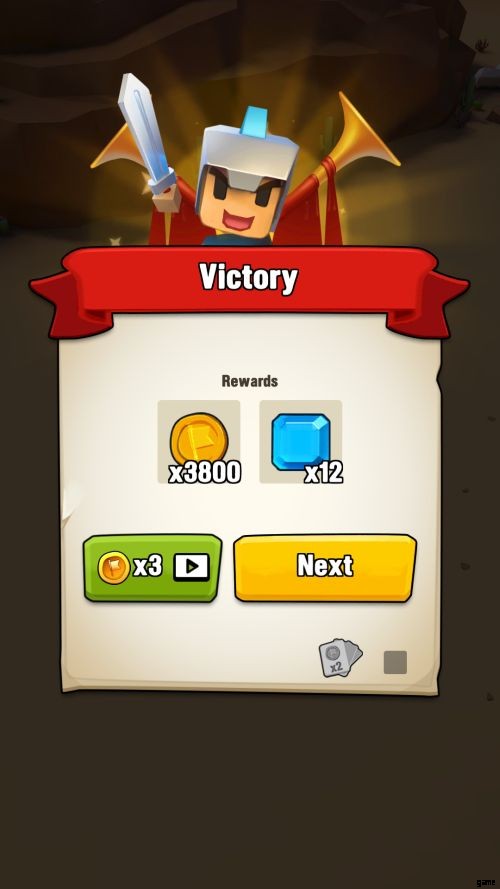
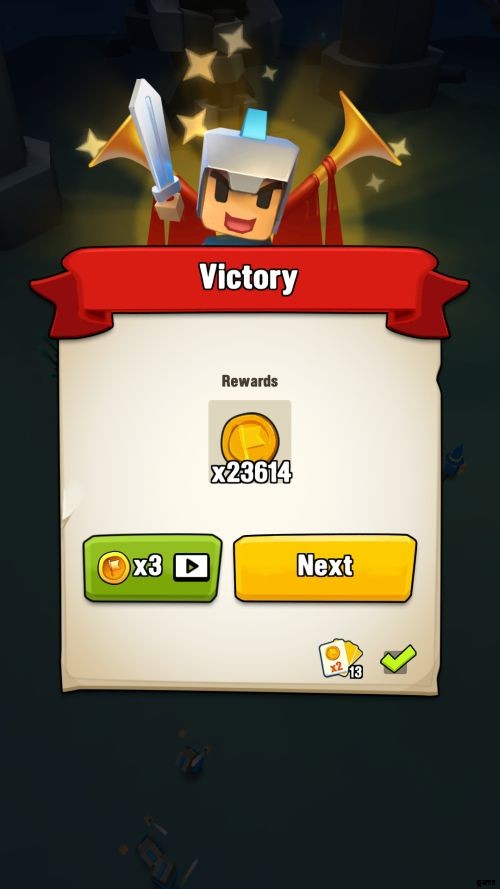
Die Länge der Anzeigen variiert zwischen 5 und 32 Sekunden und Anzeigen, die länger als 20 Sekunden sind, sind nicht so häufig wie die kürzeren. Anzeigenbeobachtungs-Ops werden immer nach jedem Kampf gegen KIs angeboten und in begrenzten Fällen auch, um die Wartezeit für das Öffnen von Truppen- und Heldentruhen zu verkürzen. Eine ähnliche „Hilfe“, die in anderen Spielen vorhanden ist, gibt nur eine magere Belohnung; In Art of War:Legions erhalten Sie einen 3-fachen Münzmultiplikator für alles, was Sie im Kampf verdient haben, ob Sie gewonnen oder verloren haben.
Unserer Erfahrung nach werden Anzeigen von nur wenigen Marken/Werbetreibenden gleichzeitig geschaltet, und ihre Länge ist normalerweise einheitlich. Es ist sehr selten, dass das Spiel über verschiedene Anzeigen oder unterschiedliche Längen springt. Unser Tipp ist, den Dauertrend zu beobachten. Wenn Sie der Meinung sind, dass das Ansehen einer 30-Sekunden-Werbung viel Zeit oder Schwung verbraucht, können Sie sich dafür entscheiden, sie zu überspringen. Umgekehrt, wenn Sie bemerken, dass Ihnen 5 Sekunden gegeben werden, nutzen Sie diese und sehen Sie sich nach jedem Kampf Anzeigen an. Im Allgemeinen ist das Ansehen von Anzeigen unabhängig von der Länge immer noch ein Gewinn für Sie.
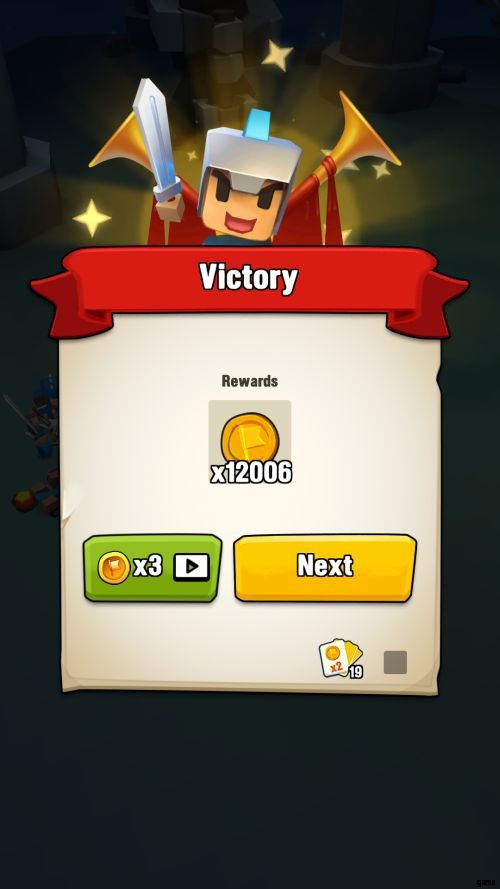
Wir empfehlen, keine Werbemöglichkeiten nach dem Kampf zu verpassen, insbesondere auf Leveln, die mit einer Münze markiert sind, da die resultierende Gesamtprämie einfach schwer zu übersehen ist.
Kopfjagd ist Goldjagd
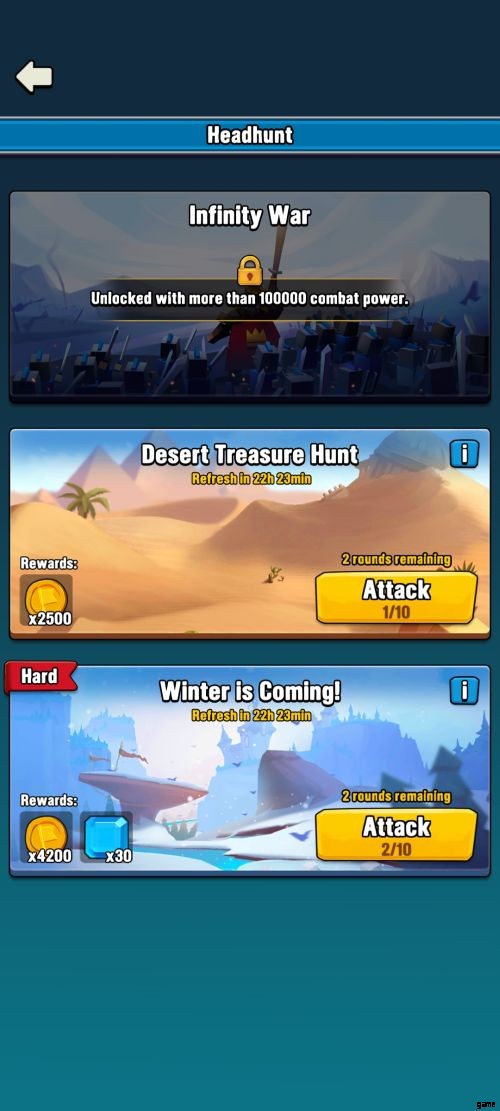
Bei Headhunt-Missionen verdienst du garantiert mehr Münzen als in normalen Kämpfen. Abgesehen von dem Kopfgeld, das Sie durch das Töten feindlicher Truppen erhalten, erhalten Sie in Headhunt-Levels eine bestimmte Menge an Münzen. Nach der 8. Stufe jedes Durchlaufs kann die Gesamtmünzensumme nach dem Kampf fast mit dem mithalten, was Sie aus normalen Schlachten mit Bonusmünzen (die mit einer Goldmünze markierten Stufen) erhalten würden.
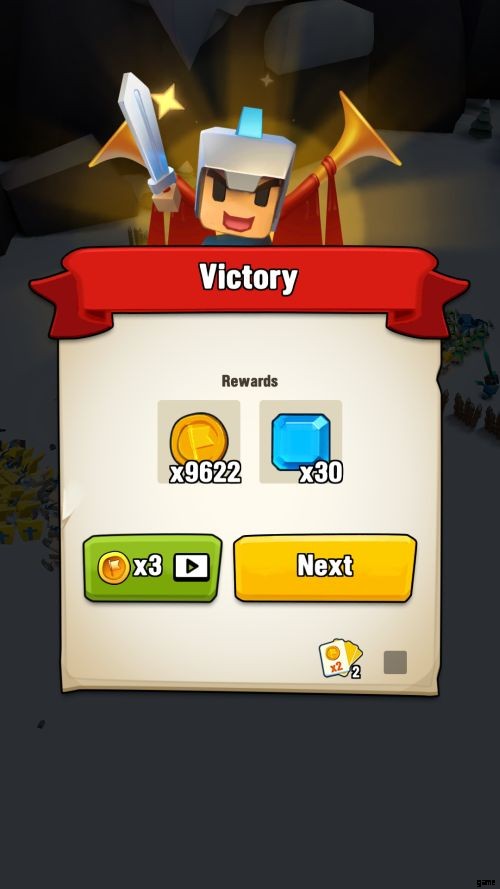
Mit der hohen Münzbelohnungsausgabe verpflichten wir Sie, IMMER den x3-Multiplikator zum Anzeigen von Anzeigen zu verwenden. Eine gerade 10-Stufen-Freigabe würde Ihnen mehr als genug Münzen einbringen, um sich etwa zweimal eine Ziehung von 30 zu leisten. Die Schatzsuche in der Wüste wird in Kürze im frühen Spiel verfügbar sein und der Winter kommt! wird freigeschaltet, wenn deine Armee eine Stärke von mindestens 60.000 erreicht.
Winter Headhunt wendet eine leichte Variation in Form der Einführung von Variablen in der Landschaft an. Manchmal hat es die Form einer Chokepoint-Brücke oder Barrikaden; manchmal ist es ein Wassergraben oder eine Felsbarriere, die die Nahkämpfer dazu zwingt, sie zu umkreisen, bevor sie angreifen können.
In jedem Fall werden die Fernkampfeinheiten und Hinterhaltskämpfer kaum durch Terrainvariationen behindert. Es ist schön zu sagen, dass, sobald Sie eine Leistungsbewertung erreicht haben, mit der Sie die beiden ständigen Kopfjagdkämpfe bequem beenden können, von da an alles ein Kinderspiel sein wird, da ihre Schwierigkeit nicht mit Ihrer Leistungsbewertung oder Ihrem Kontolevel skaliert.
Wenn Farmzeit ist, ist es Hohenheim
Hohenheim wird in den online verfügbaren Listen mit mehreren Heldenstufen möglicherweise nicht genug Aufmerksamkeit geschenkt, immer eine unterste Stufe. Um fair zu sein, er ist nicht wirklich dafür gemacht, ein Kämpfer zu sein. Wenn es jedoch darum geht, Münzen in Ihre Tasche zu harken, ist Hohenheim der Mann oder Roboter, wie auch immer, Sie verstehen es.
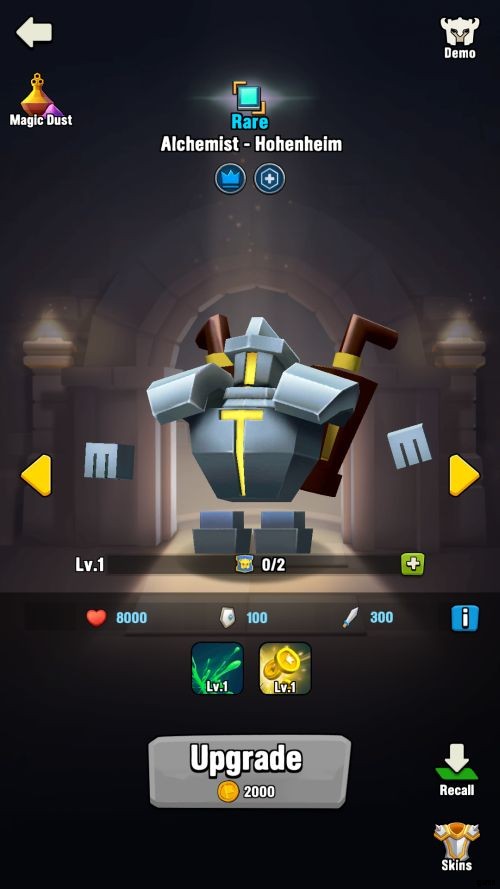
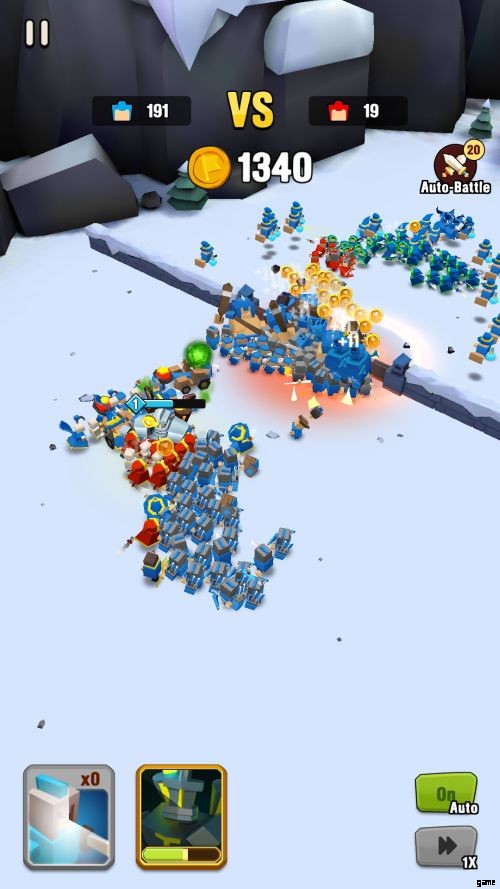
Seine passive Fähigkeit verspricht bereits auf Stufe 1 eine Erhöhung des Angriffsschadens um 1 % für Ihre Armee und einen Bonus von 1 Münze für jede getötete feindliche Truppe. Das heißt, wenn Hohenheim eingesetzt wird, werden Sie statt +10 Aufforderungen in Kills stattdessen +11 sehen. Stellen Sie sich vor, Sie gewinnen gegen eine Armee mit 200 Truppen. Sie erhalten +200 Münzen, die Sie verdreifachen können, indem Sie Anzeigen ansehen. Die Münzprämiendifferenz mit und ohne Hohenheim mag knapp unter tausend liegen, aber es wird sich alles summieren, wenn Sie ihn konsequent in Levelkämpfen und Headhunt-Missionen einsetzen.
Bevor Sie jedoch in Levelkämpfen ganz nach Hohenheim ziehen, stellen Sie sicher, dass Ihre Truppen den Schwierigkeitsgrad „Extrem“ (da diese Einstellung die meisten Münzen bringt) auch ohne die Hilfe eines schadensveranlagten oder heilenden Helden problemlos bewältigen können.
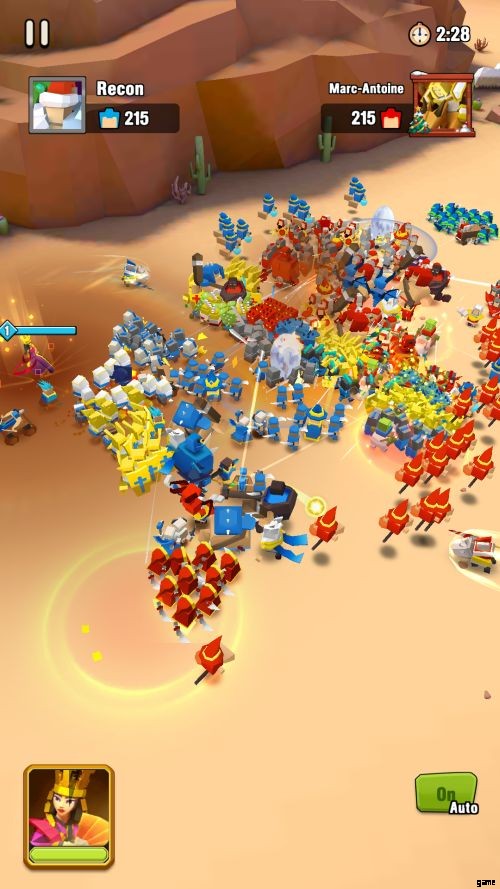
Profitieren Sie von den automatischen Kämpfen und Multiplikatoren
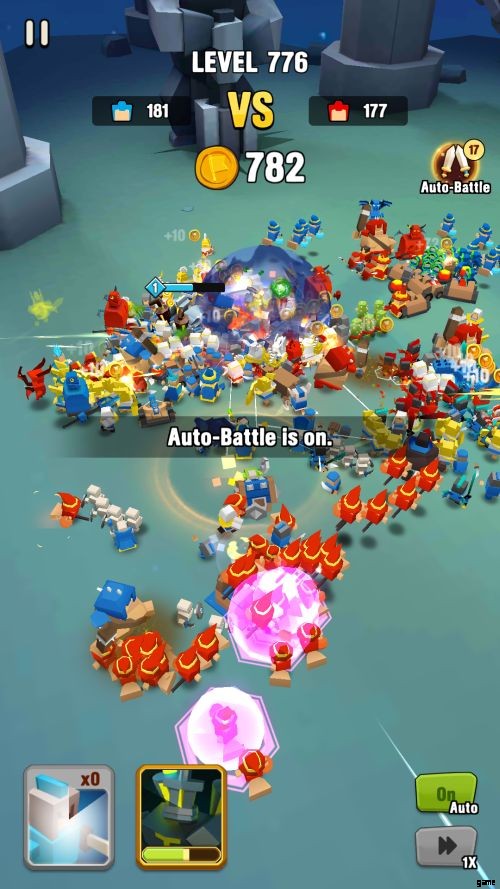
Dies mag im Widerspruch zu dem stehen, was wir dringend zu Möglichkeiten zum Anzeigen von Anzeigen raten, aber die Auto-Battle-Funktion ist zweifellos auch ein praktisches Tool für die Landwirtschaft, wenn Sie Multitasking benötigen. Müssen Sie auf die Toilette gehen? Lassen Sie das Spiel auf Auto-Battle.Müssen Sie einen schnellen Snack zubereiten? Drücken Sie die Auto-Battle-Taste. Wenn Sie es einschalten, können Sie, je nachdem, wie viele Ladungen es hat, Levelkämpfe bestreiten, selbst wenn Sie AFK gehen. This feature completes Art of War:Legions as an idle battler because your progress can keep on going even without your intervention.
Once you have unlocked it, you earn free 20 charges that replenishes after 24 hours since its depletion. The charges will be exponentially augmented to 120 daily if you avail of the VIP pass. Since having more auto-battles is a VIP perk, there is no doubt this feature gives players an edge.
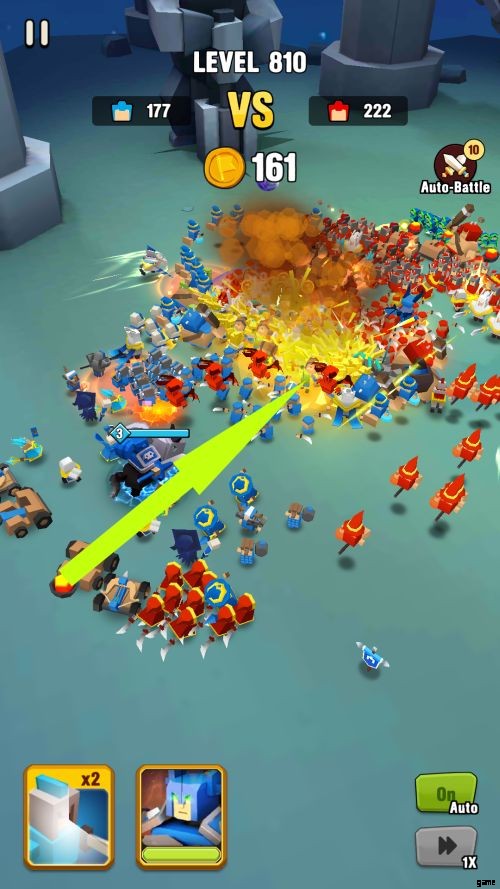
If you aren’t keen to watch ads and you want the speediest level progression, the auto-battle feature is your friend. If you have plenty of x2 bounty multipliers to spare, all the better. Coin multipliers are straightforward bounty boosts which fully stacks with the x3 ad watching multiplier.
It is important to note to only do the auto-battle + coin multiplier trick when you are confident that your army is strong enough to tear through the upcoming battles; in the event that you went AFK and lose, the reattempts would consume your auto-battle charges. Additionally, also watch out and try to avoid auto-batting through levels with bonus coins because the next one may come just after 20-40 levels (yes, their spacing are random too).
Clear the Quests
As you need every single resource to expand and upgrade your army, you wouldn’t want to pass up on what the quest rewards offer. The coins, gems, Epic troops, and Super Vouchers you can obtain daily will work towards your ability to acquire more troops and resources. What’s good with the quests is the fact that you can passively accomplish most of them as you engage in battles.
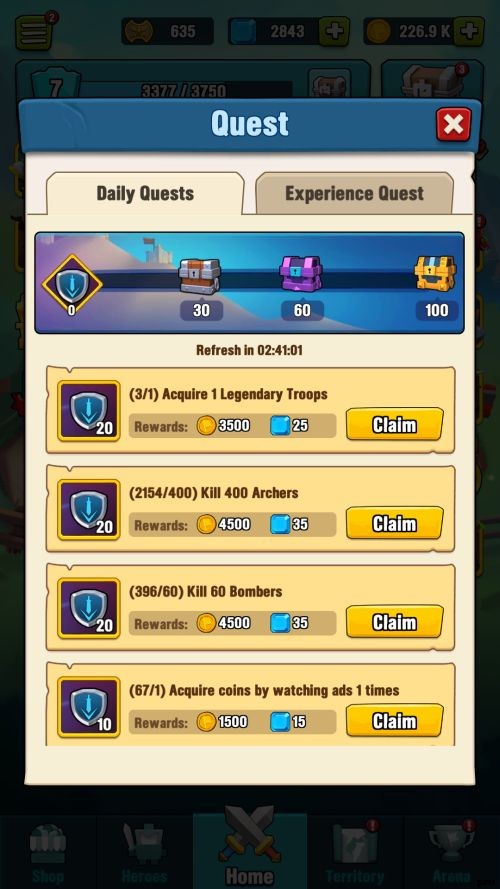
Accomplishing quests will be your constant supply of diamonds. Clearing the standard 7 quests a day guarantees at least 390 diamonds (290 directly from quests, 100 from a checkpoint gift) which will contribute to make our next recommend tip possible.
Leverage the Lucky Spin
Diamonds is the chief resource in the game which you can use for almost everything:buying troops/heroes, fusing troops, acquiring certain boosts, retries on limited events and PVP battles, purchasing coins, and shortening wait times. There really isn’t an absolute best place to spend them, it is all up to your preference.
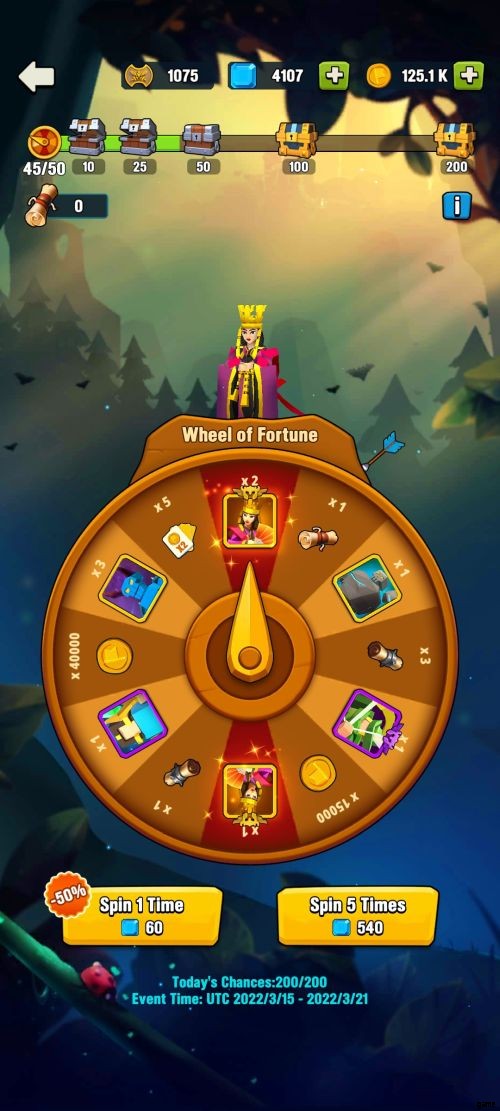
However, in our opinion, the best place where you can get the most value out of your diamonds is the Wheel of Fortune. See to it that you will use the lucky spin at least 6 times a day. Your first single spin of the day will be discounted at 50% off and going for the bulk 5 spins comes at a discounted price of 540 diamonds.
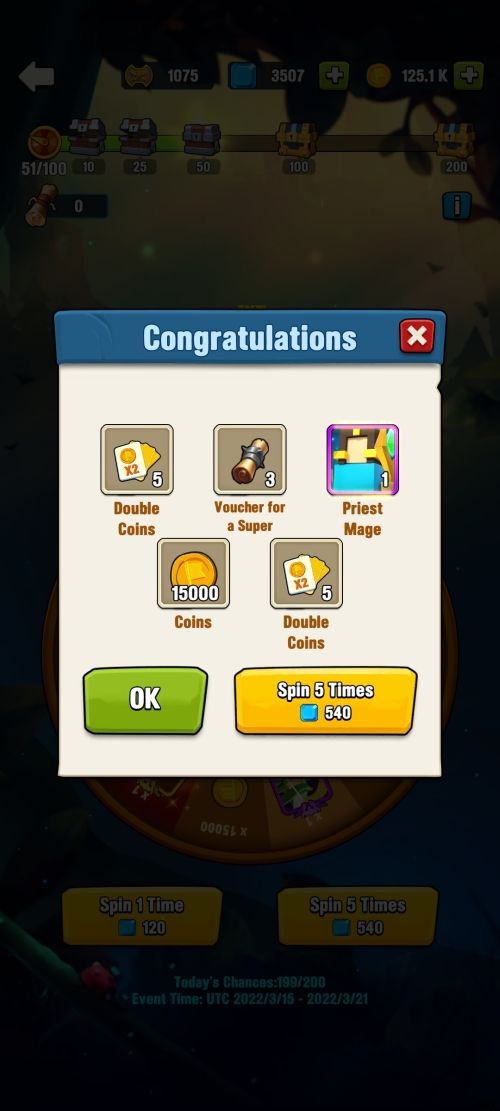
Even in the earlier versions of Wheel of Fortune, the “worst” reward is 15k coins which is still a better deal compared to trading your diamonds for coins in the Shop (where the base rate is 100 diamonds for 5k coins). Each Lucky Spin will surely be a win for you.
Note, however, that the availability of Wheel of Fortune is seasonal (usually when a new hero is released), so make sure to liberally go for Lucky Spins when it’s available.
Grab the Freebies
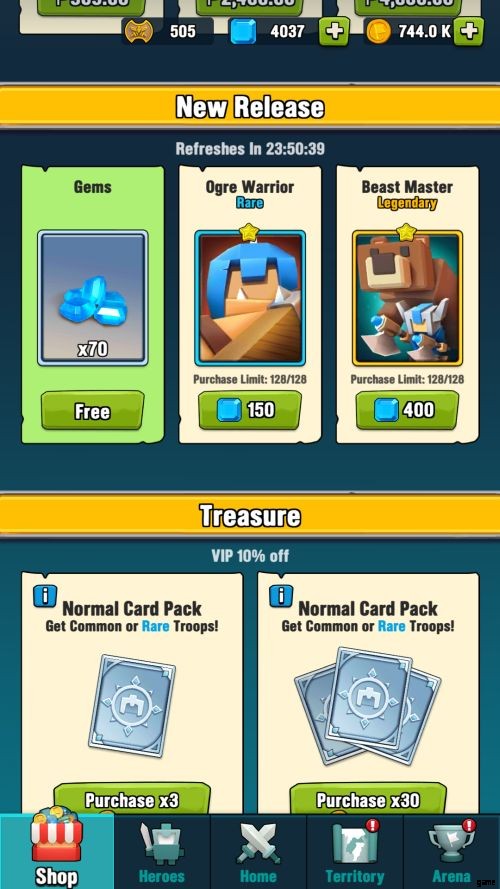
Every day, the Shop and the Mystic Store will have a free item in them. The freebies do cycle randomly, but the common loot would be coins, diamonds, and a troop card at the Shop. Meanwhile, the Mystic Store is as mystic as it gets because the freebie is totally unpredictable, it can sometimes be troops, resources, keys, or boosts.
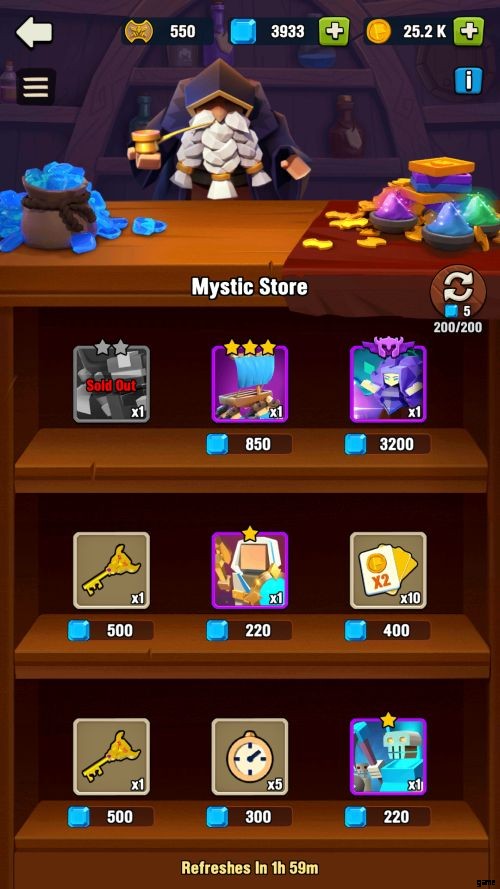
Note that the Mystic Shop has a certain power rating requirement, so you need to meet that first to take advantage of the awesome free loot daily.
With every single farming tip available all shared now, we’re hoping that you can efficiently gather the funds to raise a dominant army. Remember that nobody starts strong and being tenacious with tanking those ads, especially in the first 100 levels, is your means for quick progression. Now, let’s discuss the concepts surrounding battles.
2. BATTLE BLUEPRINTS
Approaches to battles vary depending on which point of the game you’re at and the type of battle you are participating in. Some strategies may shine in a few circumstances, but may completely be useless in others. Here are pointers and tips that will help you wrap your mind around the dynamics of combat in Art of War:Legions.
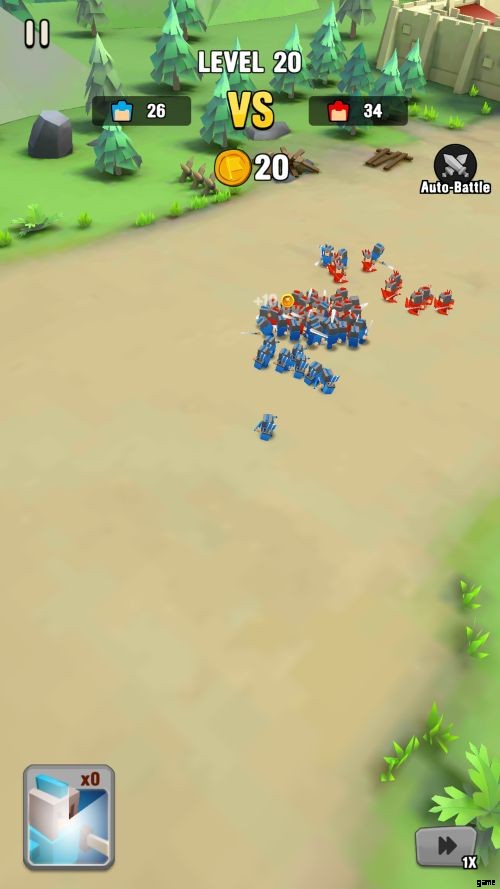
2.1 Early game

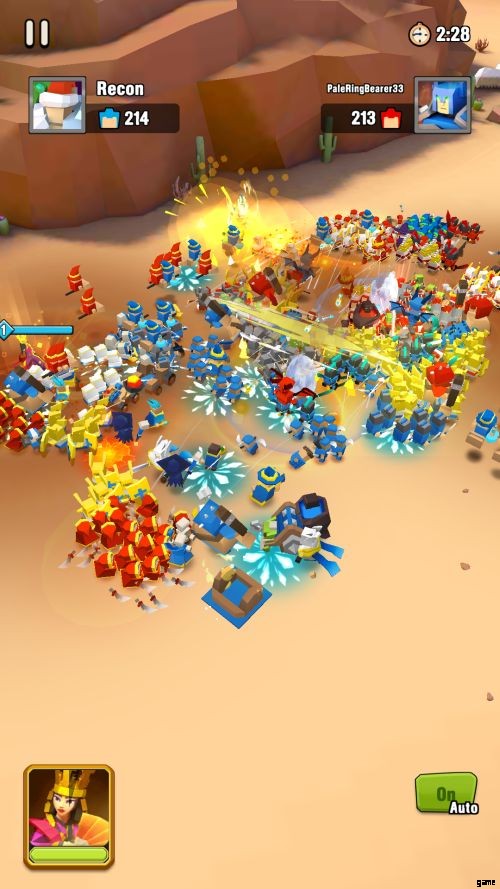
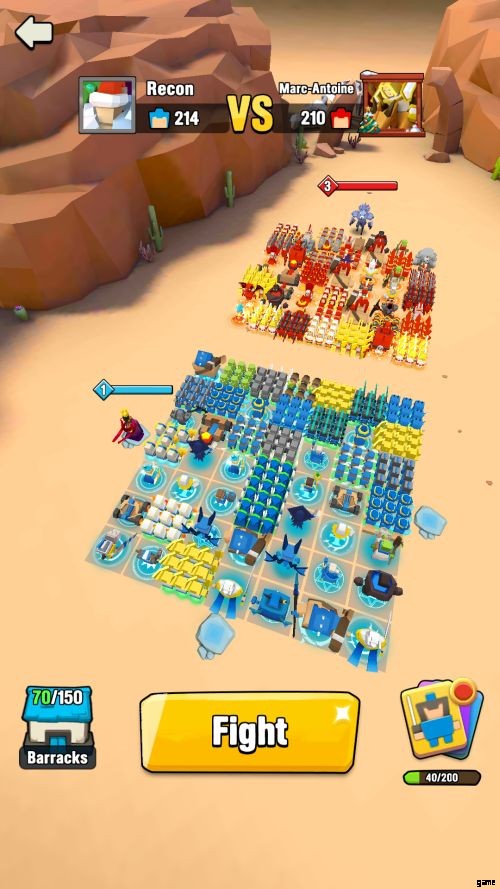
If you are still within the beginner’s range (below level 100), you can play with your rally point marker. Tapping anywhere on the battlefield will remove it from its default placement at the lower left corner.
The rally point banner will be the spawn point of the fresh infantry that trickles as the battle rages on. As ranged threats like archers can hurt your troops, you can help your melees by putting the rally point right at them so they can eventually be flanked and eliminated.
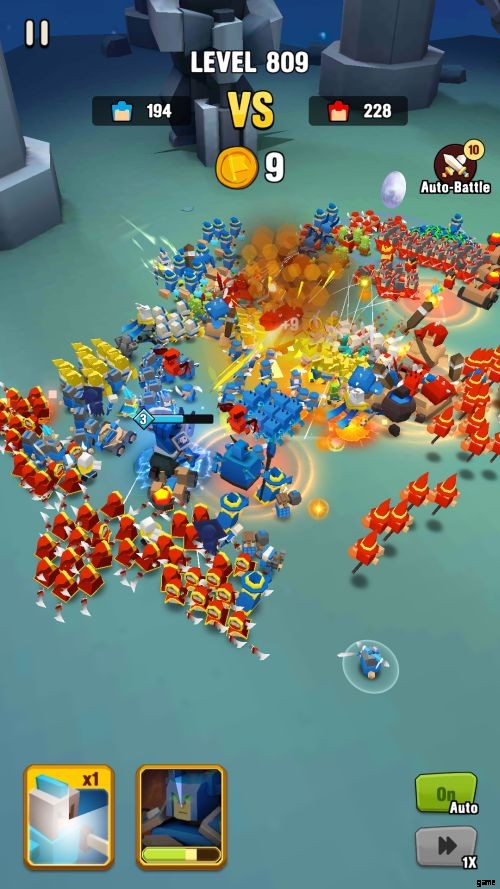
In some occasions at latter levels, dropping your rally point near a focus-fired unit may sometimes draw some aggro away which is helpful to preserve your damagers. This tactic, however, will eventually fade as infantry can be easily erased by AoE attacks when you get to level 400 and above.
2.2 Two-fronted Threat
Commonly, the straightforward goal in a war is to vehemently charge forward in a bid to steamroll the enemy’s frontline, however, in Art of War:Legions, that is not the only method for victory. Attacking the enemy from behind is an effective way to deal with any opposition because, as generals would agree, the only thing worse than a war is a war with multiple fronts.
There isn’t a long list of units capable of directly attacking the enemy backline. Such able ambushers only include troops Magic Apprentice (Rare), Ghost Assassins (Rare), and Demon (Legendary); as for heroes, it’s only Diana (Rare), Miller (Epic), and Poseidon (Legendary).
You may notice that as you crank up the difficulty of level battles from normal then hard and then extreme, the number of backline attackers increase. This is a clear confirmation that the dynamic they bring to the battlefield is a straight up gamechanger.
As such, it is fundamentally smart to have a handful of squads that prioritizes the enemy backline. This gives you the chance to quickly erase whatever units the enemy hopes to protect further behind their lines.
Formations in Art of War:Legions is an essential element in winning battles. Most troops have an ideal placement to increase their effectiveness or survivability. Backline attackers break from the formation at the onset of battle, so it does not matter where you place them, essentially easing away some of your worries on unit positioning.
2.2.1 Ambushers’ Synergy
Since ambushers disperse pretty quickly, the grids they occupy will take little time to be vacant. With this in mind, think one step ahead on how can the chaos mold into your favor. We were fortunate to have recruited and leveled up plenty of ambush units, so we’re sharing here an offense-minded formation that we use.

Our priority in the position shown above is to put a solid frontline with plenty of supportive backline firepower. We purposely placed the ambushers in the middle so they don’t bump off formation any frontline-material troops and not take up backline slots that are reserved for squishy units that could quickly get trampled if they are closer to the frontline.
In foresight of the grids the ambushers will vacate, we placed a charge-inclined hero at the back, essentially creating what we call a “hero highway.” This centerline void will allow any charging, melee hero to advance quicker and do their thing sooner. Such formation is also applicable if the hero you will use is not quite tanky because the void will allow them to ease into your own crowd, thus lessening the chances for it to be intercepted by enemy ambushers.
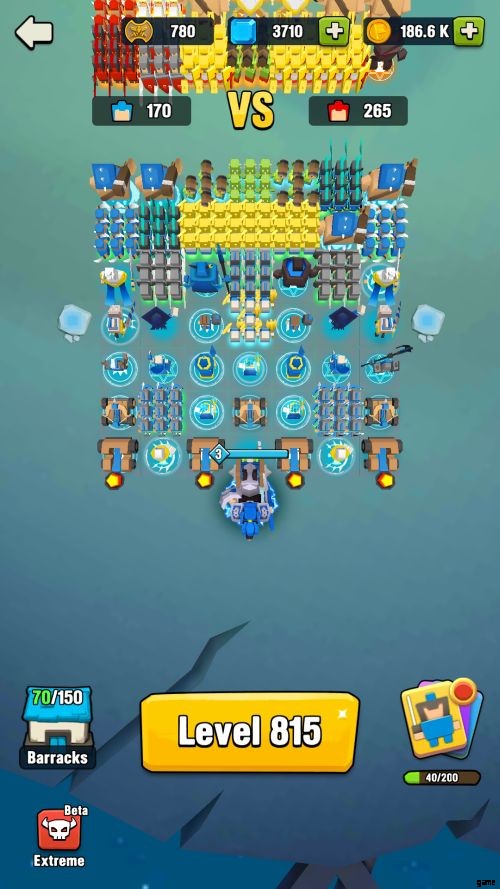
2.2.1 Defense Against Ambushers
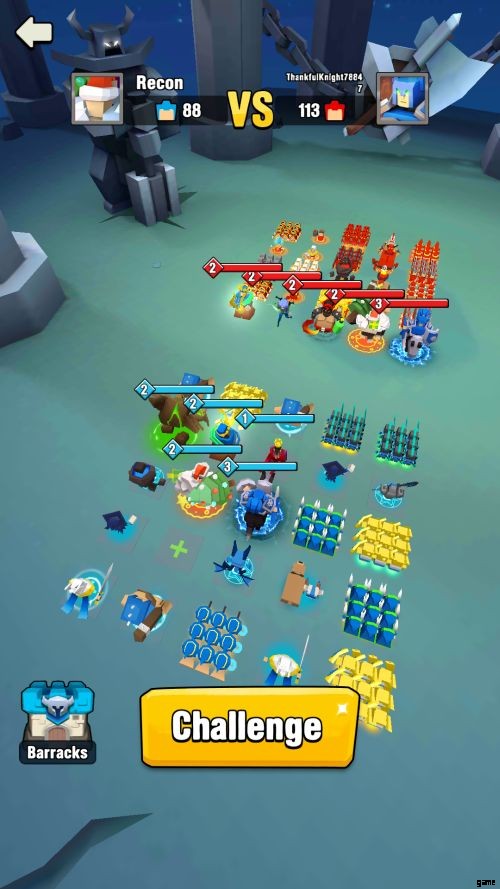
Knowing now how potent ambushers are, it is smart to set defensive measures against them. For that, we’re showing a variation of the formation we shared above.
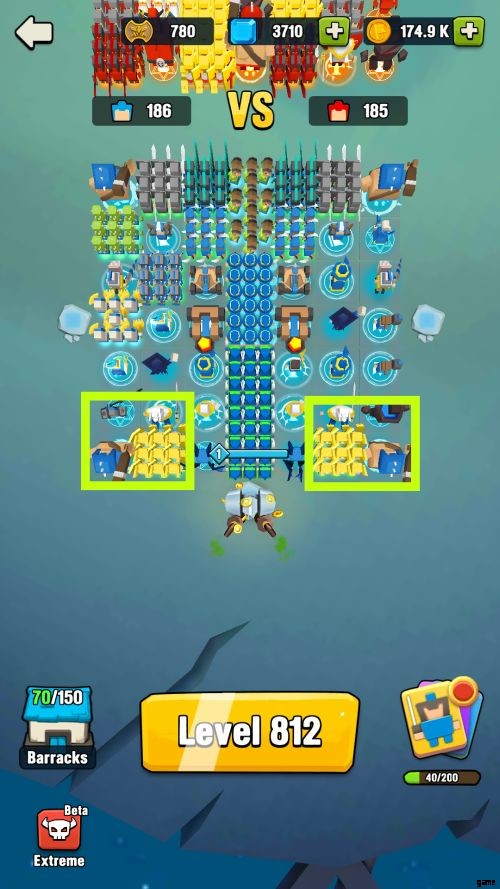
The placement of tanks and capable fighters at the backline is meant to take the shock against hostile ambushers, see how the enemy Demons, Magic Apprentices, and Ghost Assassins were met by the melees we designated to cover our rear. Also note how the rear “closed” as our non-combative hero, Hohenheim, got defensively boxed in with nothing but a scratch.
Generally, it is always better to have some backline tanks, but be wary to not thin out your first two rows because it is a nightmare scenario if your frontline gets overwhelmed quickly. As such, we only recommend hybridizing defense in your two-front threat formation if you have already recruited the troops for it.
2.3 Shield and Siege
If the RNG gods does not bestow you with ambushers yet (yes, we are optimistic you will obtain some), using a traditional formation is also fine. By traditional, we mean simply having front-attacking melee and ranged units. Like what is true in games of many genres, the tanks go front and the damagers take the back.
Nothing too fancy, just the old concept of distancing the ranged units from the frontline shock because they usually have less health, but they deal more damage. Just to draw a basic example, a level 1 archer has 120 damage, 600 health, and 25 defense while a level 1 infantry has 100 damage, 800, health, and 30 defense. As you advance through levels and increase your power rating, you can brew an early game army that will somewhat resemble what is shown below.

In such case, you are obligated to deploy your hero at the back, so it can take on any ambushers. Heroes have a ton of HP after all and everyone’s OG, Kelvins, is a tanky fighter. If he is your best and only hero as of yet, let him stay at the back. His protection and damage skill makes him fare good even when surrounded.
Also, if he ever gets pushed in by the ambushers, his aggressors will be within the range of your ranged units which will then likely provide cover fire. Should you get an overabundance of melee engagers, follow the same concept shared in an earlier sub-section, provide a defensive line to cover your rear.
2.4 Hero Heavy
Heroes can greatly affect the complexion of combat, which is why advanced players would often seek for formations meant to cater to specific heroes. Like RPG characters, heroes also have roles, some have skills with insane damage, others offer tactical advantages for the troops (stat boosts), and a few have sustain potentials (healing). Given that, adapting an approach that would favor them is a chief ingredient to victory.

The hero highway formation we shared earlier can work for most heroes because it facilitates charge-types’ advancement and can box-in for protection. Still, there is no such thing as best formation because the composition of the armies you will face (especially in the Arena) varies a lot. In general though, if you are using a ranged hero that is purely for support, like Seondeok who is very popular now, the best way to preserve her in order to maximize her heals is to make her sit at a flank.
With the exception of fighting against dedicated assassins, like Diana and Miller, heroes at the flank will have a brief time of safety, because ambushers would have to defeat your backline first before reaching your hero. If your backline guards are formidable, they can peel off troops attacking your hero allowing it to cruise into mid-battle still with ample health.
Then again, the flank designation isn’t a panacea, if your army is outnumbered, there is a high chance that your hero would be eventually dealt with. If you are really keen to secure wins, you may want to do micro-rearrangements in your formation taking into account what troops the enemy has. In the matchup above, we did not do any adjustments and as a result our hero died sooner than her counterpart.

Although our hero died, the flank designation allowed Seondeok to last a bit longer and provide a heal which enabled our troops to outlive our foes and win.

If your goal for deploying a hero at the flank is preservation, it would help to designate tanky troops throughout the exterior column because doing so would increase a number of units that can peel off attackers. Additionally, if you are running a sustain or healing-inclined army lead by Green, Kriss, Harrison, or Seondeok, it will be brilliant to assign Nuns and Pilgrims by their side. Note that healing-capable troops are quite tricky to acquire as they belong to Epic class.
We reckon we shared quite a handful here, so to summarize the lessons in this subsection, here are the pointers:
1. Do not force to adapt a deployment blueprint that is not available to you. If your ambushers are yet few or under-leveled, only use the most leveled up squad or wait until you have recruited plenty to organize your own backline breaking party. In the same way if you do not have enough melee fighters, resist the urge to designate ranged damagers in the frontline because they will just be ran over.
2. Work with what you have been given. Use a formation where your best hero can shine. In concept, heroes and troops must synergize, but if what you have heavily inclines to one side, you do not have an excellent hero yet, but your troops are formidable on their own, simply treat the hero as an extra tank with abilities.
3. Do not hesitate to take extra time to rearrange your troops especially for Arena battles. There is no time limit, the enemy troops will be visible to you before you hit the battle button. In the same way, if you do not like your chances after seeing the enemy’s power rating, number of troops, and hero in the field, you can always hit back and look for a different opponent. You will not be penalized for fleeing and remember that the smart outlives the strong.
3. DECISIONS 101
The number of decisions you have to do as a commander will make you realize of the game’s depth. From planning your battles to meeting your unit recruitment and promotion needs to spending your resources, it is all up to you. This section is meant to give you useful guidelines to help you become a successful commander in Art of War:Legions.
Arena and Hero Hunt
In the Arena, a power rating differential don’t really spell much of a difference. Taking on an opponent with a power rating that is thousands lower than yours does not guarantee you will win; in the same way, the opposite is no certain defeat. However, the constants do remain as okay, constant.
By that, we’re pertaining to having superior units, unit effects, and troop count, in that order of importance. These are the mainstay variables that will help you forecast if your troops has a chance to rout the opposition.
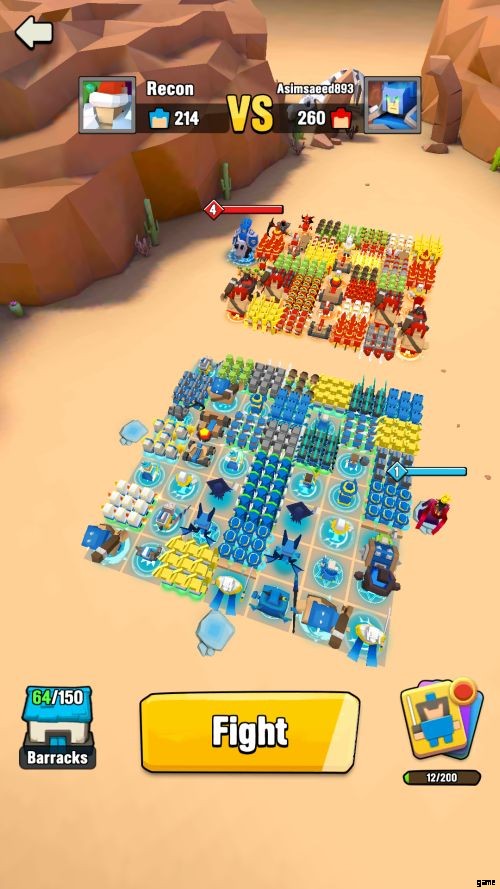
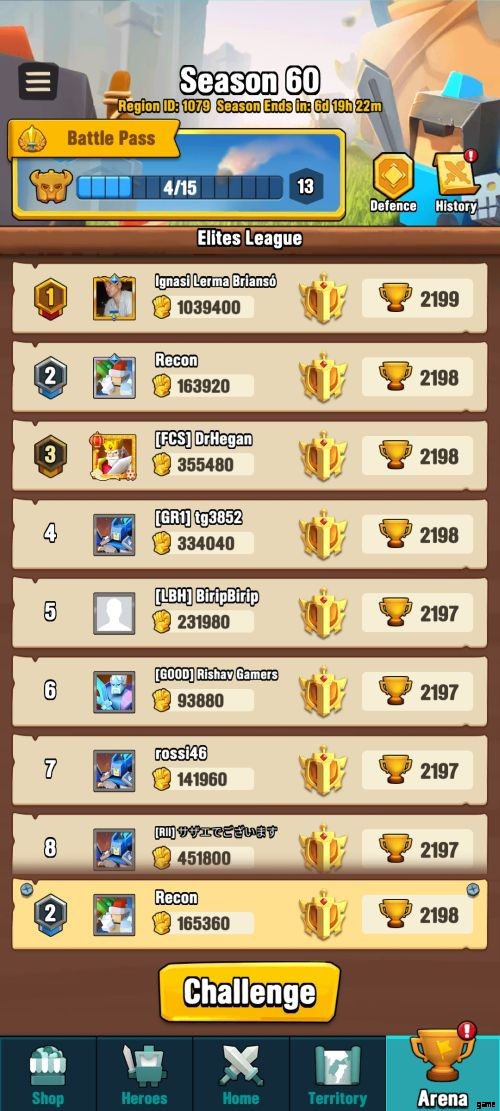
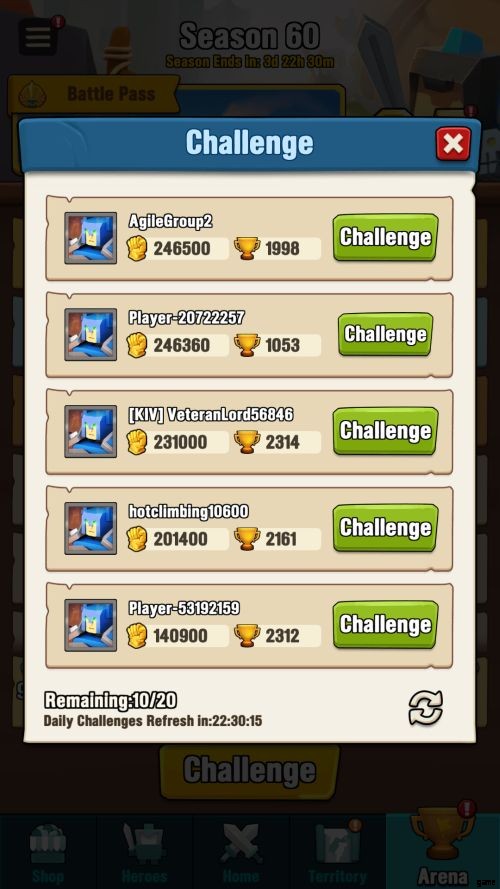
When we were looking for an opponent in the picture above, our power rating was 224160. There were two opponents on the list with a power rating lower than ours, but we challenged the one with a superior power rating at 246360. The reason for doing so? The trophy count. The number of trophies is a strong indication of an army’s effectiveness. Strong players, of course, win often so they will naturally have a high trophy count. The decision making does not stop here yet, however.
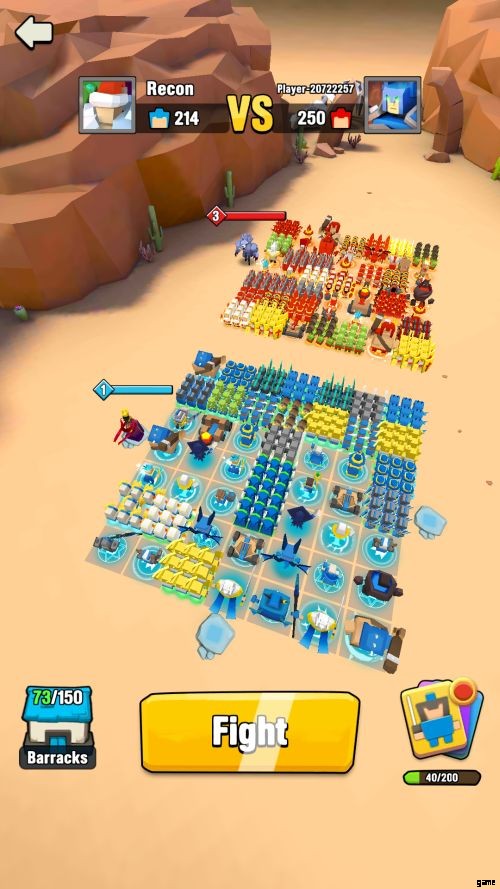
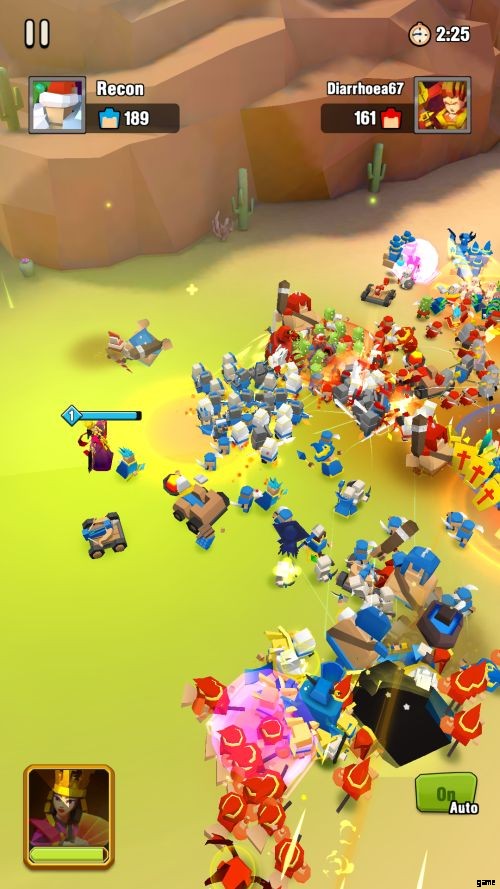
The next step, just like in any fight (the real world included), is to size up the enemy. As the battlefield opened, we saw that our opponent has 36 more troops and has a leveled up hero. Things don’t initially look good; we are behind in power rating, the enemy has more soldiers, and his hero is a way much more powerful attacker than ours, worse, he is an assassin class that focuses hero targets.
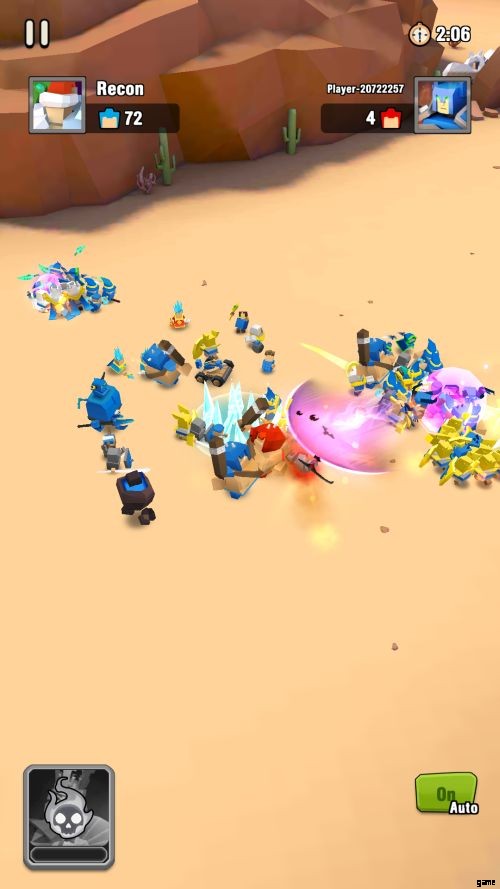
We fret a bit, but took hope with the sign if we’re fighting a strong army, how come he only has 1053 trophies? We charged into the battle trusting that our 2215 trophies at the time is a telltale sign that we are superior.
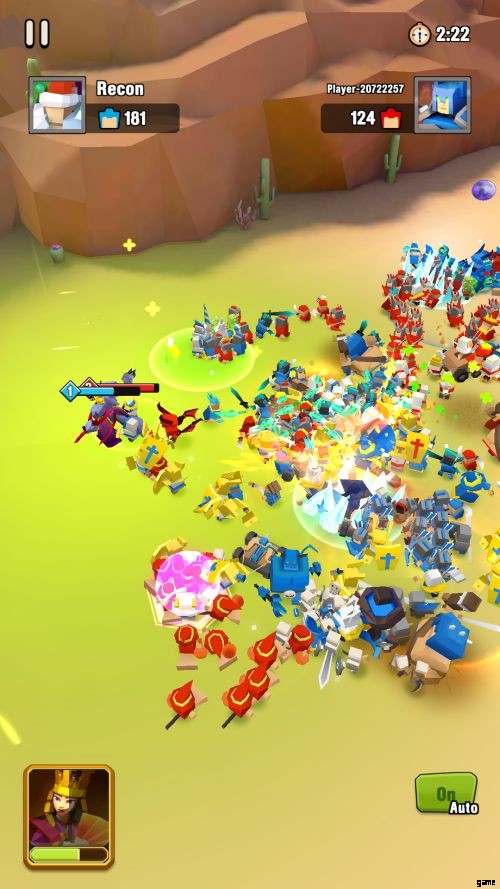
Our forecasts were correct, both the good and the bad:Miller was able to crush Seondeok, but the effects of her skills and our higher quality troops painted the battlefield green with a win!
The same idea may be applied in Hero Trial. The format of Hero Trial is exactly like what you get in the normal battle, except that all of your Heroes are pre-deployed. If the number of your total troops and heroes exceed the tiles, the game will preselect the troops, giving usual priority to upgraded units.
You can, of course, open your barracks to change the predetermined line-up and then rearrange your units’ formation. Ideally, you must set at the front any hero with damage and defense potential and then set behind anyone else with supportive skills, much like what is usually done in strategy games. The aim is to create space between the combat-inclined heroes and the supportive ones, so by the time that the enemies reach the supports their abilities will be ready by then to reinforce your team’s shock-absorbers.

In the particular match above, we just rearranged the formation a bit and included a Yasha to fill the remaining vacant slot. Take note how we set Kelvins as the solo hero in his row and that we fielded 4 support-capable heroes with him instead of choosing other pure damagers. The power rating differential for this one is slim and we were outnumbered.
Nonetheless, we soldiered on trusting a concept that works even in way more complexed games like DotA, wherein multiple supports may be utilized to groom a carry. We pulled it off, winning the battle with Kelvins at full health!
To summarize, here are our pointers when tackling on PVP matches:
1. Check the power rating and more importantly, the trophy count. What you will see in the list when looking for challenges are based on the players’ active lineup, the actual army you will face.
2. In the Arena, size up the enemy troops; if the troop differential reaches 50, you might want to reconsider especially if your hero has a chance to be deleted early. Do assign durable troops near your hero to help with survivability. In Hero Trial, always use the 5 hero slots and adapt a strategy based on who’s available to you.
3. Make micro-adjustments in the formation considering the number of enemy ambushers and how strong and capable their heroes are.
Recruitment
Like what we have mentioned earlier in this guide, your ability to recruit depends on how excellently you can farm. Assuming that you already got the groove in gaining gold, here are objective considerations on how you can spend your wealth in acquiring more troops.
Similar to spending diamonds, there is no better or best choice to use your coins for recruitment. It will all depend on your current need. If you have a lot of troop slots to fill, we recommend that you farm up 240k gold and go for the draw 30 option in the recruit camp.
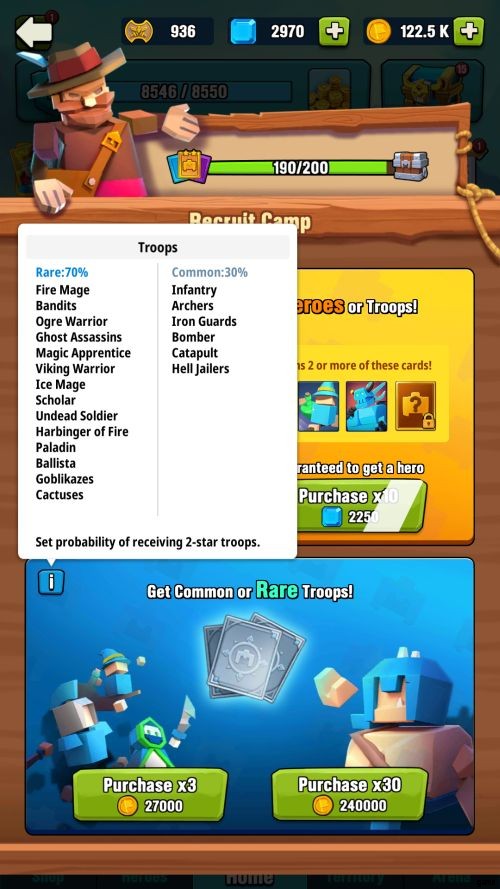
The draw 30 offers the best bang for the back as you are only paying 8,000 coins per troop. The cheaper alternative or the draw 3 is also quite economical as you’re just spending 9,000 per troop. Just to be clear, we’re comparing the prices to the only other direct option to get soldiers which is the Troop Card shop directly accessible through the battle. In the Recruit Camp, the chances for drawing a rare card is also higher at 70%. The Troop Card path can only beat this probability if you go for the 3-star option which is priced at 60k coins per draw.
In bird’s eye view, the points for deciding whether to acquire troops from the Recruit Camp or Troop Card is based on what benefits you seek. Purchasing troops from the Recruit Camp is 1) much cheaper, 2) has higher probability to turn up rares for spending less, and 3) you get more account XP per purchase. Choosing the Recruit Camp path then is better if your aim is to level up and acquire more common troops.
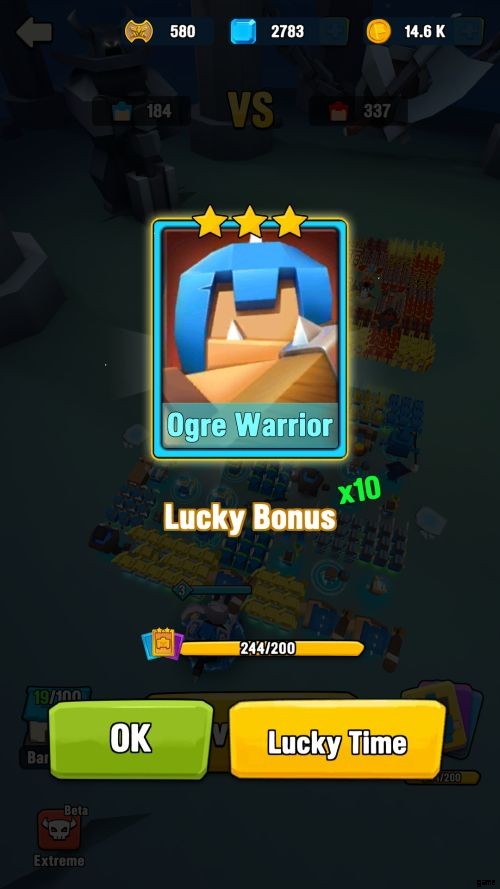
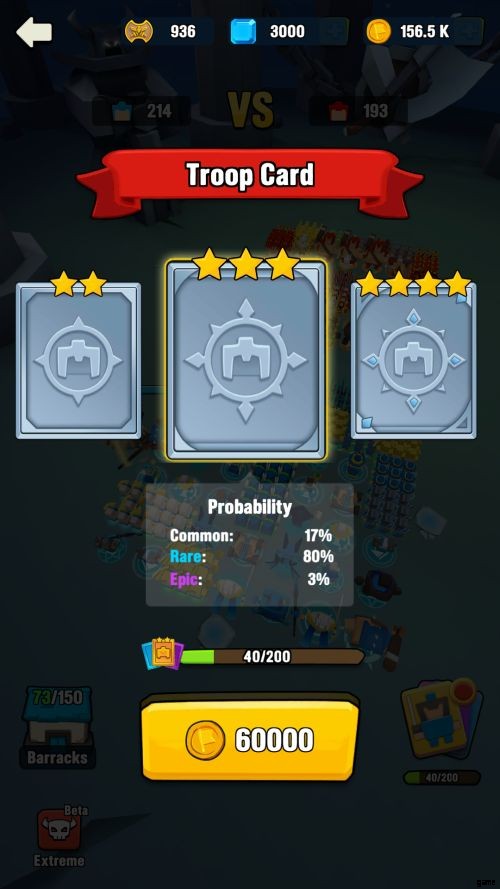
On the other hand, Troop Card purchases may be more expensive, but they work toward achieving Lucky Time. Each time you earn 200 points in Troop Card, Lucky Drawing activates which lets you choose one of three random troops for free. The options can only be Epic or Legendary and this is a great way to build an army of higher quality soldiers. This is, honestly, how we have acquired stronger units, we farm hard only to go for the less economical recruitment option. If you’re feeling lucky, aspire for Lucky Time draws!

It will take a while to rack up 200 points, but each draw gives you a chance to earn a Lucky Bonus. This bonus basically multiplies the corresponding points you earn based on how many stars a Troop Card purchase has. For reference, below are their point values and prices.
1-star =4 points at 15,000 coins
2-star =8 points at 30,000 coins
3-star =16 points at 60,000 coins
4-star =32 points at 120,000 coins
The equation is purely commutative so there is no best option here either. However, in line with the apparent chances we have observed in our playing experience, we usually go for the 60,000 coins per draw. It’s all purely RNG, but if fortune favors you too (like what happened to us a few times already), spending 500k here is often enough to earn 2 Lucky Times. For that though, you may have to mix up 2-star and 3-star draws to budget accordingly.
Now that you have an idea which recruitment mode to take base on what you aim or wish (you know, luck and wishes belong to the same universe), let’s set our sights on the troops which we think can compose a powerful army.
4. NOTABLE UNITS
Since acquiring heroes require a huge deal of luck OR investing quite a hefty sum of real currency, we’d rather focus on the battlefield units that don’t depend on much luck in recruiting the troops. Here are the units the we believe can create an impact in the battlefield and could tame the flow on combat in your favor.
Ogre Warrior
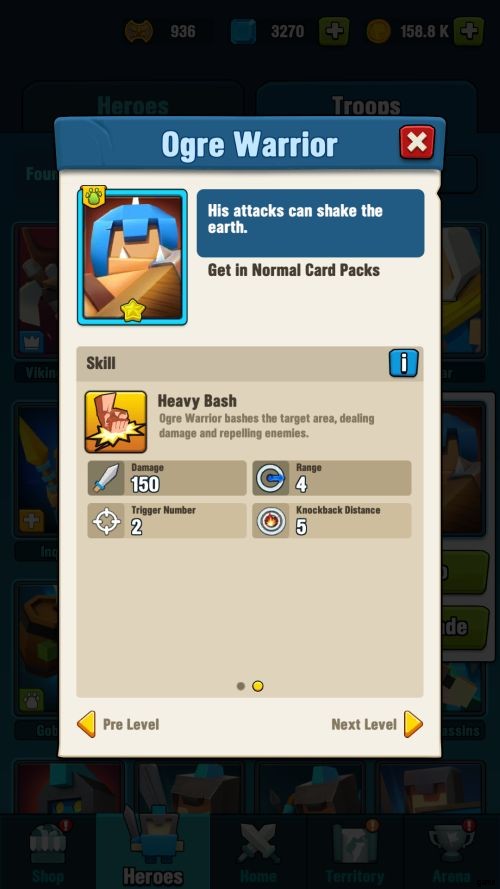
Class: Rare
Ideal placement: Frontline or backline (to protect your rear)
Strong points: durability, AoE attack, and can prolong the battle
Ogre Warriors are big, bulky beings that are easy to notice in the battlefield. They are tanky and can take a squad or two of units with lower levels. They also have a crowd splitting heavy attack that happens every other hit. The scattering effect of such heavies could cut the enemy formation into smaller, more “digestible” pieces. This scattering effect is perfect if an Ogre Warrior still has surviving teammates that can pick off the scattered enemies (ranged, preferably).
Even though they are only classified as a Rare troop and generally ranking low in troop tier guides, we are considering Ogre Warriors as notable troops because they are easy to acquire (hence, promote too), can withstand a ton of damage, and they are able to hold their ground against higher class or multiple opponents all at once.
Dämon
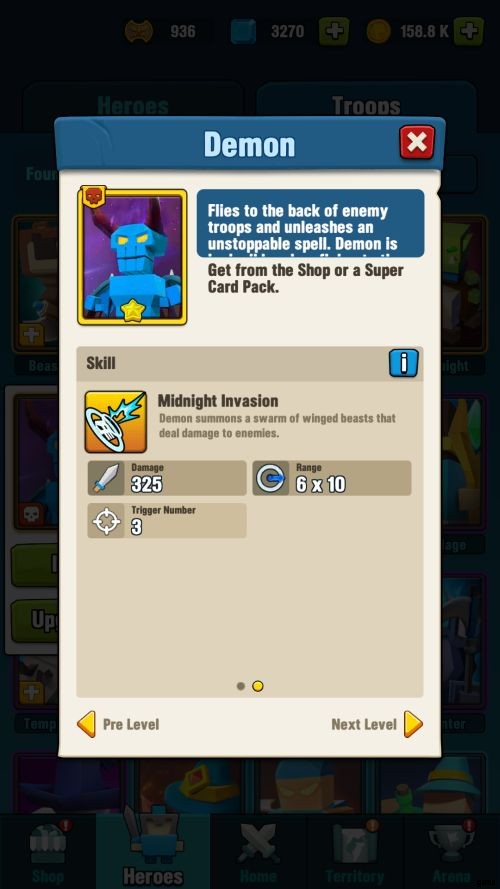
Class: Legendary
Ideal placement: Anywhere
Strong points: AoE damage, relative durability, and can help divert agro by mid-battle
The most terrifying, non-hero backline ambushers; Demons are immune to damage when they fly toward their targets and they shoot a cone-shaped AoE nuke that can hurt multiple enemies. At times, when their desired target has been eliminated, they may decide to swoop at a prey that are quite distant from them, the flight they take makes them reenter the damage-immune state.
They are often one of the last units that stand in the battlefield. If the enemy formation has no durable melee types in their backline, Demons can wreak absolute havoc and ravage enemies before they themselves fall.
Necromancer
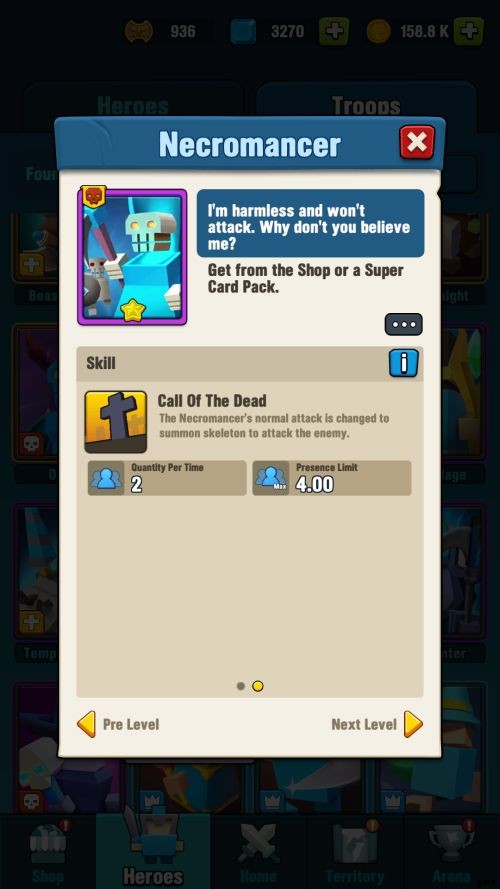
Class: Epos
Ideal placement: middle of formation
Strong points: may prolong the battle, provides “warm” bodies to keep enemies distracted
Carrying the infamous reputation of Necromancers from the archaic masterpiece of a game, Diablo II, Necromancers bring trouble to enemies with their summoned units. While Necromancers in Art of War:Legions cannot deal damage directly, their normal attack would instead summon a squad of skeleton warriors which are surprisingly quite sturdy. In a war of attrition, having the ability to augment your forces in the heat of the battle is an undeniable asset.
If Necromancers would not be eliminated early, their summons can provide ample distractions to help an allied damager turn the tide of battle. Their impact on the battlefield is so immense that newer players would not have an idea that they were once the laughingstock of Epic class troops.
Soul Hunter

Class: Epos
Ideal placement: second row of frontline or backline
Strong points: survivability, ability to handle multiple attackers
If they weren’t dealt with early, Soul Hunters can be an absolute menace because they would usually require to be focus fired by multiple enemies for them to die. They are able to deal reliable damage and their self-sustaining AoE lifesteal making them an absolute unit! At level 3, due to their life steal, they are essentially much durable than level 2 heroes.
Sacred Swordsman

Class: Legendary
Ideal placement: second row of frontline or backline
Strong points: hard to kill; can help mount a late-battle comeback
Equipped with notorious damage and brief invulnerability, a Sacred Swordman is almost guaranteed to win a 1v1 battle against any other troop (except when severely under-leveled). They can damage multiple enemies in an area making them efficient in handling small clusters of hostiles.
Ghost Assassins
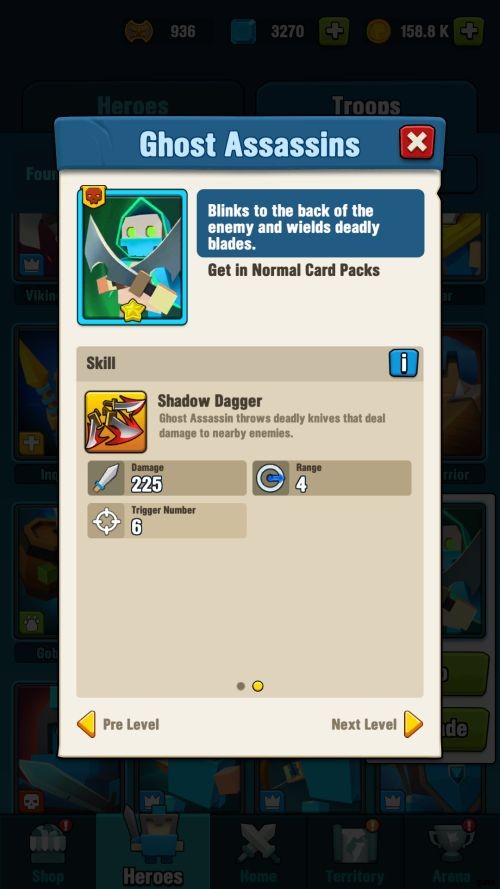
Class: Rare
Ideal placement: irgendwo
Strong points: may work to burst enemy heroes, efficient attackers
With the ability to instantly blink behind enemy troops, they are able to create an early-battle damage head room with max efficiency. At level 4, you will have 9 assassins per squad and having just two squads is often enough to create an impact and hurt enemies with formations that have no backline tanks. At level 7, a squad or two of Ghost Assassins can swiftly take a hero down.
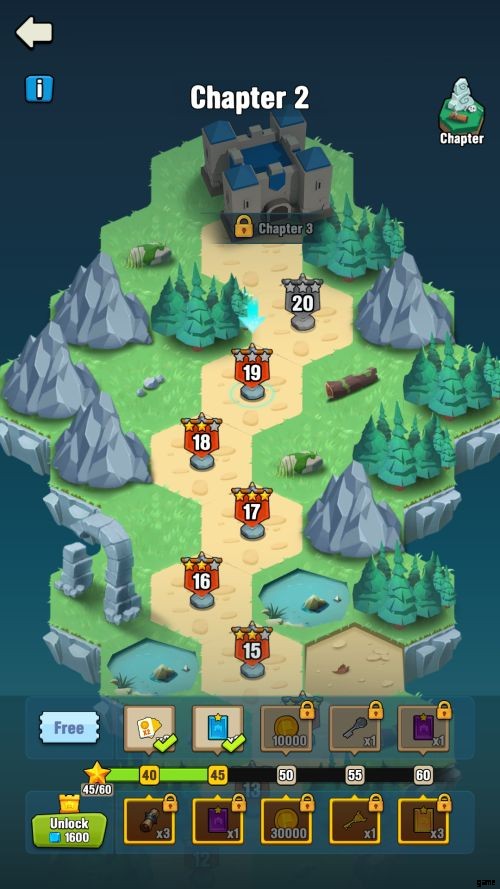
5. EXPEDITION MODE
This Art of War:Legions guide will not be complete if we do not discuss the other play mode available in Art of War:Legions, the Expedition. The checkpoint rewards from it will be handy toward your battle mode efforts, so it’s a good idea to not ignore this aspect of the game. This mode sets you on a literal base race. You have to conquer all enemy-owned structures (red) before the timer expires in order to achieve victory. In contrast to battle modes, you need a good sense of timing and focus to win in expeditions.
In expedition mode, you are set on a map with a base or two to start with. Your enemy may have more starting bases than you, but yours will always be a level higher than the AI’s. The first order of duty is to quickly upgrade your starting bases to the next level. You are practically able to max the level of your starting bases if you will waste no time in upgrading them.
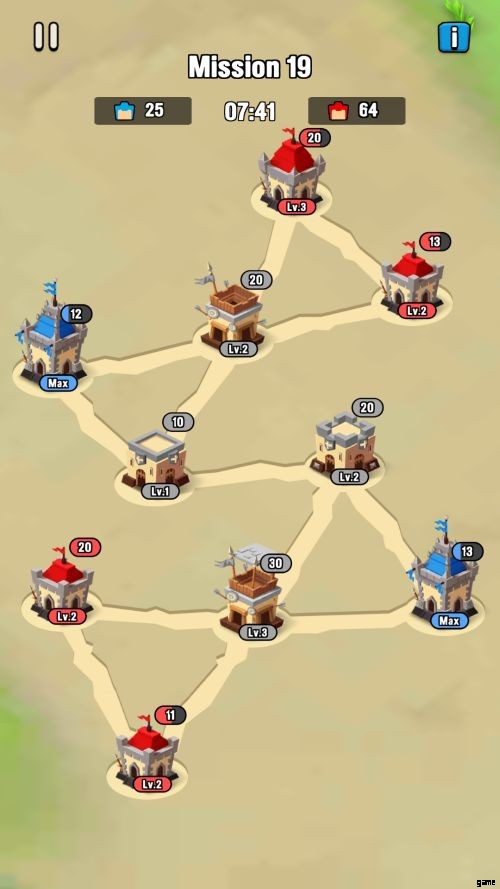
Your next objective after upgrading is to mount an attack. Keep an eye on the number of troops present in your bases. If there is a neutral (gray) structure directly accessible from a base of yours, aim to send troops to that base to prepare a siege. The key idea is that your troop count should ALWAYS be twice of whatever number is displayed on a structure you are trying to conquer. For example, if you’re conquering a neutral base with 20 HP, you would need at least 40 troops to successfully seize it.
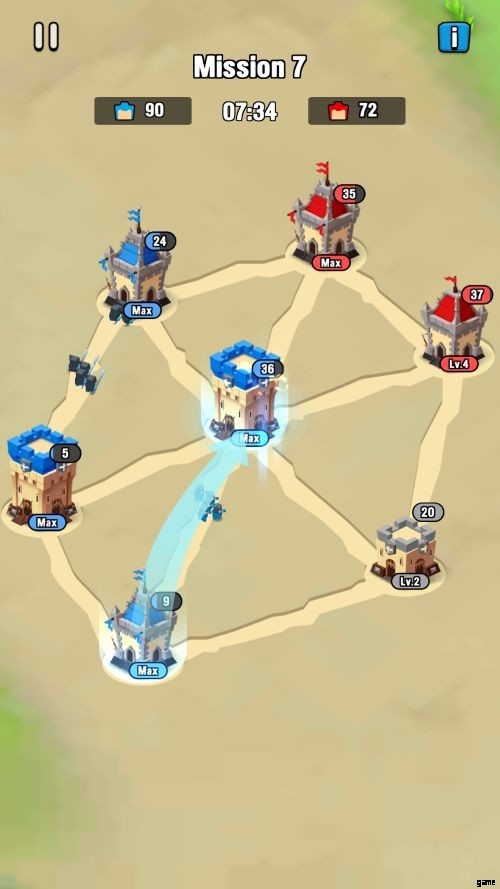
If you have two bases that has a direct access to a target structure, that is even better because troop accumulation time will be shorter. Should it happen that the enemy also has direct access to the same structure you are targeting, you can play the waiting game, simply secure a high troop count on the base(s) you will launch an attack from. If you do that, all you must do is time your siege, make your troops march as soon the enemy troops are about to make contact with the target structure.
If the enemy succeeds in that siege, that base would likely have a low HP and your volume of troops should be able to overwhelm and takeover. On the other hand, if the enemy’s attack fails, you are given a “primed” target which will require less of your troops to conquer it.
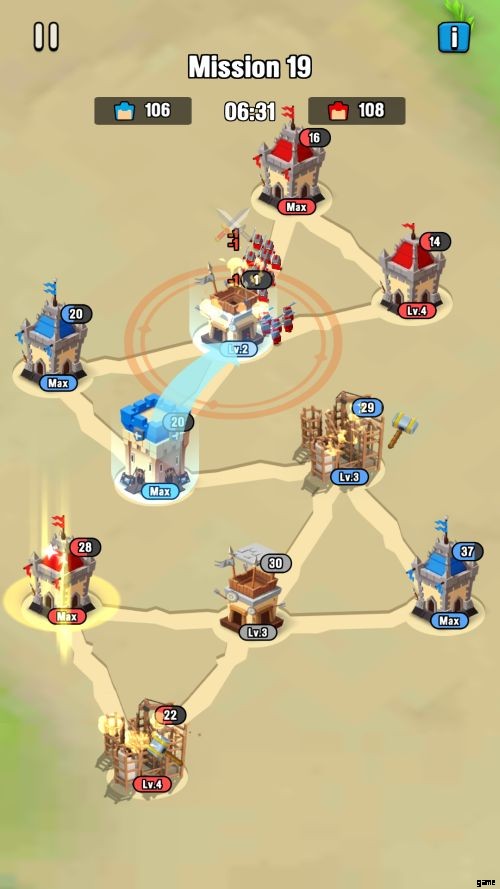
Note that you can always focus fire a target by issuing a swipe that would go through your structures. Doing so will draw multiple “ghost” arrows signaling that those structures of yours (be it a barracks, castle, or outpost) are sending troops to the target structure.
The keys to victory in Expedition is to be patient in upgrading your bases, send troops to the battle front (or bases the enemy can directly access/attack) and then amass a troop count that would be enough to conquer a target building. A max level base can gain up to 50 troops/health and in order to conquer a maxed out enemy base, you either have to time that they are yet replenishing troops or you can set 3 bases of yours to funnel all their troops to it.
Excelling in expeditions may take you a few trial and error attempts. Know that it’s totally okay to not get things right at your first try. If you feel that you have miscalculated your timing of sending troops to an outpost or castle and have multiple failed invasion attempts, feel free to hit pause then quit and then do the necessary adjustments on your next run.
And that’s a wrap! We hope you have enjoyed reading our Art of War:Legions guide. All the tips, tricks, and strategies we shared here are the tenets we lean on to become a successful commander.
We may not have played the game as long as other veterans have, but the knowledge we imparted here is what have set us in a quick upward trajectory. If you have been a commander for a long time now and just happened to browse this Art of War:Legions guide (likely in a bid to look for a Seondeok formation), feel free to share any lessons or tactics we may have missed. Our aim is to help commanders rise and improve our legions together. Join us as we aspire to dominate and conquer. See you in the battlefield!